
Cutlass Supreme V6-191 3.1L VIN M SFI (1997)
NOTICE: Do not use any type of grease to retain parts during assembly of this unit. Greases other than the recommended assembly lube will change
transaxle fluid characteristics and cause undesirable shift conditions and/or filter clogging. It is recommended that TRANSJEL (tm) J 36850 or
equivalent be used during assembly to retain checkballs or to lubricate components for ease of assembly.
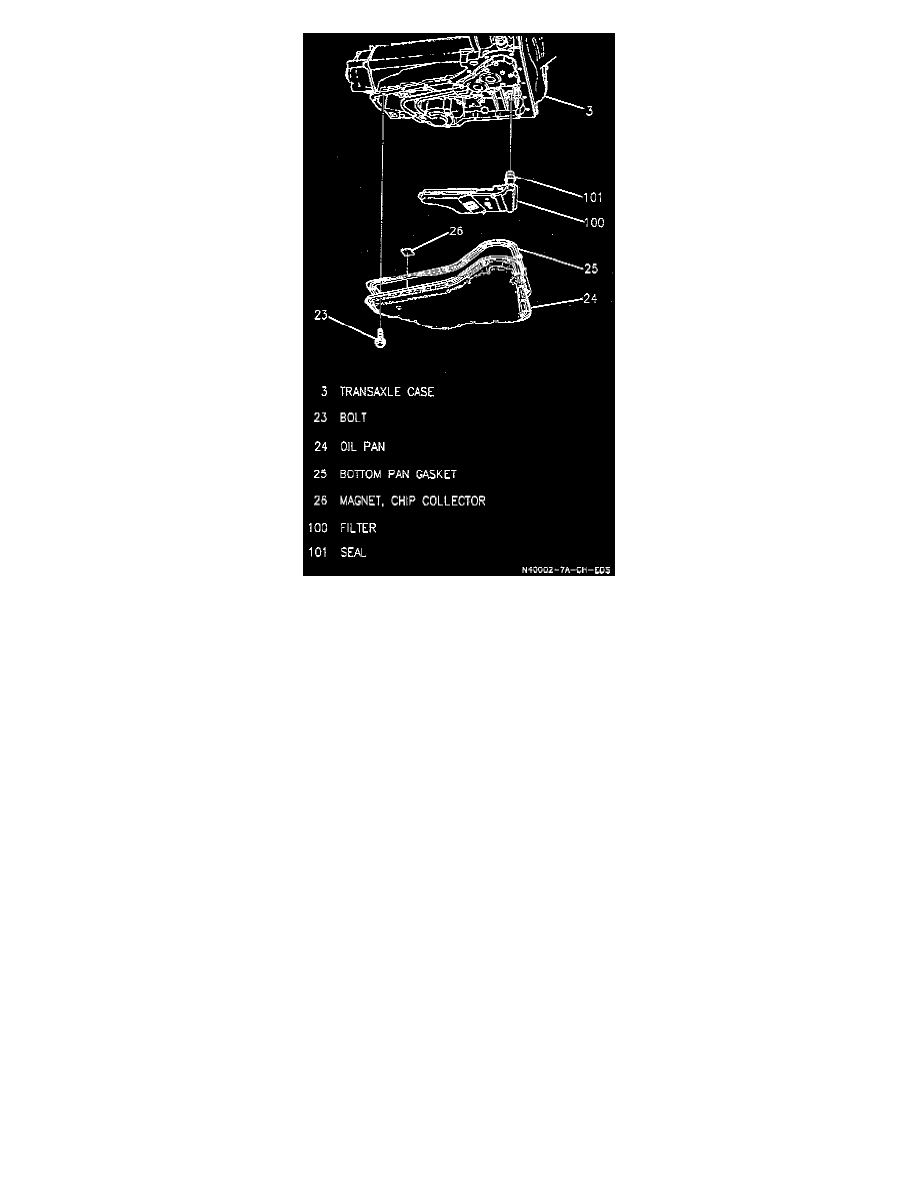
When service requires the removal of the bottom oil pan, the washers on the bolts must be inspected. A new bolt and washer assembly should be
installed if the washer is inverted.
NOTICE: Do not overfill transaxle. Overfilling causes foaming and loss of fluid through the vent and may damage the automatic transaxle.
REMOVE OR DISCONNECT
1. Raise vehicle and suitably support.
2. Place drain pan under transaxle bottom oil pan.
3. Oil pan bolts/screws from front and sides.
4. Loosen rear oil pan bolts/screws approximately four turns.
NOTICE: Care must be taken not to damage mating surfaces of oil pan and case. Such damage may result in oil leaks in this area.
5. Lightly tap oil pan with rubber mallet or pry oil pan loose with a screwdriver and allow fluid to drain.
6. Remaining oil pan bolts/screws.
7. Oil pan.
8. Oil pan gasket.
Inspect
^
Oil pan and filter screen for foreign material:
-
Metal particles.
-
Clutch facing material.
-
Rubber particles.
-
Engine coolant.
^
Determine and correct source of contamination.
^
Oil pan flange for distortion. Straighten if necessary.
Clean
-
Case and oil pan gasket surfaces with solvent and air dry. All traces of old gasket material must be removed.