
Cutlass Supreme FWD V6-189 3.1L (1989)
Remove or Disconnect:
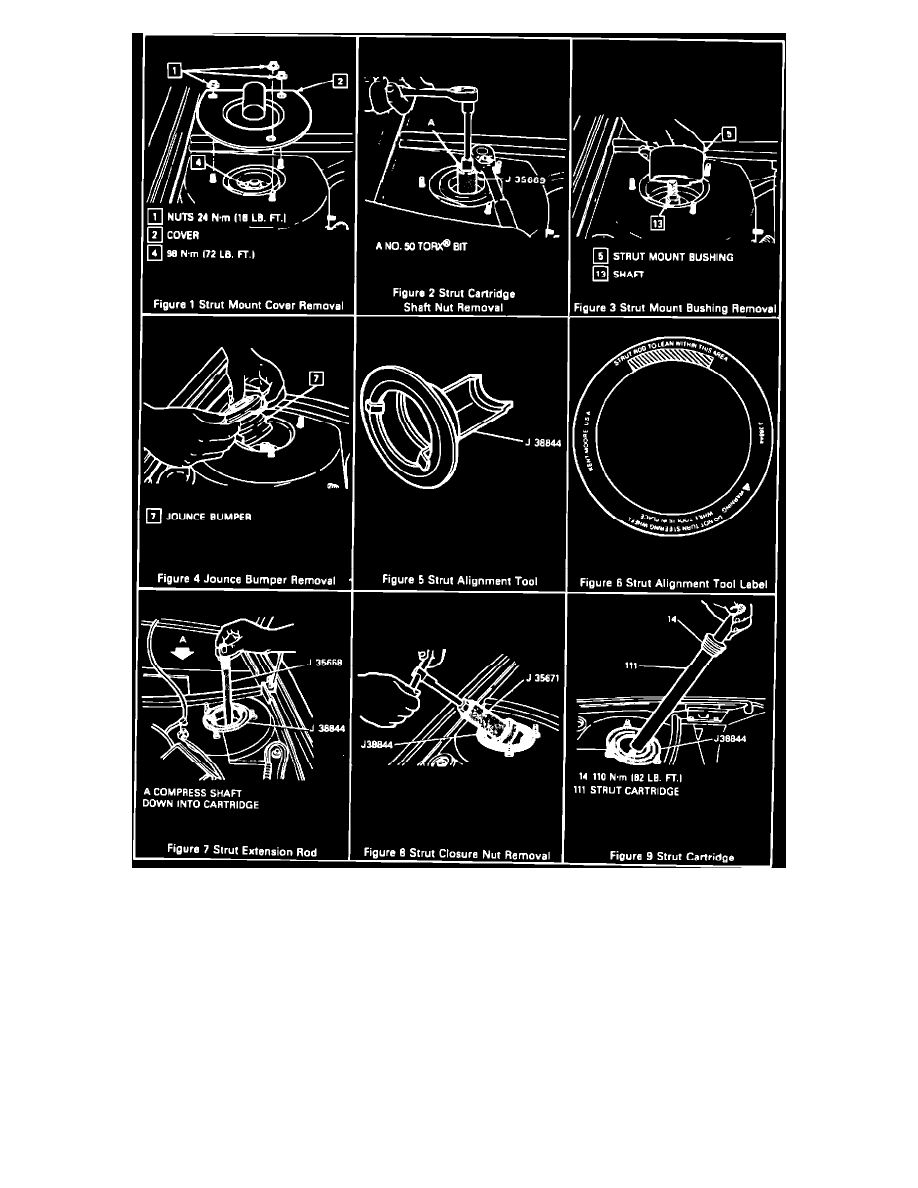
1.
Scribe strut cover to body to assure proper camber adjustment.
2.
Strut mount cover plate (2) by removlng three cover plate nuts (1), (Figure 1).
^
Convertible-strut tower brace.
3.
Strut shaft nut (4) using No. 50 Torx(R) bit and J 35669, (Figure 2).
4.
Strut mount bushing (5) by prying with suitable tool, (Figure 3).
Use J 35668 to apply pressure on strut shaft (13) as necessary to relieve bushing (compression) side load.
5.
Jounce bumper (7) by attaching J 35668 to strut shaft and pulling out jounce bumper. (Figure 4).
6.
Install J 38844, (Figure 5).
^
Use information shown on label of J 38844 to install in correct position. (Figure 6).
7.
Compress strut shaft (13) down into cartridge, (Figure 7).
8.
Strut cartridge closure nut (14) by unscrewing closure nut using J 35671, (Figure 8).
9.
Strut cartridge (111), (Figure 9).
10.
Oil from strut tube using suction device.