
Delta 88 V6-3800 3.8L (1988)
Rear Door Regulator Service Parts
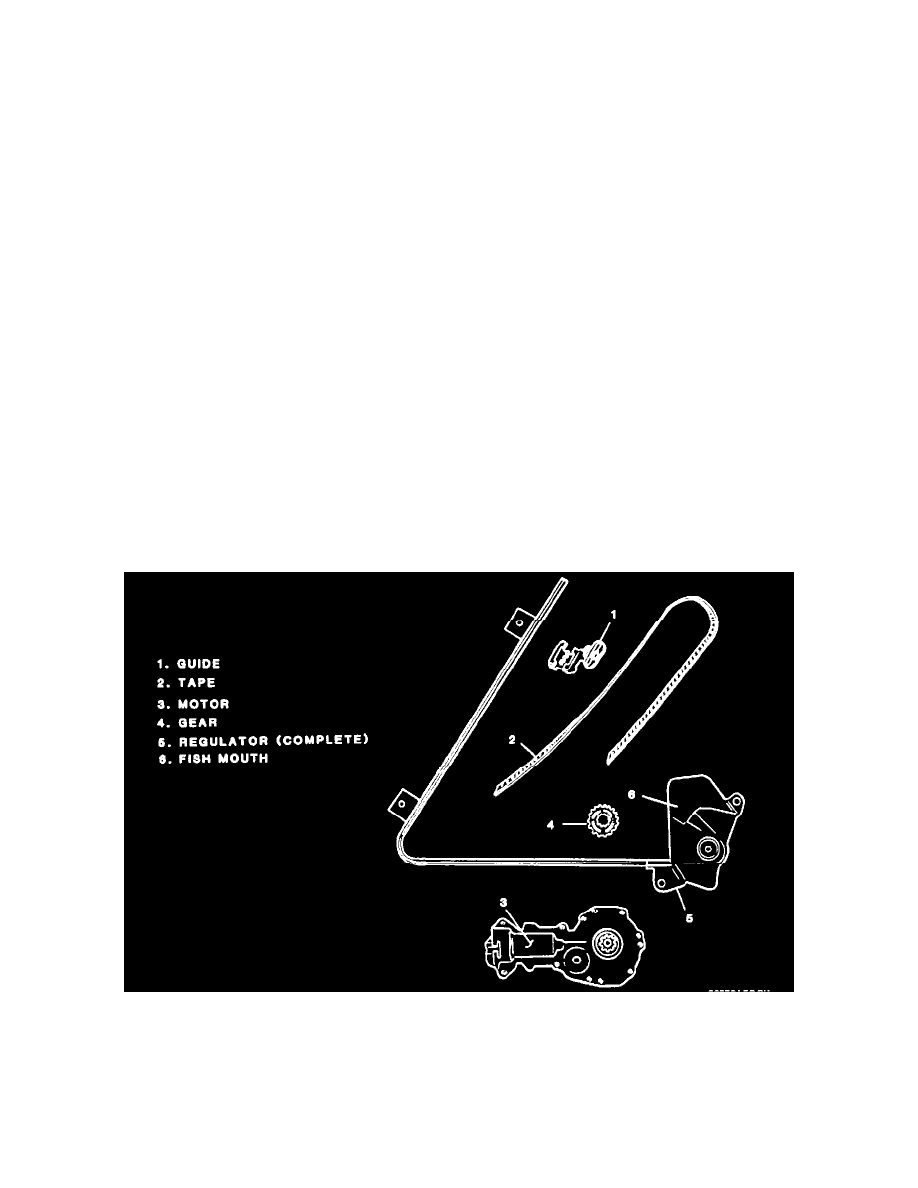
REMOVE OR DISCONNECT
1. Regulator from door important to reconnect wire harness to motor. Reconnect window switch to wire harness.
2. Tape from regulator by using a thin-bladed screwdriver and separating tape from tabs on housing and running tape out of regulator. On 6CH23-33
styles, remove rivet located through tape and regulator using a 4.8 mm (3/16") drill bit.
3. Guide from tape. Important to cut service tape to length specified.
INSTALL OR CONNECT
1. Guide to tape, making sure tabs on guide are into last four holes of tape.
2. Tape to regulator by feeding tape until contact is made with drive gear; then running regulator to complete feeding of tape. Position last hole in
tape over the last tab on regulator housing. This is required for proper glass travel.
3. Drill 3/16" hole through service tape in line with hole in regulator on 6CH23-33 styles and install a 3/16" x 3/8" rivet through tape and regulator.
Window Regulator Motor
WINDOW MOTOR
REMOVE OR DISCONNECT
1. Door trim panel
2. Water deflector
3. Window regulator and motor.
4. Motor from regulator using a 4.8 mm (3/16") drill bit, and drill out rivets holding motor to regulator.
INSTALL OR CONNECT
1. Motor to regulator using (3/16") rivets.
2. Window regulator and motor to door.
3. Water deflector.
4. Door trim panel.
Window Regulator Tape
WINDOW REGULATOR TAPE REPLACEMENT
Tape Drive Regulator Service Parts
REMOVE OR DISCONNECT
1. Regulator from door.
2. Wire harness to regulator motor.
3. Window switch to wire harness.
4. Tape from tabs on regulator using a thin flat-bladed screwdriver
5. Rivet installed through tape and regulator using a 4.8 mm (3/16") drill bit - 6CH23-33 styles.