
Firenza L4-121 2.0L VIN K TBI (1987)
Oil Pump: Service and Repair
Overhead Cam
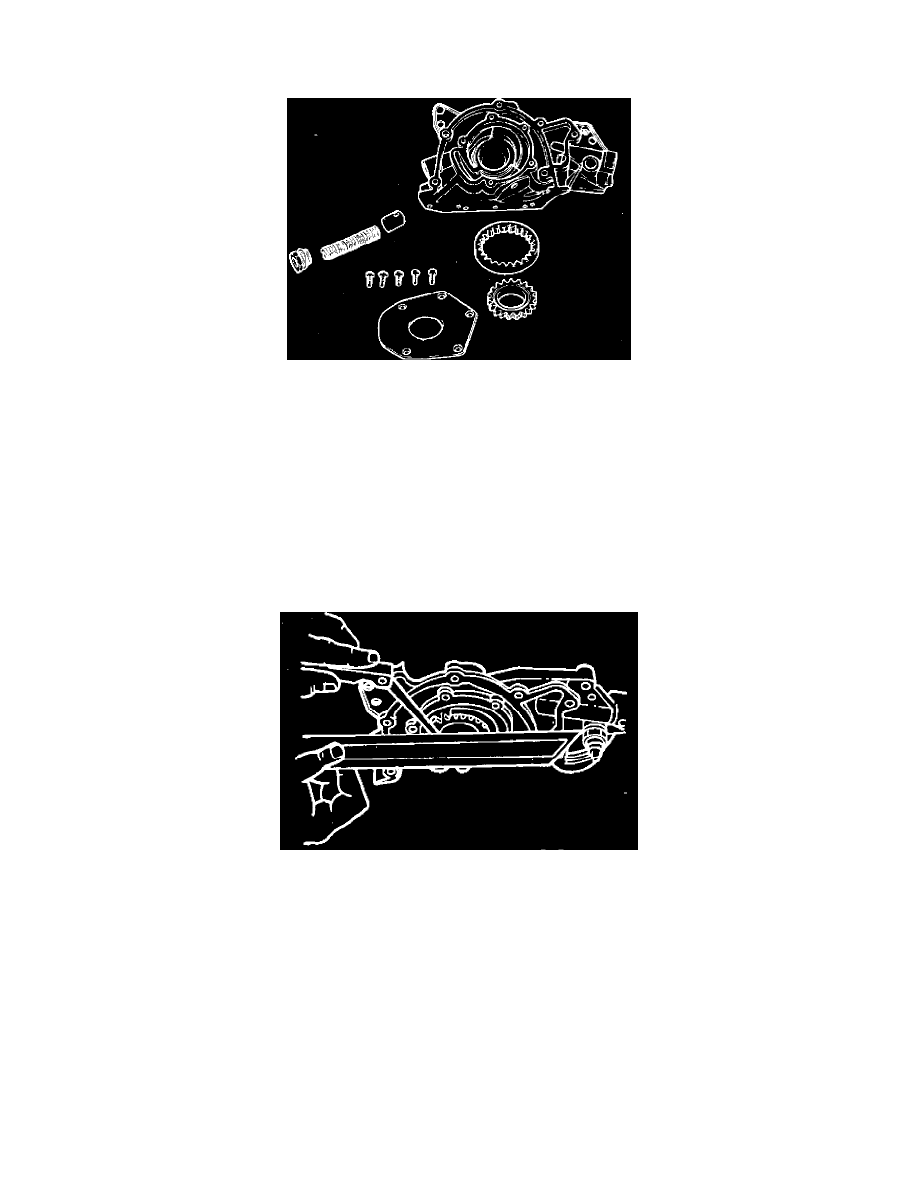
Fig. 14 Disassembled view of oil pump
REMOVAL
1.
Disconnect battery ground cable.
2.
Remove crankshaft sprocket and timing belt rear cover.
3.
Disconnect engine oil pressure switch electrical connector from the switch.
4.
Remove oil pan and oil filter.
5.
Remove pickup tube to engine block bolts, pickup tube and oil pump.
DISASSEMBLE
1.
Remove five screws and rear cover from oil pump, Fig. 14.
2.
Remove gears, plug, pressure regulator valve plunger and spring.
3.
If necessary, remove pickup tube and O-ring from oil pump body.
Fig. 15 Checking drive gear to oil pump housing clearance
INSPECTION
After disassembling the oil pump, thoroughly clean all oil pump components and check them for excessive wear and damage.
1.
Using a suitable straight edge and feeler gauge, Fig. 15, check oil pump clearances.
2.
Check clearances for the following oil pump components:
a. Clearance between idler gear and oil pump body should be .004---.007 inch.
b.
Clearance between drive gear and oil pump body should be .014---.018 inch.
c.
Clearance between gears and oil pump cover should be .002---.004 inch.
3.
If clearances obtained are not within specified limits, replace worn or damaged oil pump components.
ASSEMBLE
1.
Install valve plunger and spring.
2.
Using a suitable sealer, coat threads of pressure regulator valve plunger plug and install. Torque plug to 15 ft. lbs.
3.
Install oil pump gears into oil pump body.