
Intrigue V6-3.8L VIN K (1998)
The upper and lower fuel injector O-rings use different part numbers. To identify the correct O-ring, the upper O-ring is black and the lower O-ring is
brown. Both O-rings are the same size but consist of different material.
The fuel injector lower O-ring uses a nylon collar, called the O-ring backup, to properly position the O-ring on the injector. Always reinstall the O-ring
backup, or the sealing O-ring may move on the injector when installing the fuel rail and result in a possible vacuum leak.
Fuel injector O-rings should always be replaced whenever fuel injectors are serviced.
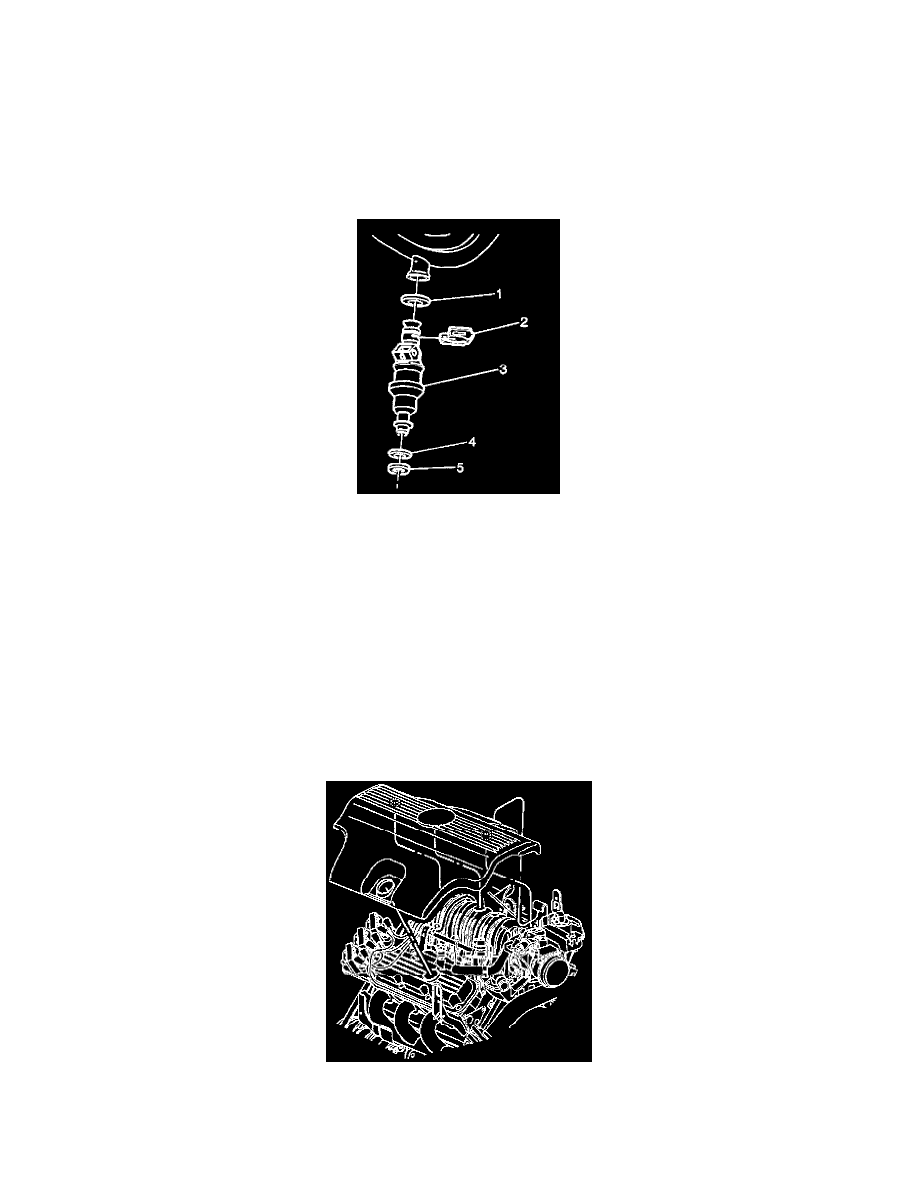
The fuel injector assembly (1) is stamped with a part number identification (2) and a build date code (3). The build date code consists of the month (4)
1-9 (Jan-Sept.) O, N, D, (Oct, Nov, Dec), day (5), and year (6).
1. Coat all new O-rings with engine oil before installing.
2. Install the fuel injector back up O-ring (4).
3. Install the fuel injector lower O-ring (5).
4. Install the fuel injector upper O-ring (1).
5. Install the fuel injector to the fuel rail (3).
6. Install the fuel injector retaining clips (2).
7. Install the fuel rail.
Caution: Refer to Battery Disconnect Caution in Cautions and Notices.
8. Connect the negative battery cable.
9. Inspect for leaks.
9.1. Turn the ignition switch ON for 2 seconds.
9.2. Turn the ignition switch 0FF for 10 seconds.
9.3. Turn the ignition switch ON.
9.4. Check for fuel leaks.
10. Reinstall the injector sight shield. Refer to Engine Cover Replacement See: Engine, Cooling and Exhaust/Engine/Service and Repair.