
Intrigue V6-3.8L VIN K (1998)
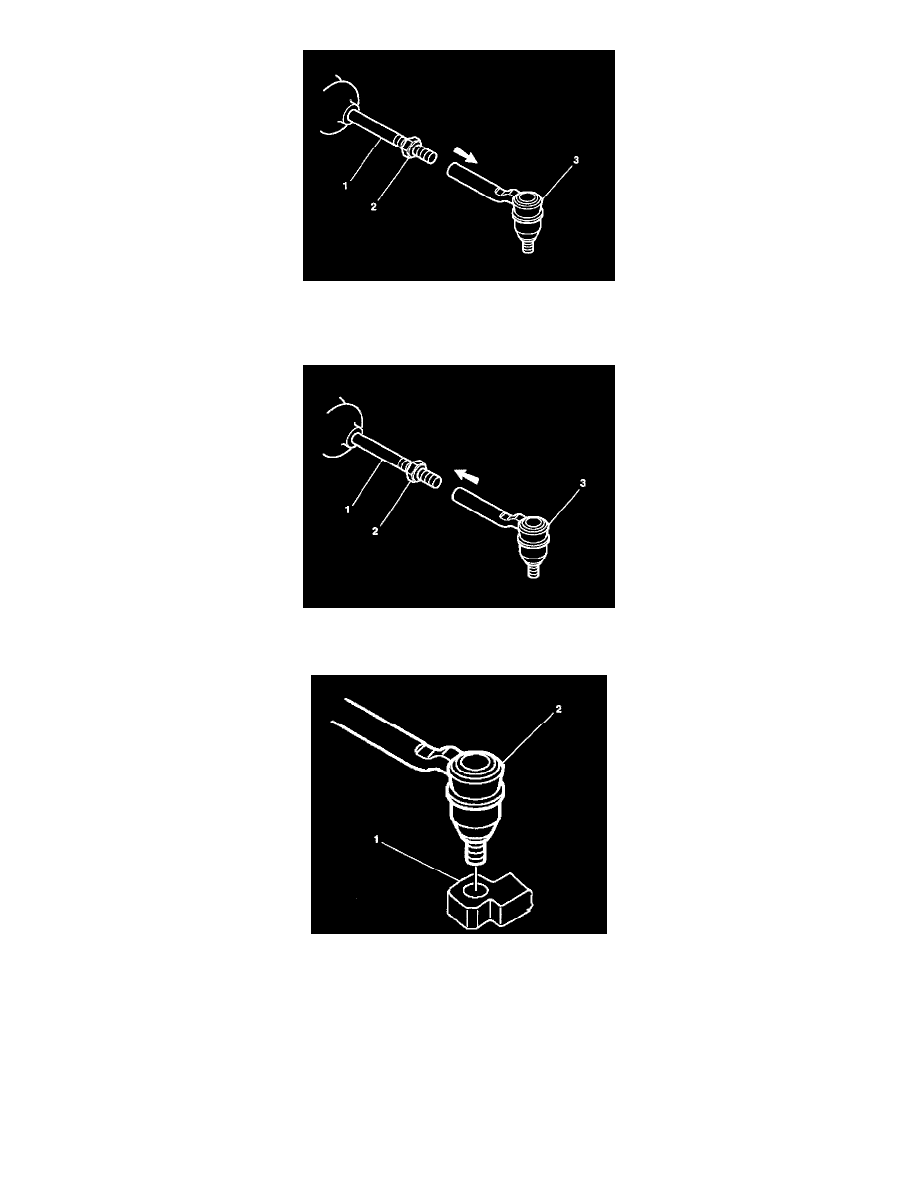
4. Remove the outer tie rod assembly (3) from the inner tie rod assembly (1).
ASSEMBLY PROCEDURE
1. Connect the outer tie rod assembly (3) to the inner tie rod (1).
2. Do not tighten the jam nut (2).
3. Connect the outer tie rod assembly (2) to the steering knuckle (1).
4. Connect the prevailing torque nut (2) to the outer tie rod stud (1).
-
Tighten:
^
Hex torque prevailing nut (1) to 30 Nm (22 ft. lbs.).
^
Tighten hex torque prevailing nut (1) an additional 120 degrees of rotation.
^
Visually inspect to ensure that 2 1/2 - 4 1/2 threads are visible past the nylon washer.
Important: Be sure the rack and pinion boot is not twisted or puckered during toe adjustment.
5. Adjust toe by turning the inner tie rod. Follow the recommended manufacturer specifications; refer to FRONT TOE ADJUSTMENT.