
Intrigue V6-3.8L VIN K (1998)
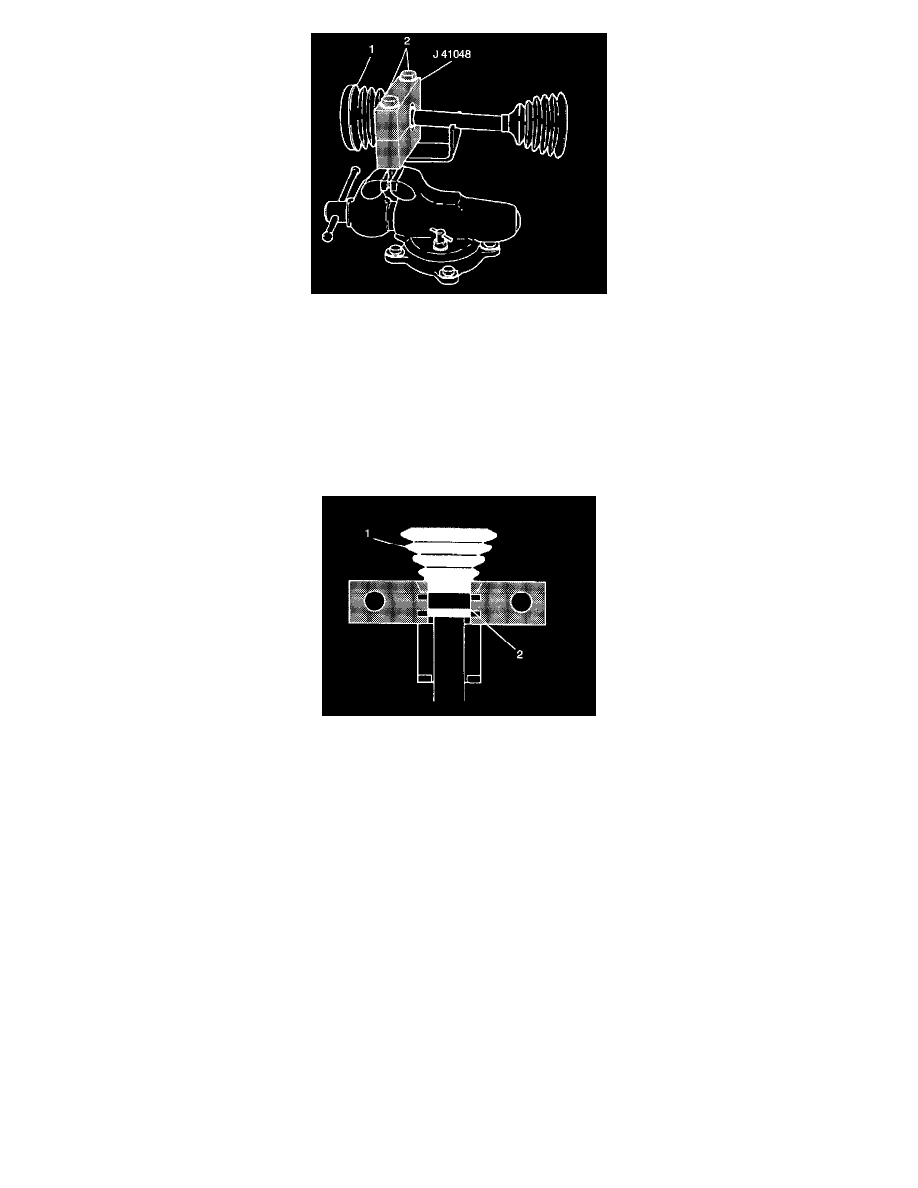
4. Position the inboard end of the halfshaft assembly (1) using J 41048.
5. Align the swage ring (2) by performing the following steps:
5.1. Place the top half of J 41048 on the lower half of J 41048.
5.2. Insert the bolts.
5.3. Tighten the bolts by hand until snug.
NOTICE: Refer to Fastener Notice in Service Precautions.
IMPORTANT: Before proceeding, ensure there are no pinch points on the halfshaft inboard boot (1). This could cause damage to the halfshaft
inboard boot (1).
5.4. Loosen the bolts.
5.5. Separate the dies.
5.6. Check the swage ring (2) for any "lip" deformities. If present, place the ring (2) back into the J 41048 ensuring the swage ring (2) covers the
whole swaging area.
5.7. Re-swage the swage ring (2).
IMPORTANT: Align the following items:
^
The halfshaft inboard boot (1)
^
The housing
^
The swage ring (2)
-
Tighten Each bolt 180 degrees at a time using a ratchet wrench. Alternate between each bolt until both sides are bottomed.
6. Install the spacer ring (3) on the halfshaft bar (4) and beyond the second groove.
IMPORTANT: Ensure that the counter bored face of the tripot joint spider (2) faces end of the halfshaft bar (4).