
Intrigue V6-3.8L VIN K (1998)
7. Slide the tripot joint spider assembly (2) toward the spacer ring (3) as far as it will go on the halfshaft bar (4).
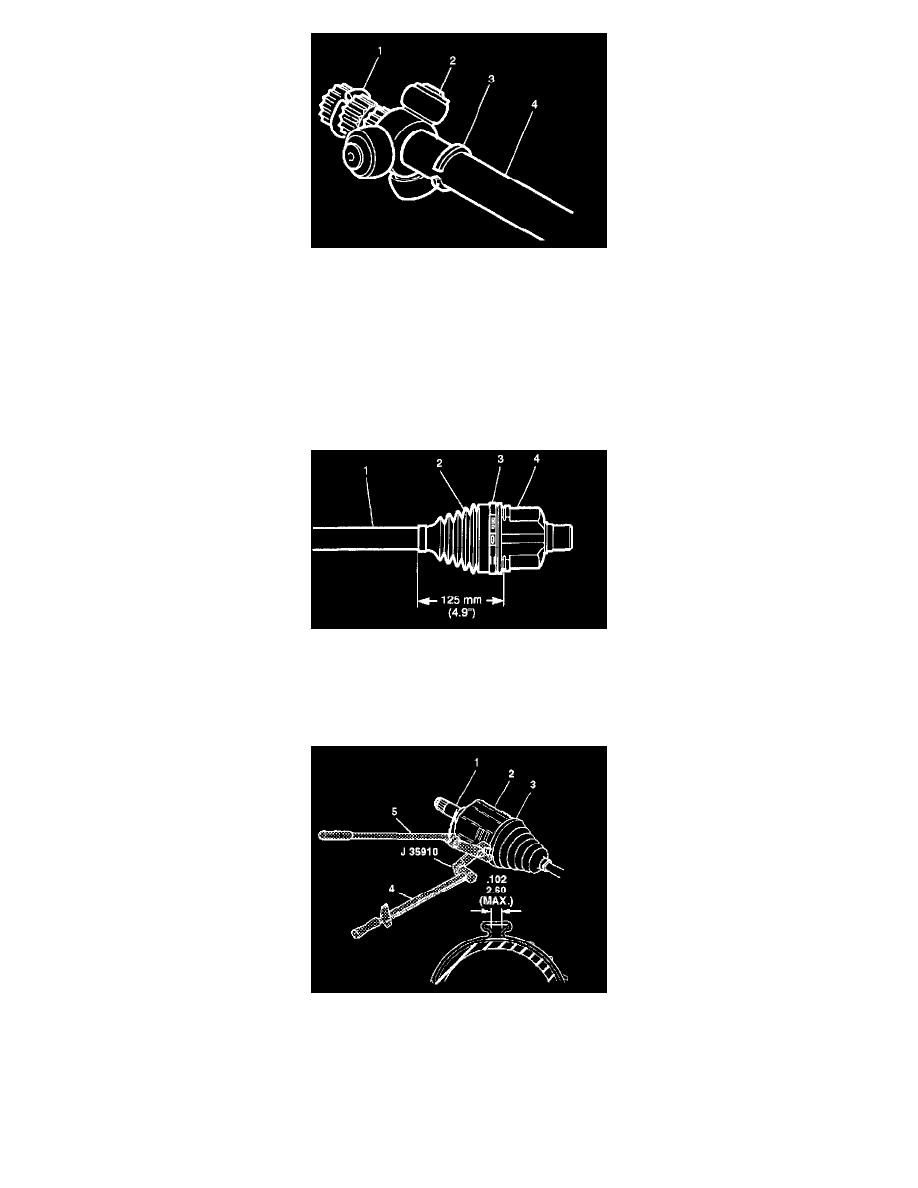
8. Install the halfshaft bar retaining ring (1) in the groove of the halfshaft bar (4) using J 8059.
9. Slide the tripot joint spider assembly (2) towards the end of the halfshaft bar (4).
10. Reseat the spacer ring (1) in the groove on the halfshaft bar (4).
11. Place approximately half of the grease from the service kit in the halfshaft inboard boot. Use the remainder of the grease to repack the housing.
12. Install the trilobal tripot bushing to housing. Ensure the trilobal tripot bushing is flush with the face of the housing.
13. Position the larger new clamp on the halfshaft inboard boot.
14. Slide the housing over the tripot joint spider assembly on the halfshaft bar.
15. Slide the large diameter of the halfshaft inboard boot, with the larger clamp in place, over the outside of the trilobal tripot bushing and locate the
lip of the boot in the groove.
16. Position the joint assembly at the proper vehicle dimension.
IMPORTANT: The halfshaft inboard boot (2) must not be dimpled, stretched out or out of shape in any way. If the halfshaft inboard boot (2) is
not shaped correctly, carefully insert a thin flat blunt too] (no sharp edges) between the large boot opening and the trilobal tripot bushing to
equalize the pressure. Shape the halfshaft inboard boot properly by hand. Remove the tool.
17. Crimp the boot retaining clamp (3) with J 35910.
IMPORTANT: Align the following items while latching:
^
The halfshaft inboard boot
^
The housing (2)
^
The large boot retaining clamp (3)