
LSS V6-3.8L VIN K (1997)
Brake Bleeding: Service and Repair
Manual Bleeding
Bleeding The Brakes
CAUTION: Do not move the vehicle until a firm brake pedal is obtained. Air in the brake system can cause loss of brakes with possible personal injury.
Whenever air gets into the brake hydraulic system, you must bleed the system to remove it. You might have to bleed the hydraulic system at all four
wheel positions if air has entered the system due to low fluid level, or from brake pipes having been disconnected at the master cylinder. If a brake pipe
is disconnected at one wheel, only that caliper needs to be bled. If pipes are disconnected at any fitting located between the master cylinder and the
wheels, then the brake system served by the disconnected pipe must be bled.
NOTE: Deplete the booster reserve by applying the brakes several times with the engine off until all reserve is depleted. Be very careful to prevent
brake fluid from getting on painted surfaces.
1. Fill master cylinder reservoir to full level mark using only Delco Supreme 11 Brake Fluid, or equivalent DOT-3 brake fluid. Maintain fluid level in
reservoir during bleeding. Have an assistant press the brake pedal, when needed, during bleeding. Be sure the master cylinder reservoir cap is
installed before the brake pedal is pressed. This prevents brake fluid from spraying from the reservoir.
2. If master cylinder is known or suspected to have air in the bore, bleed it as follows before bleeding the calipers.
a. Loosen forward brake master cylinder.
b. Allow brake fluid to flow Maintain reservoir fluid level.
c. Tighten forward brake pipe on master cylinder.
d. Depress brake pedal slowly one time and hold. Loosen forward brake pipe connection again to purge air from the bore. Tighten the connection
and then slowly release the brake pedal. Wait 15 seconds. Repeat the sequence, including the 15-second wait, until all air is removed from the
bore. Tighten Brake pipe connection to 15 Nm (11 ft. lbs.).
e. Repeat Step 2 and bleed the master cylinder at the rear connection.
3. Bleed individual wheel calipers only after all air is removed from the master cylinder. If you know the calipers do not contain air, then you do not
have to bleed them.
4. If you must bleed all the wheel circuits, use the following sequence: Right rear, left rear, right front, and then left front.
5. Raise vehicle and suitably.
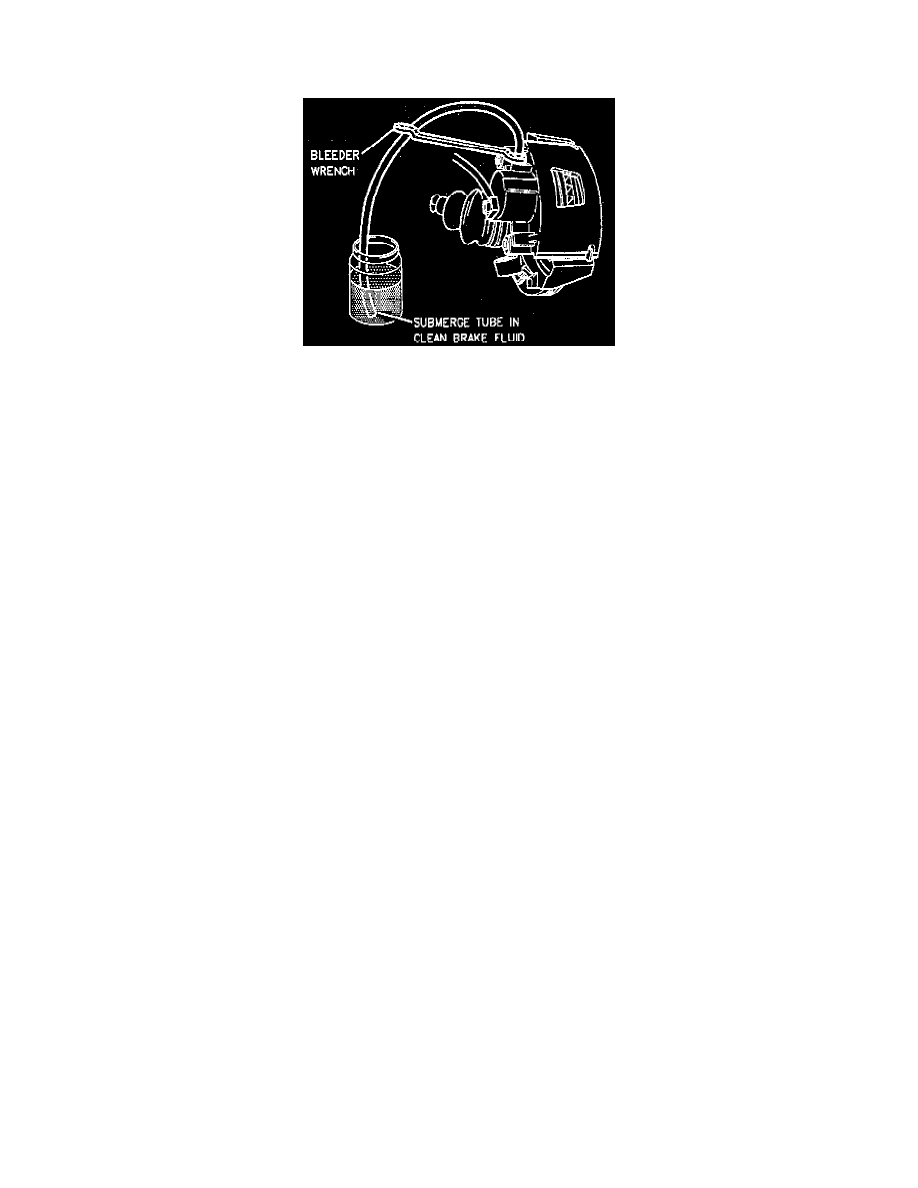
6. Remove bleeder valve cap and place proper size box-end wrench, or J 21472 / J 28434, over bleeder valve.
7. Attach a transparent tube to bleeder valve; submerge other end of tube in a clear container, partially filled with clean brake fluid.
8. Depress brake pedal slowly one time and hold. Use slow pedal action. Rapid pedal pumping pushes the master cylinder secondary piston down the
bore in a way that makes it difficult to bleed the system.
a. Loosen bleeder valve to purge air from the caliper.
b. Tighten bleeder valve, and slowly release brake pedal.
c. Wait 15 seconds, then repeat the sequence, including the 15-second wait, until all air is removed. You might have to repeat the sequence 10 or
more times to remove all the air support. Tighten Caliper bleeder valve to 13 Nm (115 inch lbs.) or wheel cylinder bleeder valve to 10 Nm (88
inch lbs.).
9. Install bleeder valve caps.
10. Lower vehicle.
11. Fill master cylinder to full mark.
12. Check brake pedal for "sponginess." Repeat entire bleeding procedure to correct "sponginess."
13. When manual bleeding is completed, pressure bleed the brake system using Tech 1. Refer to pressure bleed procedure in Tech 1 manual.