
LSS V6-3.8L VIN K (1997)
Fuel Injector: Service and Repair
REMOVAL PROCEDURE
NOTICE: Use care in removing the fuel injectors to prevent damage to the fuel injector electrical connector pins or the fuel injector nozzles. The
fuel injector is an electrical component and should not be immersed in any type of cleaner as damage to the fuel injector may result.
IMPORTANT: The fuel injector is serviced as a complete assembly only. If the fuel injectors are found to be leaking, the engine oil may be
contaminated with fuel.
1. Remove the fuel rail.
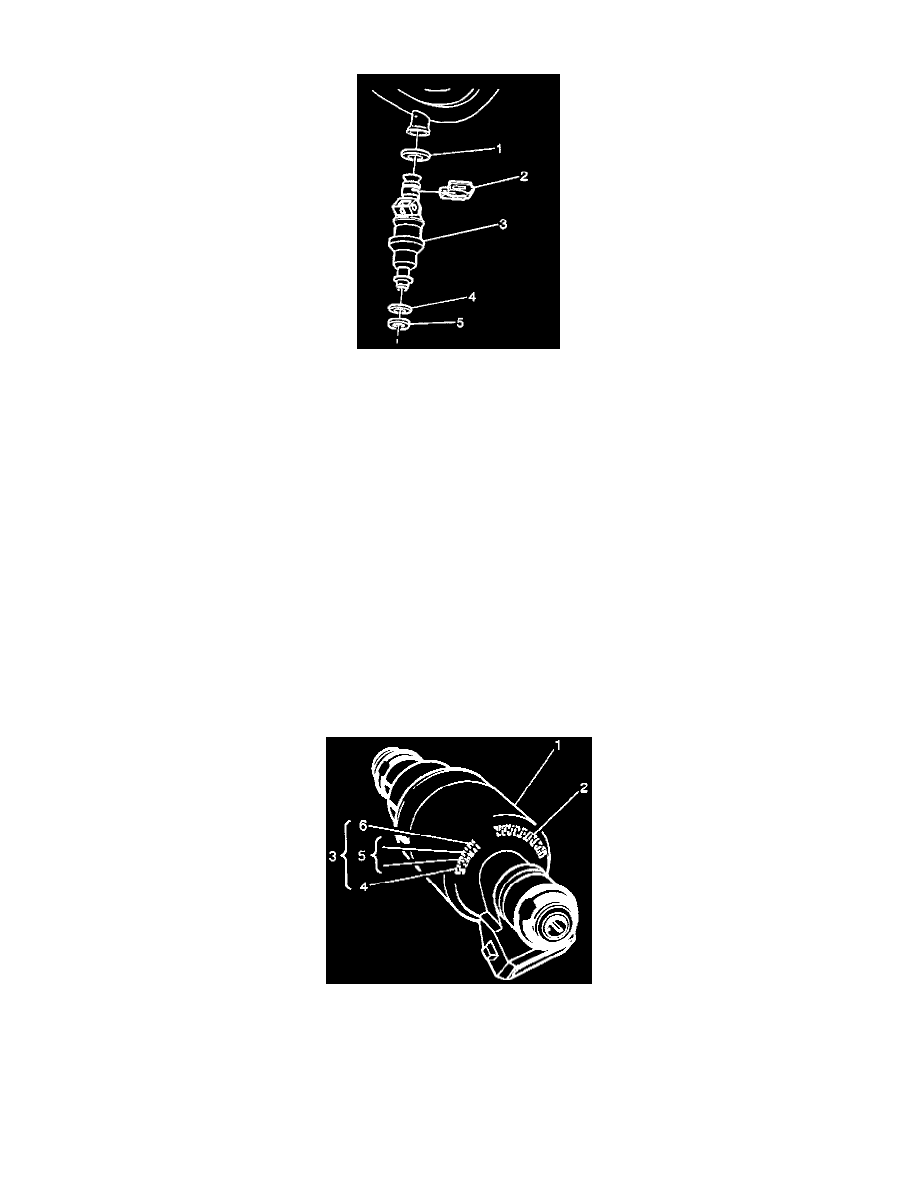
2. Remove the fuel injector retaining clips (2).
3. Remove the fuel injectors (3).
4. Remove the fuel injector upper O-ring (1).
5. Remove the fuel injector lower O-ring (5).
IMPORTANT: Fuel injector O-rings should always be replaced whenever fuel injectors are serviced.
The fuel injector lower O-ring (5) uses a nylon collar, called the O-ring backup (4), to properly position the O-ring on the fuel injector. Be sure to
reinstall the O-ring backup, or the sealing O-ring may move on the fuel injector when installing the fuel rail. If the sealing O-ring is not seated
properly, a vacuum leak is possible and driveability complaints may occur.
6. Remove the O-ring backup (4).
INSTALLATION PROCEDURE
The fuel injector assembly (1) is stamped with a part number identification (2) and a build date code (3). The build date code consists of the month
(4)1-9 (Jan-Sept) 0, N, D, (Oct, Nov, Dec), day (5), and year (6).
IMPORTANT: When ordering new fuel injectors, be sure to order the correct injector for the application being serviced.
The upper and lower fuel injector O-rings use different part numbers. To identify the correct O-ring, the upper O-ring is black and the lower