
Ninety-Eight V6-252 4.1L VIN 4 4-BBL (1982)
Intake Manifold: Service and Repair
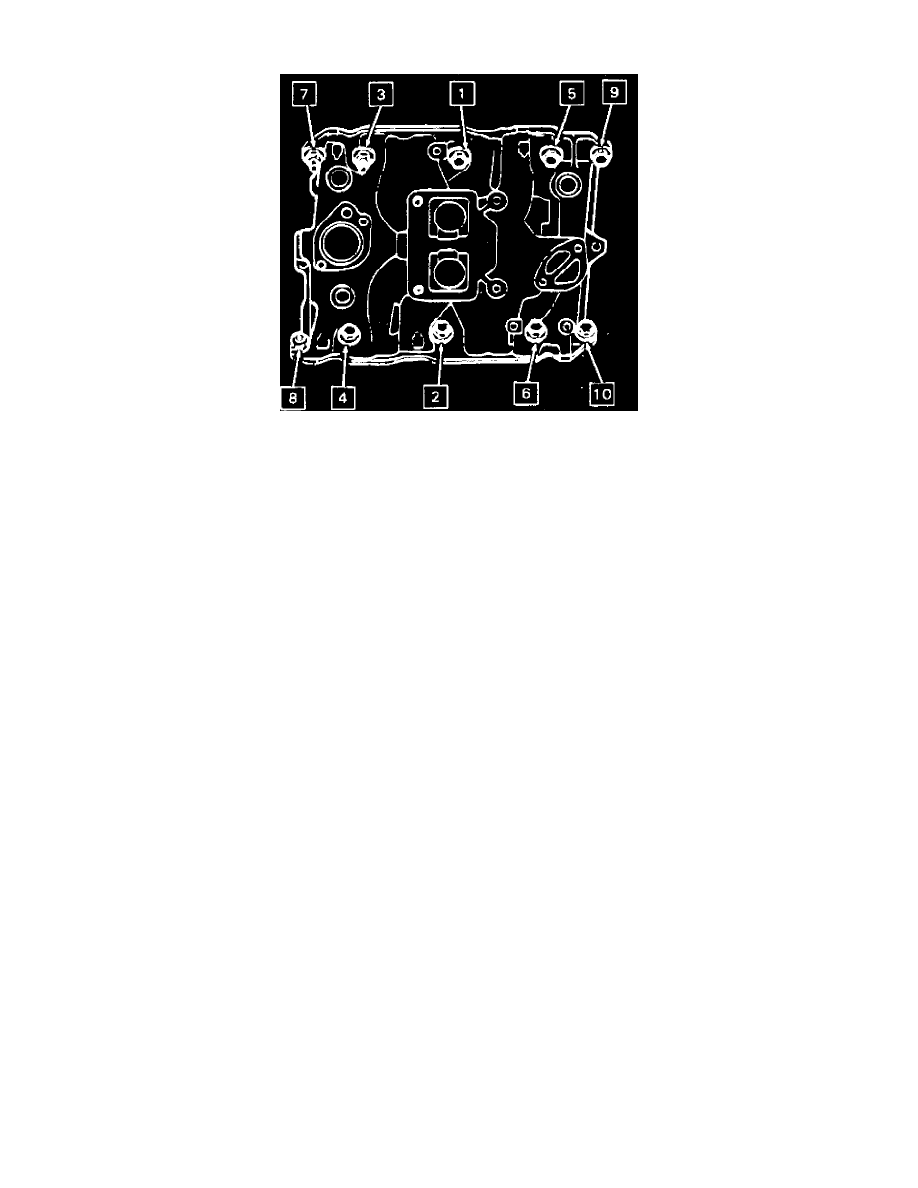
Fig. 3 Intake manifold tightening sequence. V6-231 & 252
V6-231 & 252
1.
On fuel injected engines, relieve fuel pressure as follows:
a. Disconnect fuel tank harness connector.
b. Start engine and allow to run until engine stalls. Engage starter for approximately 3 seconds to completely clear lines of any remaining
pressure.
2.
On all engines, disconnect battery ground cable and remove air cleaner assembly.
3.
Disconnect accelerator cable, fuel lines and cruise control cable or rod.
4.
Drain cooling system, then remove upper radiator, heater and bypass hoses.
5.
Disconnect all wiring and remove all accessory mounting brackets that will interfere with manifold removal.
6.
If applicable, remove distributor cap and rotor to gain access to left hand intake manifold torx head bolt. Use tool J-24394 to remove torx head
bolt.
7.
Remove remaining attaching bolts and the intake manifold.
8.
Reverse procedure to install. Refer to Fig. 3 for bolt tightening sequence.