
Ninety-Eight V6-252 4.1L VIN 4 4-BBL (1982)
Ball Joint: Service and Repair
Upper
On some models the ball joints are riveted to the control arms. All service ball joints, however, are provided with bolt, nut and washer assemblies for
replacement purposes. Some ball joints are pressed into the control arms, in which case they may be pressed out and new ones installed.
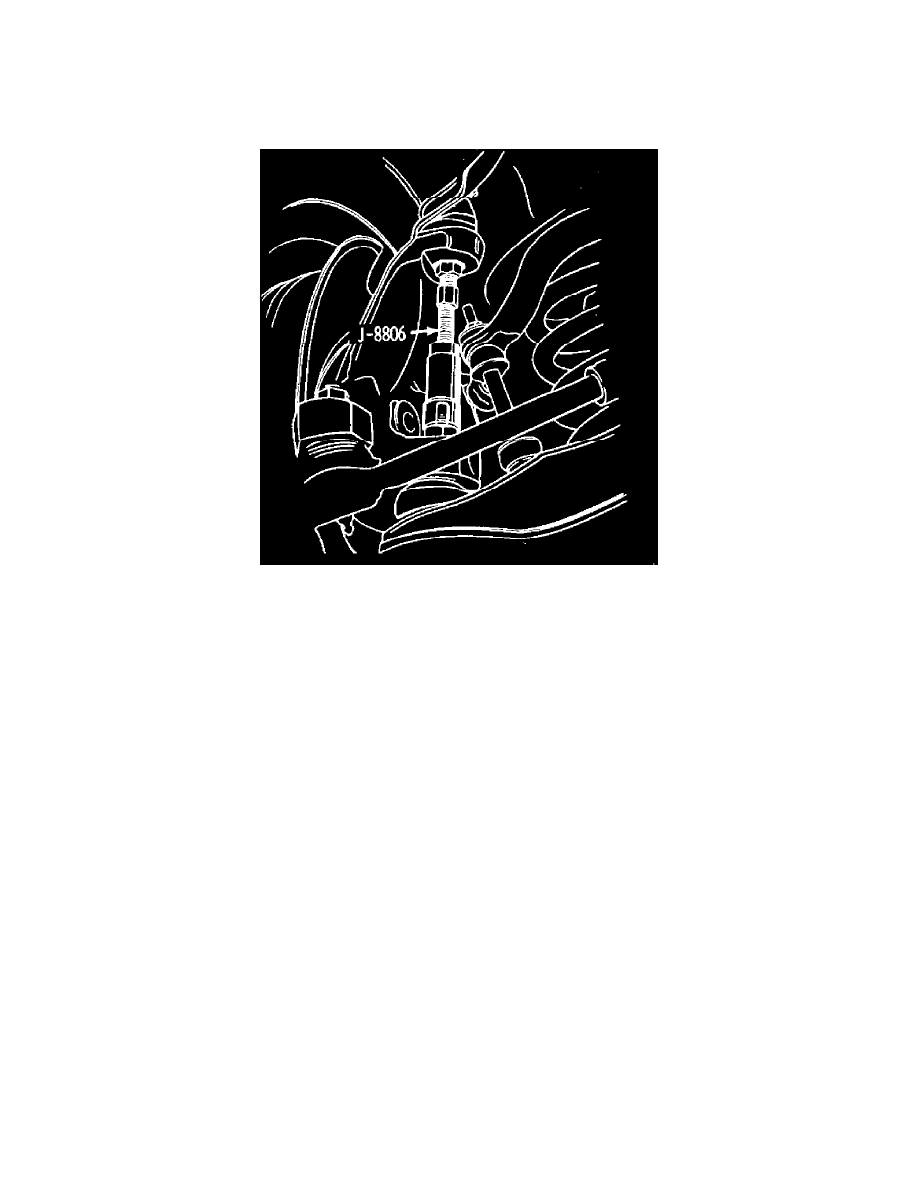
Fig. 6 Removing upper ball joint stud from knuckle
1.
Raise vehicle and support at frame. Remove wheel.
2.
Support lower control arm with suitable jack or jack stand.
3.
Remove cotter pin and loosen stud nut 2---3 turns. Using tool No. J-8806 or equivalent, break ball joint loose from the knuckle, Fig. 6.
4.
Remove stud nut and support knuckle assembly to prevent damage to brake hose.
5.
Using a 1/8 inch twist drill, drill the 4 ball joint rivets approximately 1/4 inch. Then drill off rivets heads using a 1/2 inch twist drill.
6.
Punch out rivets and remove lower ball joint.
7.
Install new ball joint in lower control arm and torque attaching bolts to 8 ft. lbs.
8.
Reverse procedure to assemble. Torque ball joint stud nut to 50 ft. lbs.