
Ninety-Eight V6-252 4.1L VIN 4 4-BBL (1982)
Suspension Spring ( Coil / Leaf ): Service and Repair
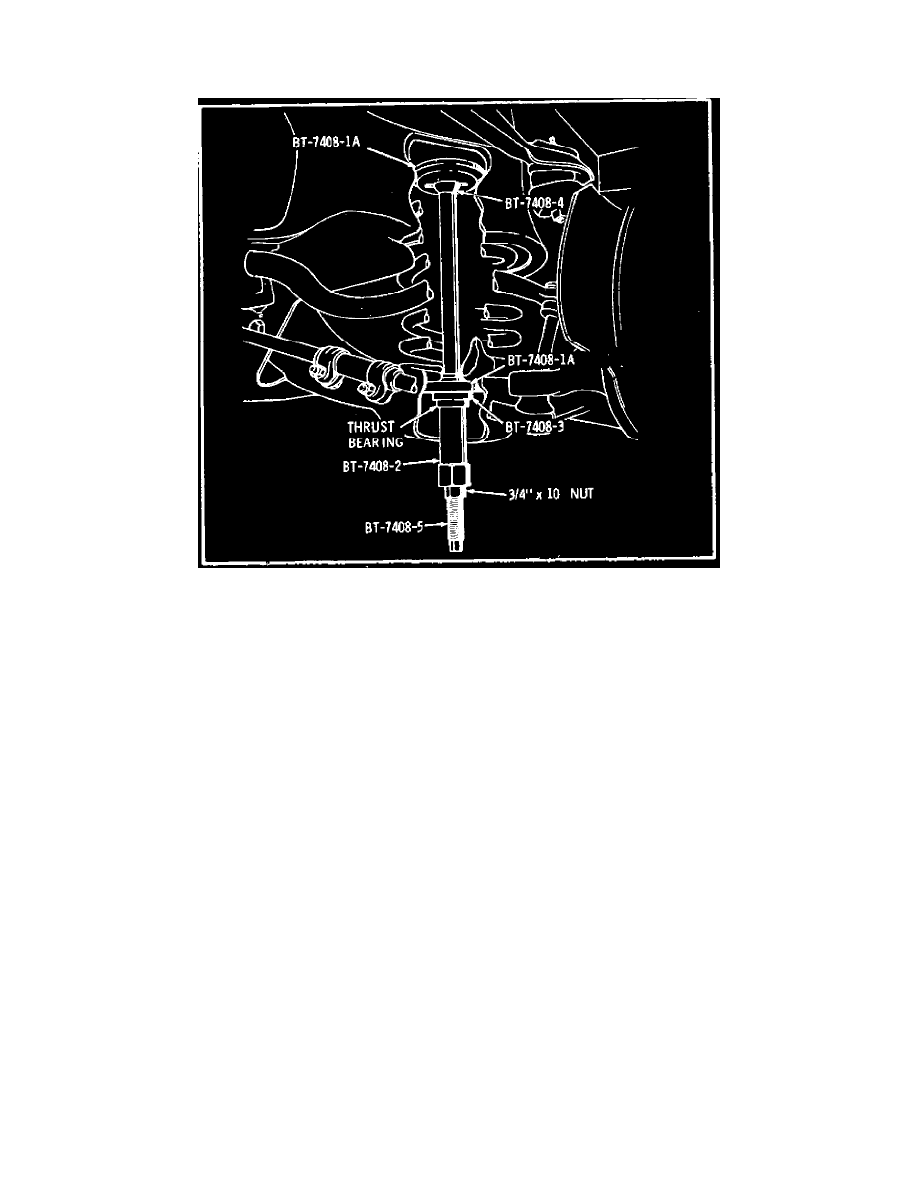
Front Coil Spring
Fig. 7 Replacing coil spring
Left and right coil springs should not be interchanged. Spring part number is stamped on outer side of end coil.
1.
Place transmission in Neutral.
2.
Disconnect shock absorber from upper mounting.
3.
Raise vehicle and support at frame. Remove wheel.
4.
Disconnect stabilizer bar from lower control arm.
5.
Remove shock absorber.
6.
Install lower plate BT-7408-1A or 1B, Fig. 7, with pivot ball seat facing downward into spring coils. Rotate plate to fully seat it in lower control
arm spring seat.
7.
Install upper plate BT-7408-1A or 1B, Fig. 7, with pivot ball seat facing upward into spring coils. Insert ball nut BT-7408-4 through spring coils
and onto upper plate.
8.
Install rod BT-7408-5 through shock absorber opening in lower control arm and through the upper and lower plates. Depress lock pin on shaft and
thread into upper ball nut BT-7408-4. Ensure lock pin is fully extended above ball nut upper surface.
9.
With ball nut tang engaged in slot in upper plate, rotate upper plate until it contacts upper spring seat.
10.
Install lower pivot ball, thrust bearing and nut on rod and rotate nut until coil spring is compressed enough to be free in the seat.
11.
Remove lower control arm pivot bolts. Move control arm rearward and remove coil spring.
12.
Reverse procedure to install.