
Ninety-Eight V6-3.8L VIN K (1995)
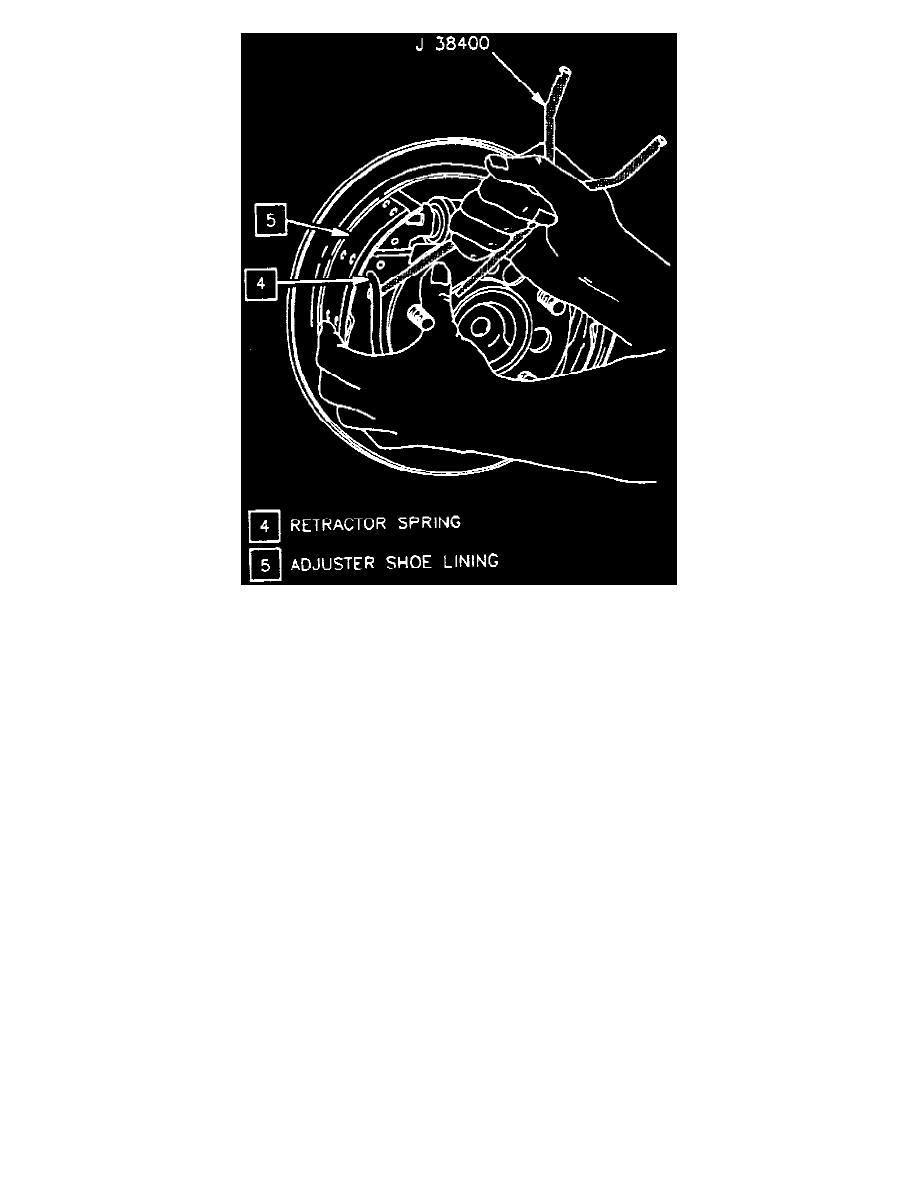
Fig. 4 Retractor Spring Disengagement
REMOVAL
1. Raise and support vehicle.
2. Mark relationship of wheel to axle, then remove wheel and tire assembly.
3. Remove brake drum. If drum is difficult to remove, proceed as follows:
a. Ensure parking brake is released.
b. Back off parking brake cable adjustment.
c. Remove access hole plug from backing plate, insert screwdriver through hole and push parking brake lever off its stop.
d. Insert punch through hole in splash shield Fig. 2, tap on punch to loosen drum. Then remove drum.
4. Remove actuator spring using special brake tool J 38400 or equivalent to pry loop end of spring from adjuster actuator, Fig. 3. When removing
the retractor spring do not over stretch the spring, this will reduce its effectiveness.
5. Remove end of retractor spring from adjuster shoe and lining assembly using special brake tool J 38400 or equivalent, Fig. 4. Keep finger away
from retractor spring to prevent fingers from being pinched.
6. Remove adjuster shoe and lining assembly, adjuster actuator, then adjusting screw assembly.
7. Remove park brake lever from shoe assembly, do not remove parking brake cable from lever unless parking brake lever is being replaced.
8. Remove retractor spring from park brake shoe and lining.
9. Pry end of retractor spring toward axle using special brake tool J 38400 or equivalent, until it snap off shoe web onto backing plate. Remove park
brake shoe.