
Silhouette V6-191 3.1L VIN D TBI (1995)
Important: It is possible to install a PROM backward. If the PROM is installed backward and the ignition key turned to "ON," the PROM
circuitry will be destroyed, requiring PROM replacement. The ignition should always be "OFF" when installing or removing the PCM connectors.
REMOVE OR DISCONNECT
1. Negative battery.
2. Right side sound insulator.
3. Vacuum center.
4. Connectors to PCM.
5. PCM.
6. PROM access cover.
7. PROM from PCM.
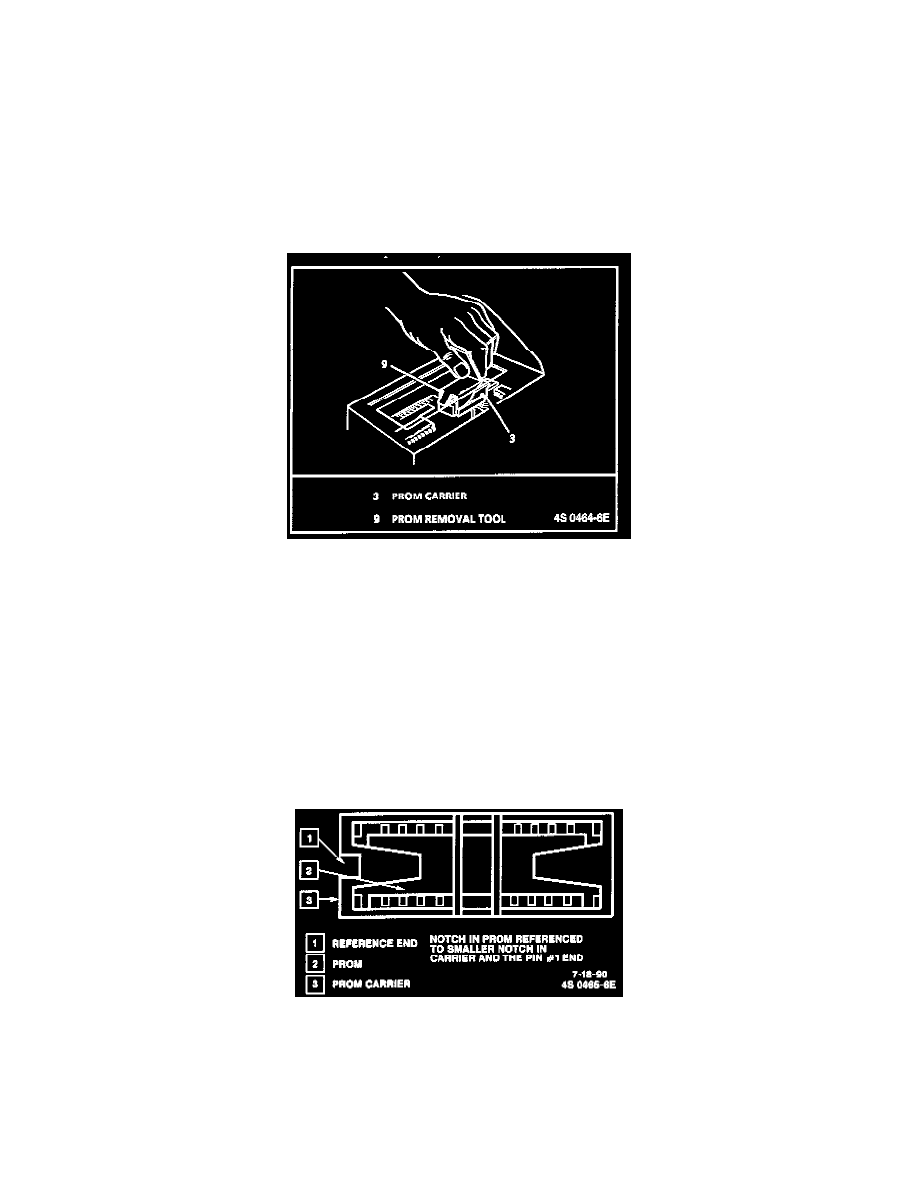
PROM Removal Tool
CAUTION: Use the rocker type PROM removal tool, engage one end of the PROM carrier with the hook end of the tool. Press on the vertical bar
end of the tool and rock the engaged end of the PROM carrier up as far as possible. Engage the opposite end of the PROM carrier in the same
manner and rock this end up as far as possible. Repeat this process until the PROM carrier and PROM are free of the PROM socket. The PROM
carrier with PROM in it should lift off of the PROM socket easily. PROM carrier should only be removed by using the pictured PROM removal
tool. Other methods could cause damage to the PROM or PROM socket.
INSTALL OR CONNECT
1. New PROM carrier in PROM socket.
Inspect New PROM for same part number as old.
NOTE: Do NOT remove PROM from carrier to check PROM number.
PROM In PROM Carrier
Check reference of PROM in carrier.
NOTE: Small notch of carrier should be aligned with small notch in socket. Press on PROM carrier until it is firmly seated in the socket. Do not
press on PROM; only the carrier.
2. Access cover on PCM.