
Silhouette V6-3.4L VIN E (1996)
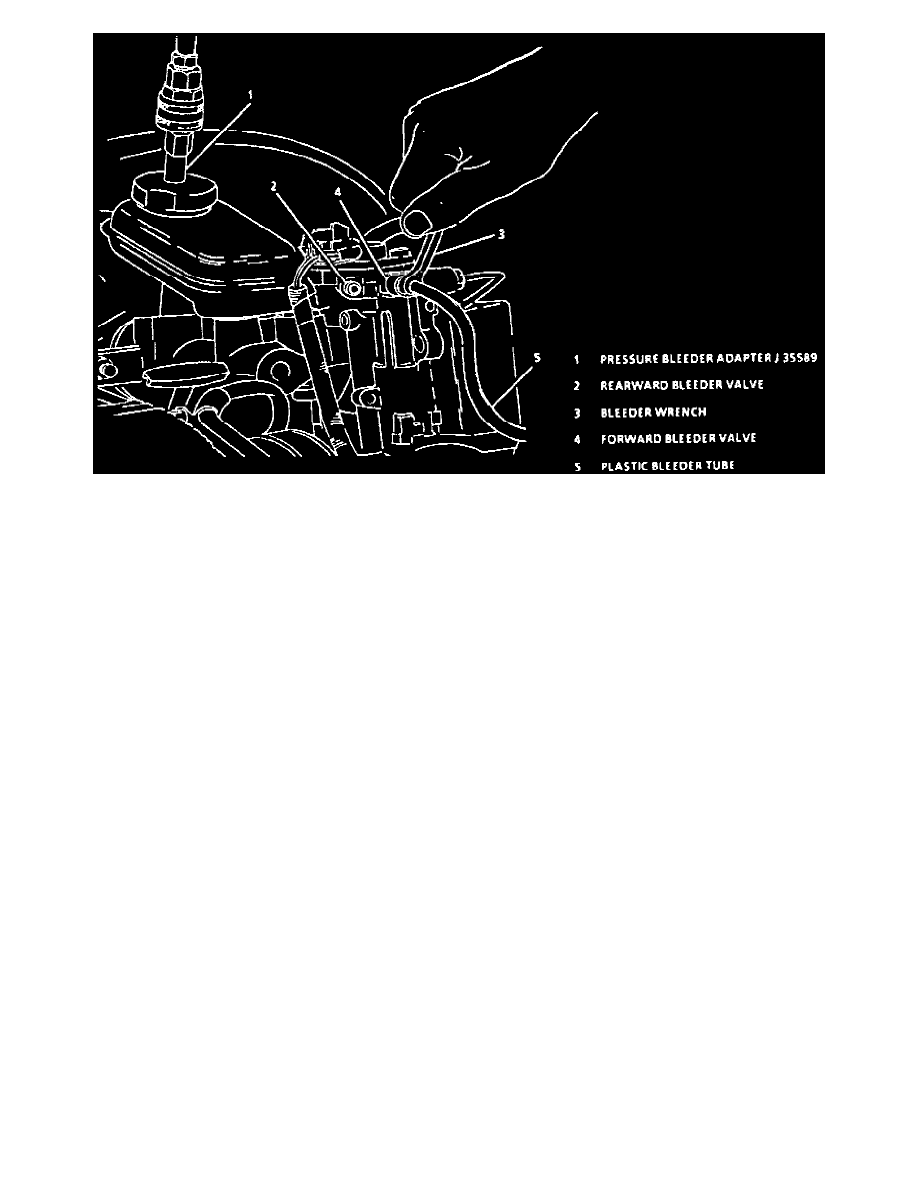
Fig. 13 Combination Valve Installation
1. Fill pressure tank at least 2/3 full of brake fluid. Bleeder must be bled each time fluid is added.
2. Charge pressure bleeder to 30-35 psi.
3. If master cylinder is replaced or suspected to have air in the bore, bleed it before bleeding calipers.
a. Attach a clear hose to rearward bleeder valve and submerge the opposite end of the hose into a clean suitable clear container, partially filled
with clean brake fluid.
b. Slowly open bleeder valve and allow fluid to flow until no air bubbles are seen, then close valve.
c. Repeat procedure on front bleeder valve.
4. Install master cylinder adapter tool No. J 35589, or equivalent, Fig. 13, to reservoir. Install bleeder hose to adapter
5. Bleed each wheel in the following sequence:
a. Right rear.
b. Left rear.
c. Right front.
d. Left front.
6. Open bleeder tank valve.
7. Attach a clear hose to caliper bleeder valve and immerse the opposite end of the hose into a clean suitable container, partially filled with clean
brake fluid.
8. Open bleeder valve at least 3/4 turn and allow fluid to flow until no air is seen in fluid, then close valve.
9. To assist in purging air bubbles, tap lightly on caliper or backing plate to help dislodge bubbles.
10. Repeat procedure at each wheel.
11. Check brakes for sponginess. Repeat bleeding procedure if necessary.
12. Remove pressure bleeder, adaptors, and tools, then fill reservoir to proper level.