
Silhouette V6-3.4L VIN E (1996)
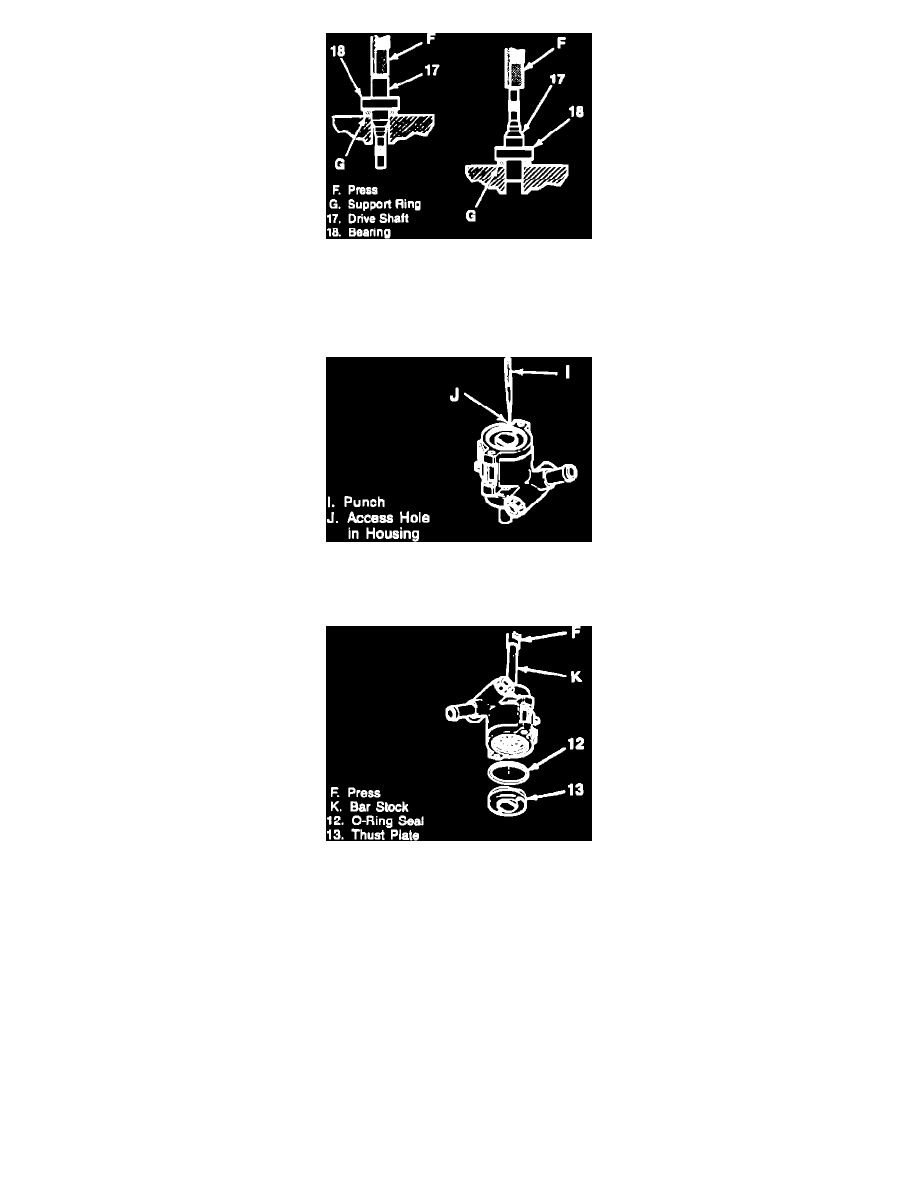
Fig. 6 Driveshaft & bearing removal
6. Remove driveshaft and bearing. Note and measure any clearance between collar and shaft. Press bearing from shaft using a support ring under
bearing.
7. Remove driveshaft seal by prying seal loose with a screwdriver.
Fig. 7 Thrust plate retaining ring removal
8. Insert a punch into access hole, then pry retaining ring loose with a screwdriver.
Fig. 8 Thrust plate removal
9. Using a 5/16 inch piece of bar stock or a suitable brass drift, remove thrust plate.
10. Remove pump ring, rotor, vanes and dowel pins.
11. Remove pressure plate and O-ring, then the spring, seal and remaining dowel pin.
12. Using a suitable punch, remove sleeve assembly.
Inspection
1. Clean all parts with solvent and blow dry.
2. Inspect rotating components as follows:
a. Vane tips for scoring or wear.
b. Fit of vanes in rotor. Vanes must fit properly in slots without sticking or excessive play.
c. Rotor slots for burrs and excessive wear at thrust faces.
d. Inner surface of pump ring for scoring or wear.
e. Thrust plate and pressure plate for wear on plate surfaces.
f.
If heavy wear is present, or parts are faulty, replace entire rotating group.