
Silhouette FWD V6-3.4L VIN E (2004)
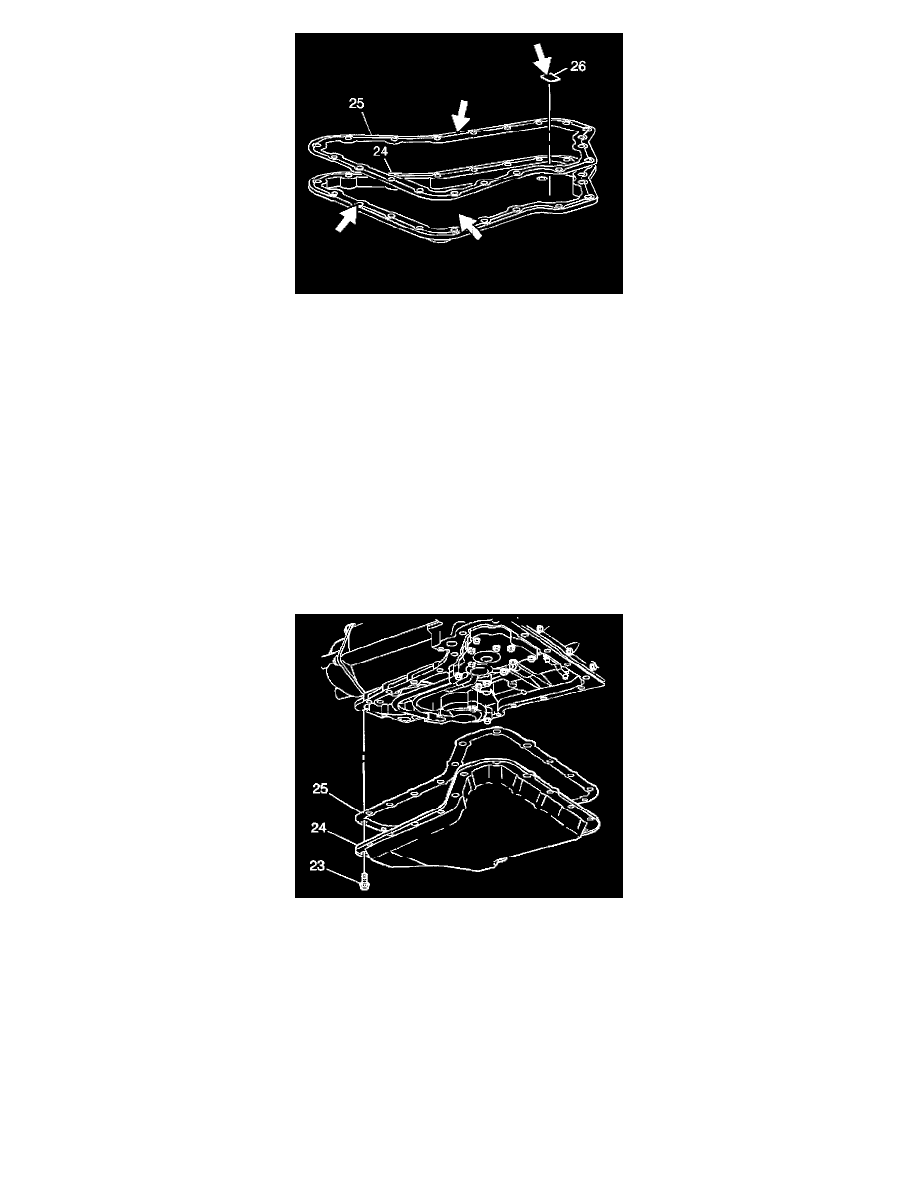
18. Inspect the oil pan (24) for the following conditions:
^
A damaged sealing surface
^
A dented or cracked bottom surface
19. Inspect the oil pan gasket (25) for the following conditions:
^
A bent or damaged seal core
^
A damaged rubber seal surface
20. Inspect the oil pan magnet (26) for the following conditions:
^
Damage
^
Misalignment
21. Clean the oil pan, the gasket and the magnet in order to remove any sediment.
Notice: Ensure the oil pan and the case flanges are dry and are free of any oil film or leakage may result.
22. Clean the case sealing surface and the pan sealing surface. Ensure all traces of the old gasket material are removed.
23. Allow the case sealing surface and the pan sealing surface to dry completely.
Installation Procedure
1. Install the oil pan gasket (25).
2. Install the oil pan (24).
Notice: Refer to Fastener Notice in Service and Precautions.
3. Install the oil pan bolts (23).
Tighten the oil pan bolts (23) to 14 Nm (10 ft. lbs.).
4. Lower the vehicle.
Notice: Do NOT overfill the transaxle. The overfilling of the transaxle causes foaming, loss of fluid, shift complaints, and possible damage to the
transaxle.
5. Adjust the fluid level. Refer to the following information.