
Toronado V6-252 4.1L (1983)
Alignment: Service and Repair
Front Wheel Alignment
Prior to checking caster and camber settings, check front end standing height. Refer to ``Standing Height, Adjust'' under Front Suspension & Steering
Section for procedure.
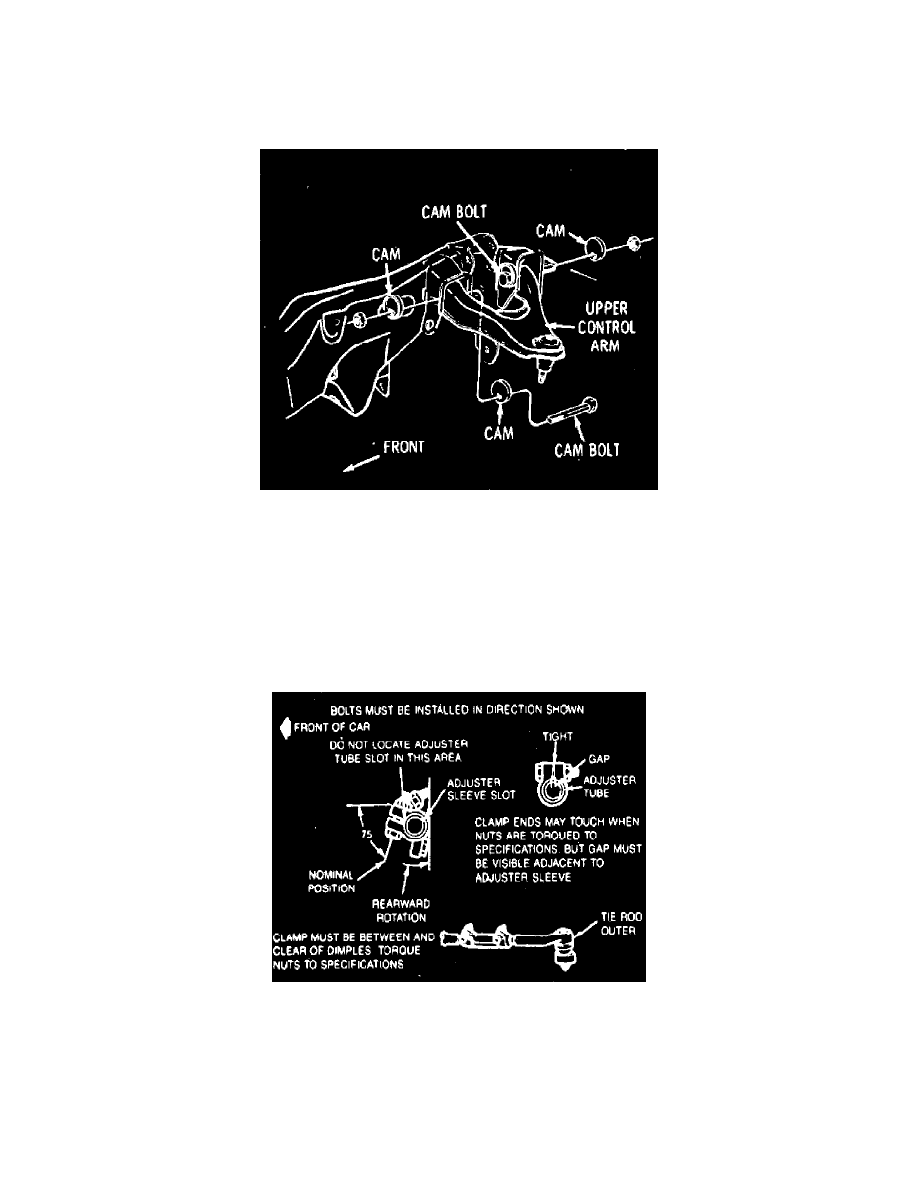
Fig. 2 Caster-camber cam locations. Eldorado & Seville
Caster
Record camber reading, then hold front cam bolt and loosen nut, Fig. 2. Turn front cam bolt to obtain 1/4 of the desired caster change. At front cam
bolt a positive camber change produces a positive caster change and a negative camber change produces a negative caster change. Hold cam bolt in
position and tighten nut. Loosen rear cam bolt nut and rotate cam bolt to return camber to setting recorded previously, Fig. 2. When adjustment has been
completed hold rear cam bolt and torque nut to 70 ft. lbs.
Camber
While holding cam bolt in position, loosen cam bolt nut, Fig. 2. Rotate cam bolt to obtain a change in camber equal to 1/2 the needed correction. Hold
cam bolt in position and tighten cam bolt nut. To obtain the remaining 1/2 of needed correction apply the above procedure to the other cam bolt.
Fig. 3 Tie rod clamp and sleeve positioning
Toe-In, Adjust
Toe-in is adjusted by turning the tie rod adjusting tubes at outer ends of each tie rod after loosening clamp bolts. Readings should be taken only when
front wheels are straight ahead and steering gear is on its high spot.
1.
Loosen clamp bolts at each end of tie rod adjusting sleeve.
2.
Turn tie rod adjusting sleeve to obtain the proper toe-in adjustment.
3.
After completing adjustment, check to ensure that the number of threads at each end of sleeve are equal and tie rod end housings and clamps are
properly positioned, Fig. 3. Torque clamp bolt to 14 to 15 ft. lbs.