
Toronado V6-3800 3.8L (1988)
Brake Caliper: Service and Repair
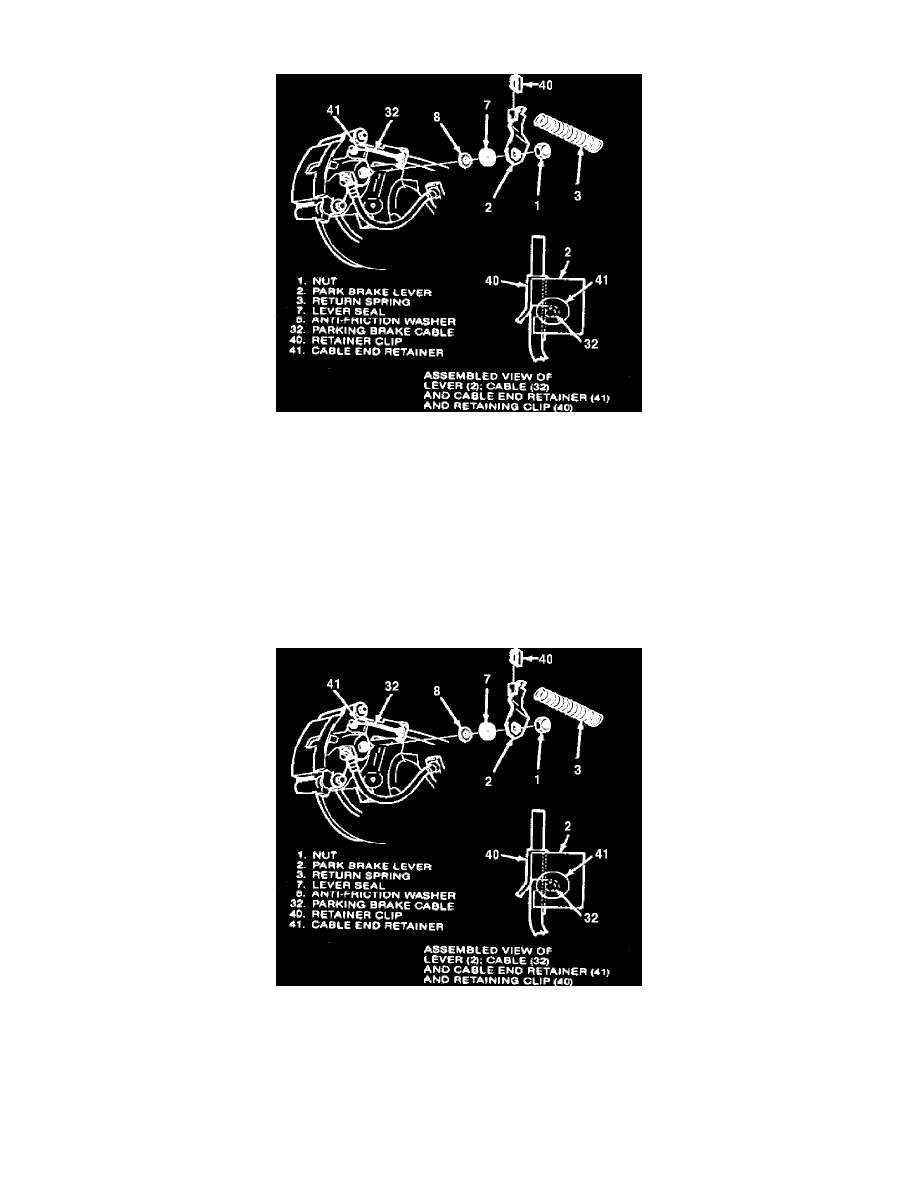
Fig. 8 Parking brake lever installation. Rear brake caliper removal
REMOVAL
1.
Siphon approximately 2/3 of brake fluid from master cylinder.
2.
Raise and support vehicle, then remove wheel and tire assembly.
3.
Loosen tension on parking brake cable at equalizer.
4.
Remove retaining clip from parking brake lever, then disconnect cable and spring, Fig. 8.
5.
Hold parking brake lever and loosen locknut, then remove nut, lever, seal and washer.
6.
If caliper is to be overhauled or replaced, remove bolt securing fluid line union, then disconnect fluid line.
7.
Remove caliper mounting bolts, then lift caliper assembly off rotor and mounting bracket.
8.
If rotor is to be replaced, remove caliper bracket mounting bolts and the bracket. Prevailing torque bolts used to secure mounting bracket
cannot be reused. If bolts become loose or are removed, bolts must be replaced.
Fig. 8 Parking brake lever installation. Rear brake caliper removal
INSTALLATION
1.
Install mounting bracket and torque bolts to 83 ft. lbs.
2.
Position caliper over bracket and rotor, ensuring insulators are in place.
3.
Coat caliper bolts with thin film of silicone grease and torque bolts to 55---70 ft. lbs.
4.
Install fluid line union using new copper washers, and torque union bolt to 30 ft. lbs. on 1986 models, or 15 ft. lbs. on 1987---88 models.
5.
Install friction washer, seal, lever and nut on parking brake shaft as shown in Fig. 8, then torque nut to 30---40 ft. lbs. while holding lever.