
Toronado V6-3800 3.8L (1988)
Ball Joint: Service and Repair
Upper
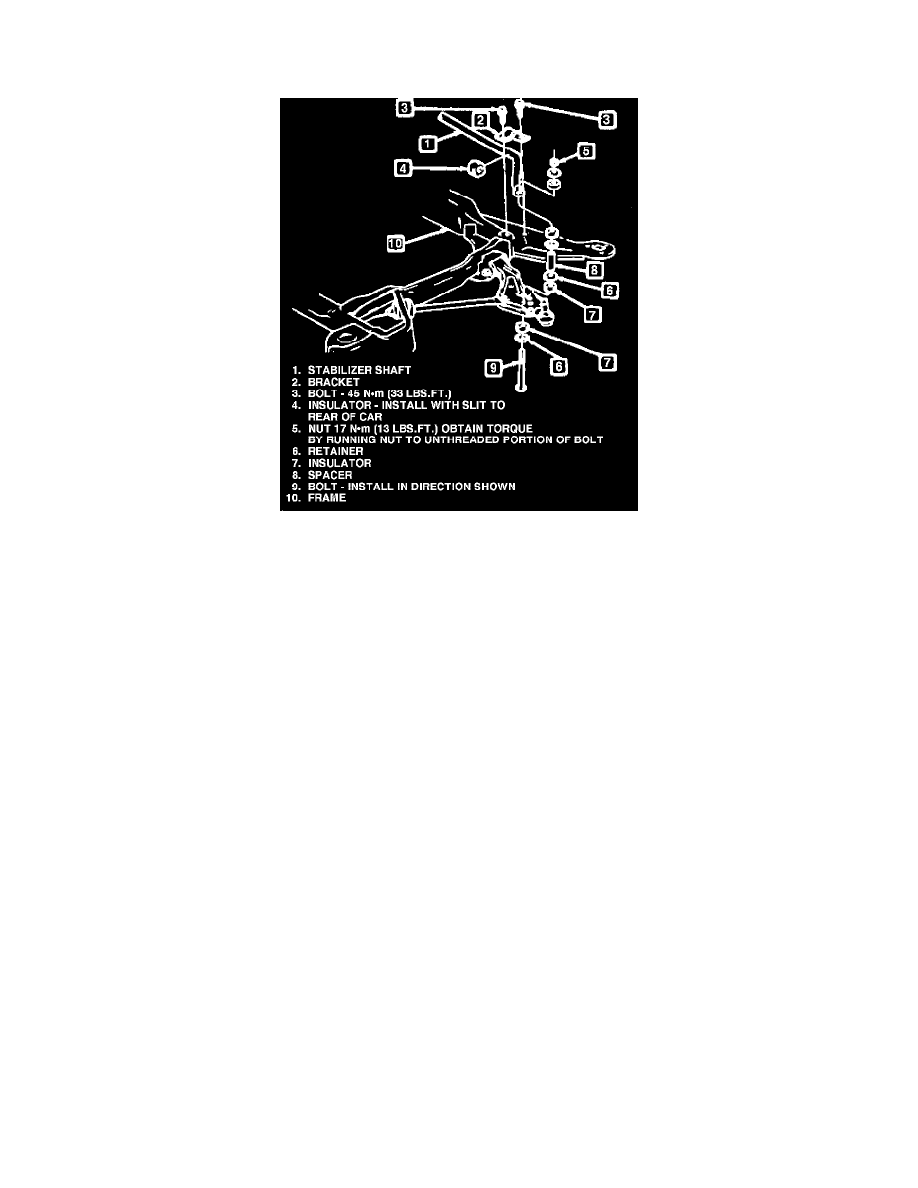
Fig. 1 Stabilizer shaft installation
Care must be taken not to overextend driveshaft Tri-Pot joints when replacing suspension components. Overextending joint could cause separation of
internal joint components, resulting in failure of the joint.
1.
Raise vehicle and support frame with suitable stands.
2.
Remove wheel and tire assembly.
3.
Remove insulator, retainers, spacer and bolt securing stabilizer shaft to control arm, Fig. 1.
4.
Cut inner tabs from boot protector J-34754 and install protector over drive axle outer joint.
5.
Remove nut and cotter pin securing ball joint to steering knuckle.
6.
Separate ball joint from knuckle using separator J-35315 or equivalent.
7.
Center punch rivets securing ball joint to control arm, then drill out rivets starting with 1/4 inch drill bit and finishing with 1/2 inch bit.
8.
Install service replacement joint in control arm, Insert bolts from underside of arm, and torque to 50 ft. lbs.
9.
Insert ball stud into steering knuckle and install nut.
10.
Torque ball joint nut to 84 inch lbs. using 90° adapter J-35551 or equivalent.
11.
Tighten nut an additional 180° on Eldorado and Seville models, or 120° on Riviera and Toronado models, noting torque reading, then tighten nut
up to 60° additional to align holes and install cotter pin. When tightening nut, minimum torque of 48 ft. lbs. on Eldorado and Seville models,
or 37 ft. lbs. on Riviera and Toronado models must be obtained. If minimum torque cannot be obtained, check for stripped threads and
repair as needed. If threads are satisfactory, replace ball joint and steering knuckle.
12.
Reverse remaining procedure to complete installation.