
Toronado V8-307 5.0L (1982)
Alignment: Service and Repair
Rear Wheel Alignment
Camber & Toe-In
Camber and toe-in are checked at the same time following the procedure outlined below. Camber is factory set and is not adjustable. If camber
deviates from specified settings, check for a bent control arm or frame, or for a improperly mounted hub and bearing assembly.
1.
Check front and rear trim heights.
2.
Check automatic level control system, if equipped, for proper operation.
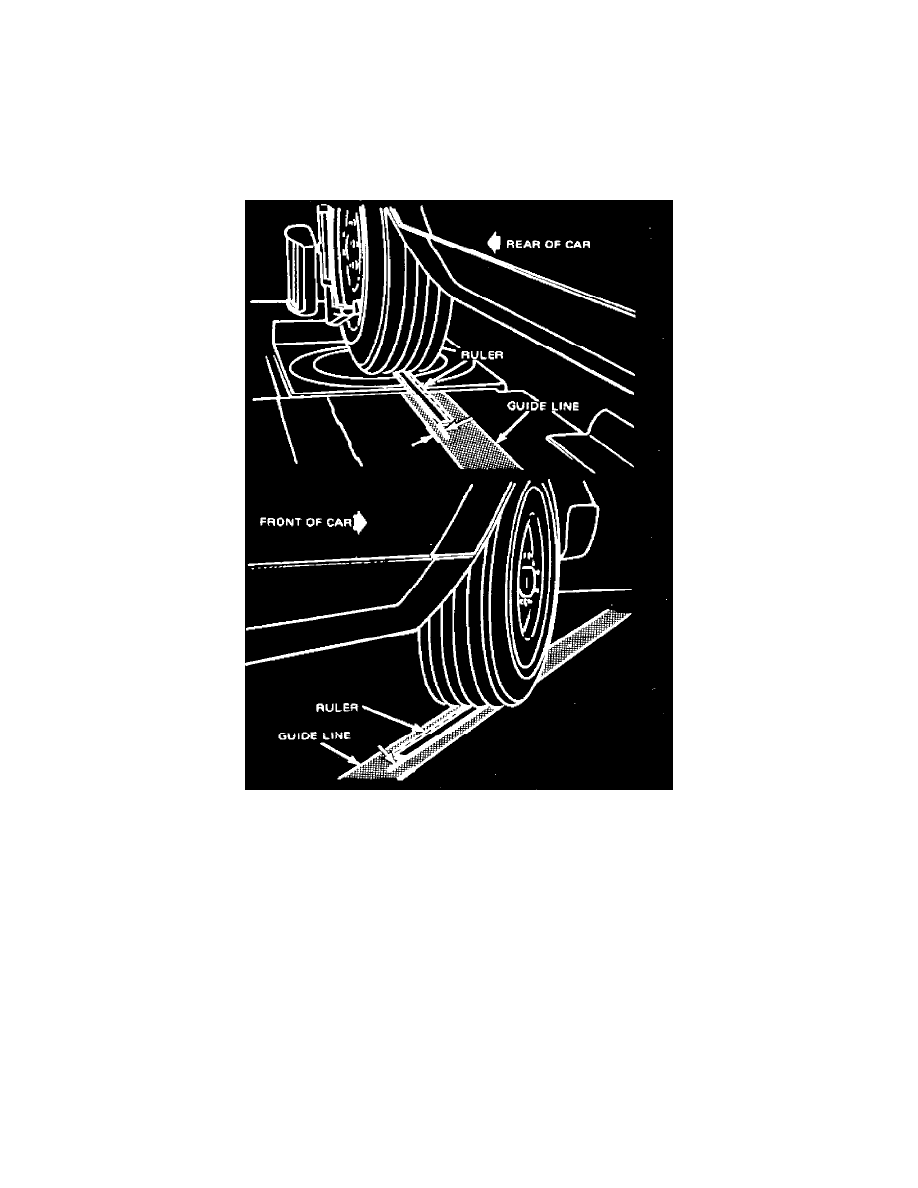
Fig. 4 Checking vehicle for squareness on alignment rack
3.
Position vehicle on alignment rack as follows:
a. Place masking tape on floor from wheel plate to rear of vehicle to use as a guide to square vehicle on alignment rack.
b. Back rear of vehicle onto rack, positioning wheels on wheel plates.
c. Place a ruler at same rib of tire at front and rear of vehicle, then measure distance from inside edge of ruler to edge of guide line, Fig. 4.
When vehicle is square, measurement from guide line to ruler should be greater at rear tire by approximately 5/8 inch.
4.
Attach alignment mirrors to rear wheels, then check camber and toe settings and compare to specifications. When vehicle is backed onto
alignment rack, toe-in and toe-out are reversed. That is, toe-in will be read as toe-out, while toe-out will be read as toe-in.
5.
As stated previously, camber is not adjustable. To adjust toe-in, loosen inner pivot bushing retaining nut and bolt. Move control arm rearward to
increase toe-in, or toward front of vehicle to decrease toe-in. A pry bar can be used to facilitate adjustment. After adjustment is completed, torque
bushing retaining nut to 70 ft. lbs.