
Acclaim V6-181 3.0L SOHC (1990)
Brake Shoe: Service and Repair
Brake Shoe Removal and Installation
Removal
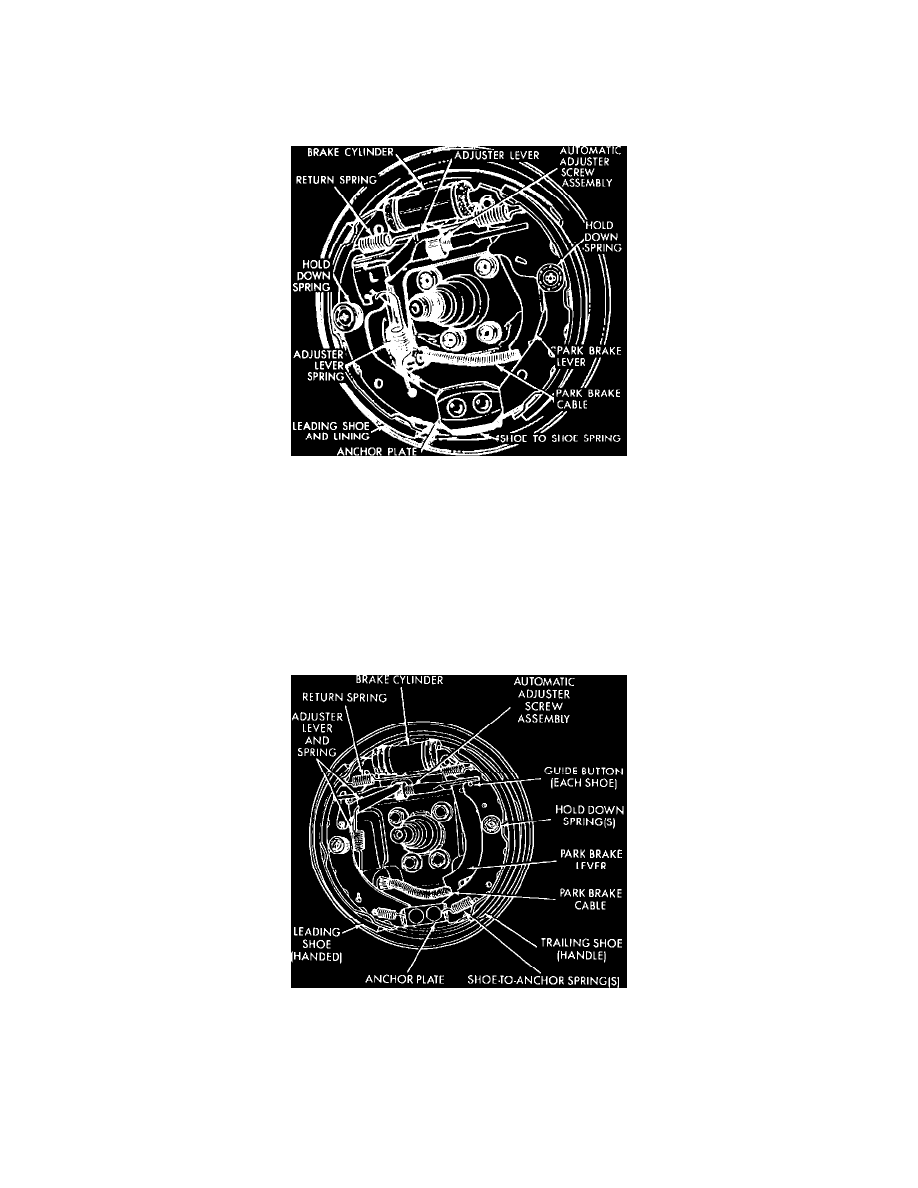
Fig. 1 Kelsey-Hayes Leading Trailing Drum Brake Assembly. Type 2
1.
Raise and support rear of vehicle.
2.
Remove tire and wheel assembly, then remove brake drum. If brake lining is dragging on brake drum, back off brake adjustment by rotating
adjustment screw.
3.
Using suitable pliers, remove adjuster lever spring.
4.
Remove adjuster lever.
5.
Turn automatic adjuster screw out to expand shoes past wheel cylinder boot.
6.
Disconnect parking brake cable from parking brake lever.
7.
On Type 2--Kelsey Hayes, using suitable tool, remove hold-down springs.
8.
Pull brake shoe assembly down and away from anchor plate, then remove brake shoe springs and adjusting screw assembly.
Fig. 2 Varga Leading Trailing Drum Brake Assembly. Type 3
9.
On Type 3--Varga, remove upper shoe to shoe return spring on leading shoe, leading shoe hold down spring, shoe to shoe spring at anchor plate,
then the shoe and adjuster assembly.
10.
Remove hold down spring and lower shoe to anchor plate spring for trailing shoe.
11.
On Type 2--Kelsey Hayes, remove C-clip retaining parking brake lever to trailing brake shoe webbing.
12.
On Type 3--Varga, remove parking brake lever from trailing shoe by prying retainer tags apart.
13.
Clean dirt from brake drum, anchor plate and all other components. Do not use compressed air or dry brush to clean brake parts. Many brake