
Acclaim V6-181 3.0L SOHC (1990)
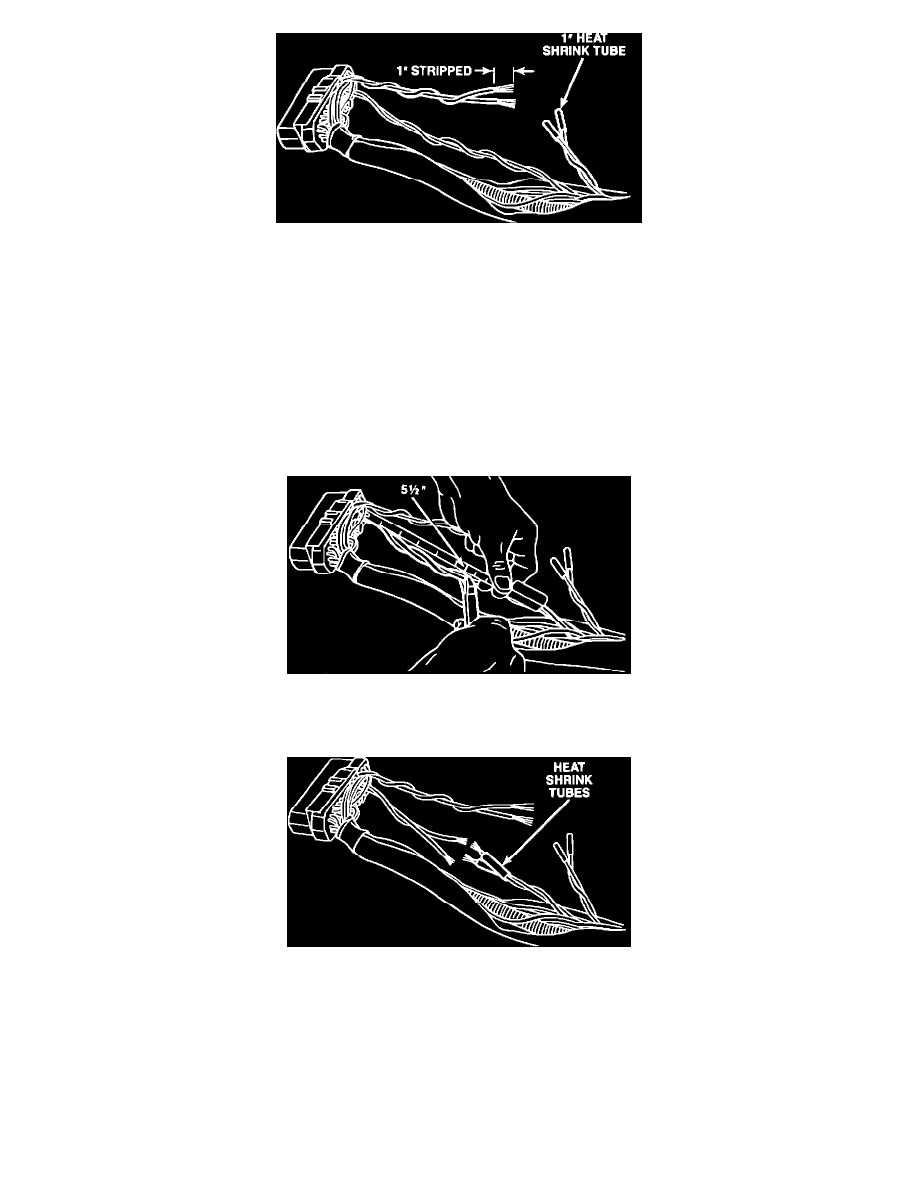
Figure 4
7.
Strip one inch of insulation from both wires leading to the 60-way connector, Figure 4.
8.
Cut one of the heat shrink tubes (PN 4419644) in half so that you have 2 one inch long heat shrink tubes.
NOTE:
USE ONLY HEAT SHRINK TUBE PN 4419644 FOR THIS REPAIR BECAUSE IT IS THE CORRECT
DIAMETER AND CONTAINS A SEALER TO ENSURE A WATER TIGHT CONNECTION.
9.
Position the one inch long heat shrink tubes over the two wires that run back into the harness so that 1/2 inch of the shrink tube is over the wire
insulation. Using an air heat gun, apply heat until the heat shrink tube contracts over the wire and sealer is showing at both ends, Figure 4.
NOTE:
DO NOT USE AN OPEN FLAME, OR SOLDER GUN TO SHRINK THE TUBING.
Figure 5
10.
Measure 5-1/2 inches back from the 60-way connector on the twisted wires exiting the bottom row of the connector and cut both wires, Figure 5.
Figure 6
11.
Strip 1/2 inch of insulation from the four wire ends, Figure 6.
12.
Place one of the heat shrink tubes over the white with black tracer wires running back into the harness, and the remaining tubes over the violet with
brown tracer wire running back into the harness.