
Breeze L4-2.0L VIN C (1997)
Trailing Arm: Service and Repair
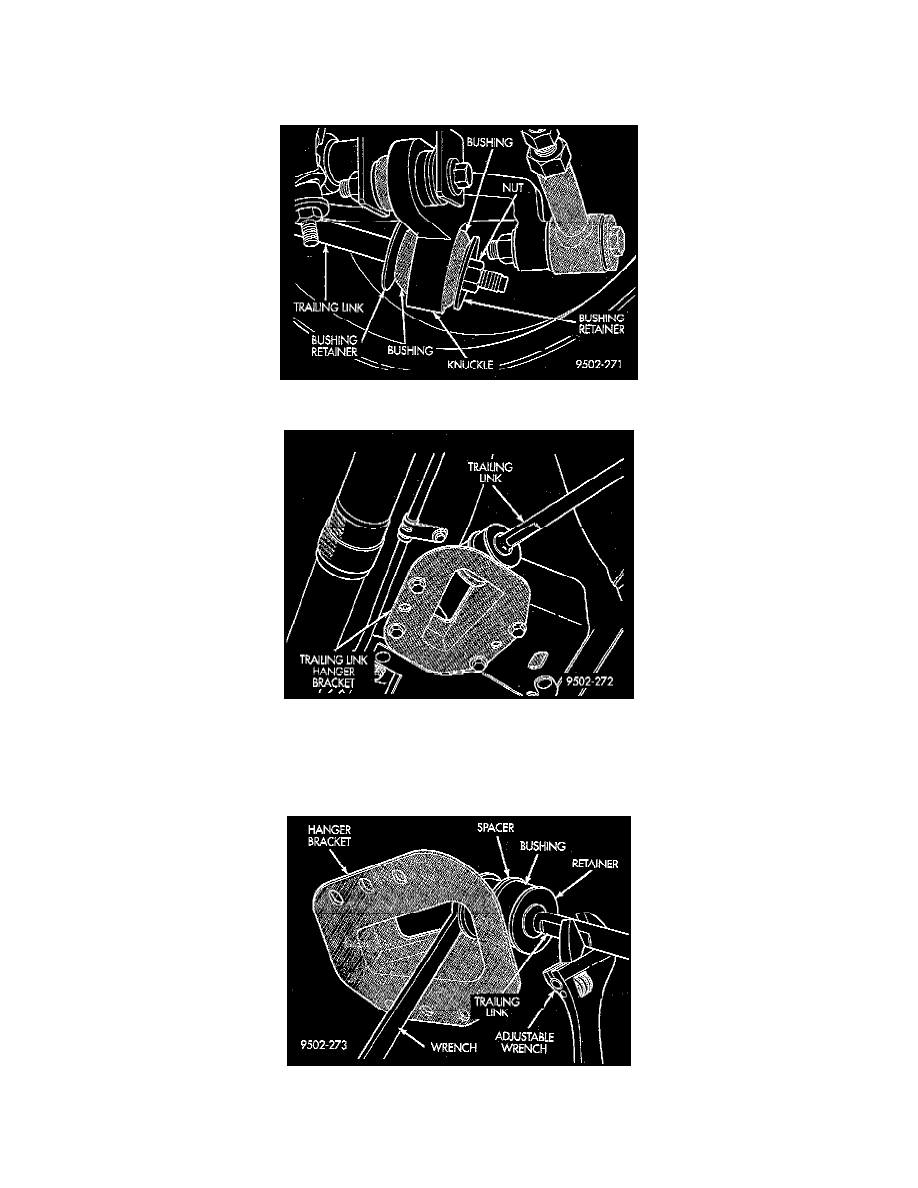
REMOVE
1. Raise vehicle on jackstands or centered on a frame contact type hoist.
2. Remove rear wheel and tire assembly from the vehicle.
3. At the knuckle, remove the nut, bushing retainer and outer trailing link bushing from the trailing link.
4. Remove the 4 bolts attaching the trailing link hanger bracket to the floor pan and frame rail.
5. Remove the trailing link and mounting bracket as an assembly from the vehicle.
CAUTION: The installation position of the bushings and retainers on the trailing link is important. When separating the trailing link from the
hanger bracket, note the position and orientation on the bushings and retainers to ensure they are re-installed correctly.
6. Separate the trailing link from the hanger bracket. To separate trailing link from hanger bracket, use a large adjustable wrench on flat of trailing
link to turn link while holding nut stationary.
CAUTION: The inner and outer trailing link to hanger bracket bushings and retainers must be installed in their correct position on the trailing link. Do