
Breeze L4-2.4L VIN X (2000)
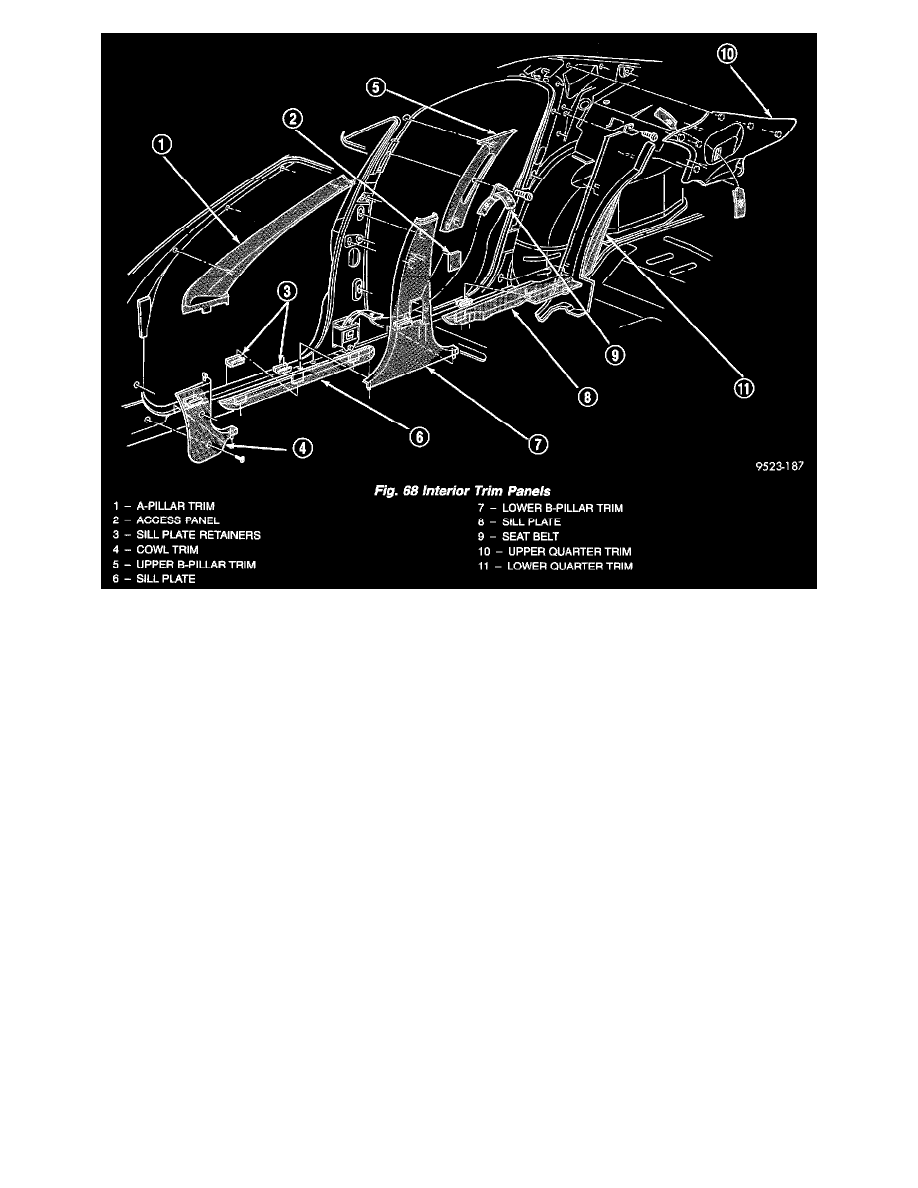
Fig. 68
2. Disengage clips attaching seat belt access panel to lower B-pillar trim (Fig. 68).
3. Remove sill plates.
4. Disengage clips attaching lower B-pillar trim to B-pillar.
5. Route seat belt webbing through access hole in lower B-pillar trim.
6. Remove lower B-pillar trim from vehicle.
INSTALLATION
1. Place lower B-pillar trim into position.
2. Route seat belt webbing through access hole in lower B-pillar trim.
3. Engage clips attaching lower B-pillar trim to B-pillar.
4. Install sill plates.
5. Engage clips attaching seat belt access panel to lower B-pillar trim.
6. Install upper B-pillar trim.
B-Pillar Upper Trim
UPPER B-PILLAR TRIM
REMOVAL
1. Pry shoulder belt knob straight off height adjuster using a trim stick (C-4755).
2. Remove seat belt turning loop cover.
3. Remove bolt attaching turning loop to height adjuster.
4. Remove bolt attaching seat belt lower anchor to floor.
5. Disengage clips attaching upper B-pillar trim to B-pillar.