
Breeze L4-2.4L VIN X (2000)
Engine Mount: Service and Repair
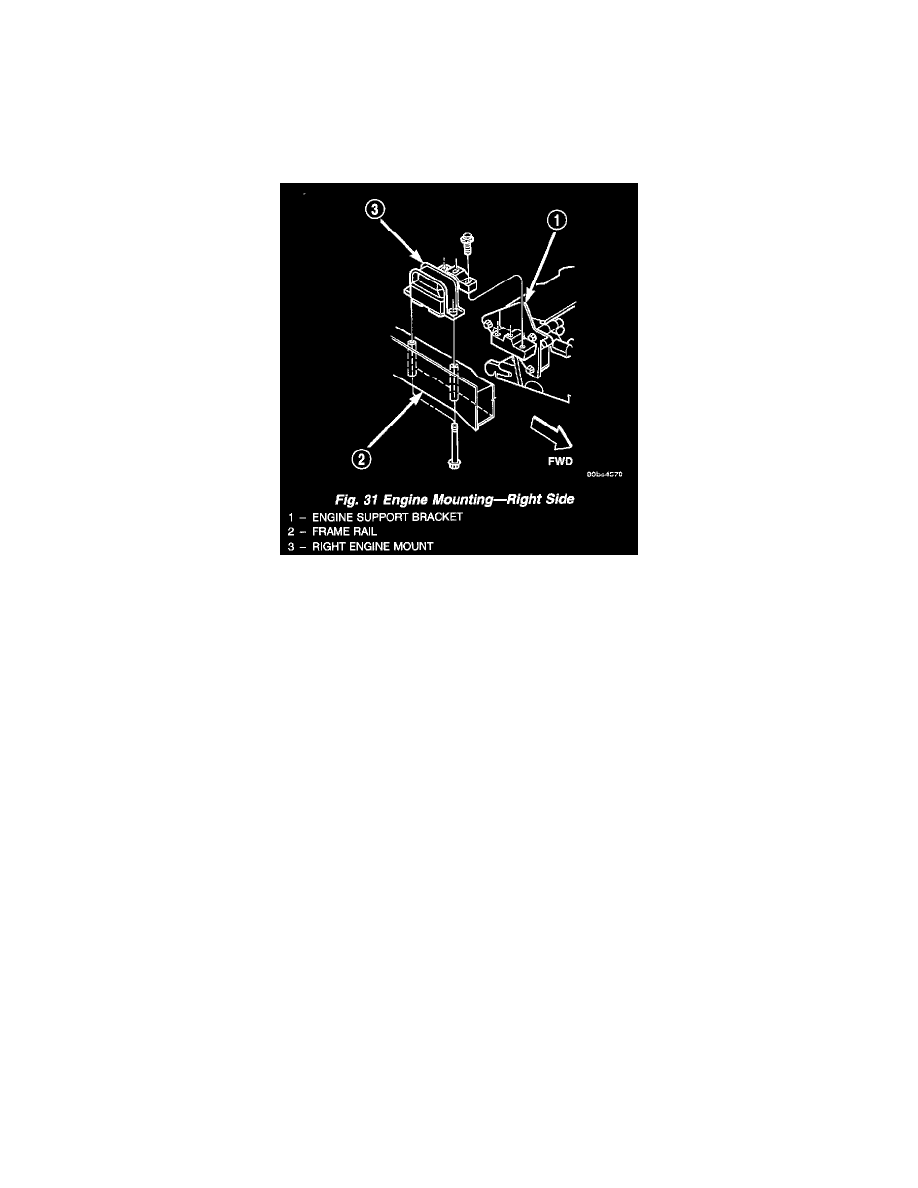
Engine Mount and Support Bracket-Right
NOTE: The right side engine mount is a HydroMount and may show surface cracks. This will not effect mount performance and should not be replaced.
Replace the Hydro-Mount if fluid is leaking from mount.
REMOVAL
1. Raise vehicle on a hoist and remove inner splash shield.
Fig. 31
2. Remove the right engine support assembly vertical fasteners from frame rail.
3. Lower vehicle. Remove the load on the engine motor mounts by carefully supporting the engine assembly with a floor jack.
4. Remove the three bolts attaching the engine support assembly to the engine bracket.
5. Move the air conditioning dryer aside.
6. Remove coolant reserve/recovery container.
7. Remove right engine mount.
8. Remove the three bolts attaching the engine support bracket to the cylinder block.
INSTALLATION
1. Install engine support bracket (if removed). Tighten bolts to 33 Nm (24 ft. lbs.).
2. Position right engine mount and install frame rail to mount bolts. Tighten bolts to 61 Nm (46 ft. lbs.).
3. Install the mount to engine bracket bolts and tighten to 61 Nm (45 ft. lbs.).
4. Install coolant reserve/recovery container. Refer to Cooling System for procedure.
5. Position the air conditioning dryer and install mounting screw.
6. Install inner splash shield.
NOTE: If centering or adjusting the engine/transmission assembly is needed refer to Adjustments