
Breeze L4-2.4L VIN X (2000)
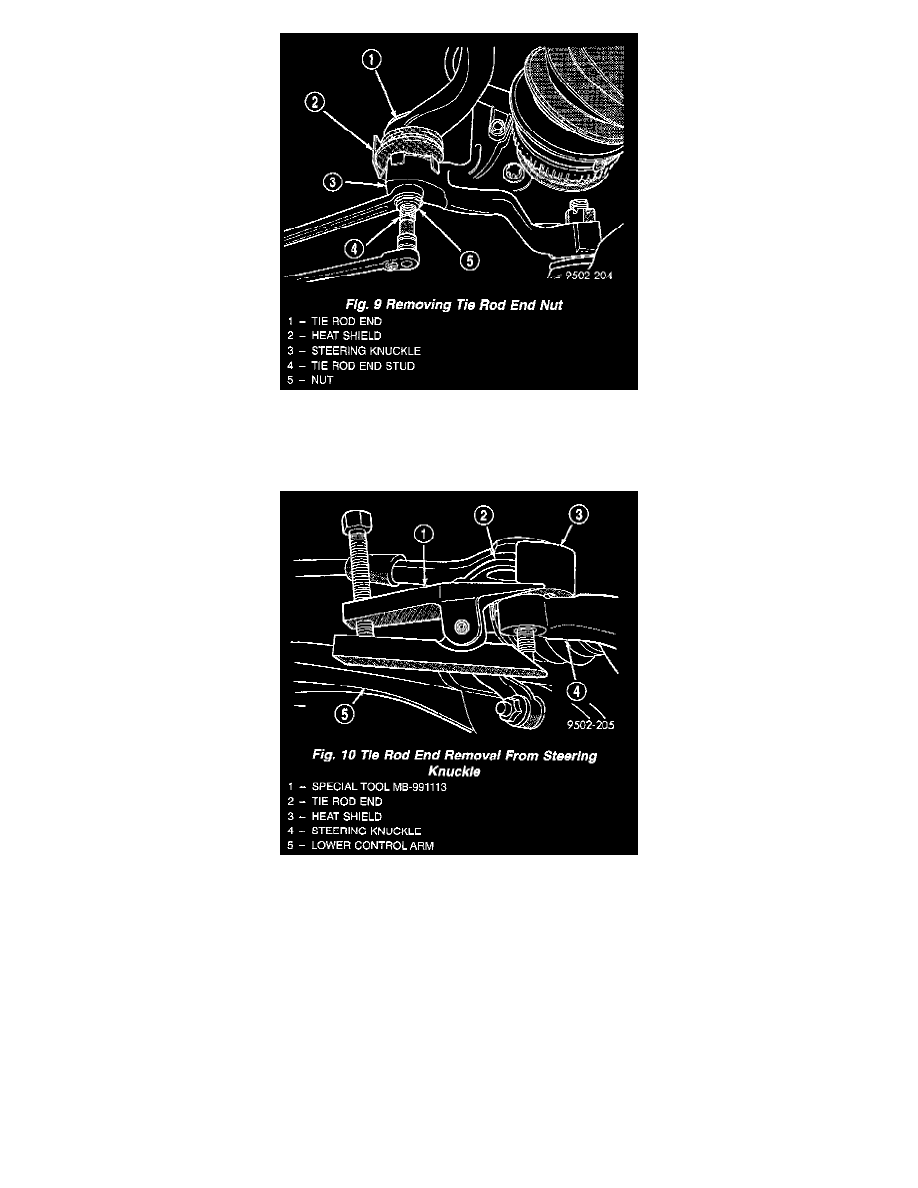
Fig. 9
7. Remove nuts attaching both outer tie rod ends to the steering knuckles. Nuts are to be removed from tie rod ends using the following procedure,
hold tie rod end stud with an 11/32 socket, while loosening and removing nut with wrench.
Fig. 10
8. Remove both tie rod end studs, from the steering knuckles, using Remover, Special Tool MB-991113.
CAUTION:
-
This vehicles is designed and assembled using NET BUILD front suspension alignment settings. This means that front suspension alignment
settings are determined as the vehicle is designed by the location of front suspension components in relation to the vehicle body. This process
is carried out when building the vehicle, by accurately locating the front suspension crossmember to master gage holes located in the
underbody of the vehicle. With this method of designing and building a vehicle, it is no longer necessary or possible to adjust a vehicles front
suspension alignment settings. Consequently, whenever the front suspension crossmember is removed from a vehicle, it MUST be replaced in
the same location on the body of the vehicle it was removed from. Front suspension Toe settings though are still adjustable by the outer tie rod
ends.
-
Before removing the front suspension crossmember from the vehicle, locating marks for the front suspension crossmember MUST be scribed
on the front suspension crossmember and body of vehicle. This must be done so front suspension crossmember can be located against body of
vehicle, in the same location when it is installed back in vehicle. If location of front suspension crossmember to body of vehicle is not
maintained when vehicle is assembled, NET BUILD front suspension alignment settings will not be obtained. This may lead to handling and or