
Breeze L4-2.4L VIN X (2000)
Power Window Motor: Service and Repair
WARNING: DO NOT HAVE ANY HANDS OR FINGERS IN SECTOR GEAR AREA WHERE THEY CAN BE PINCHED BY SMALL
MOVEMENTS OF REGULATOR LINKAGE.
REMOVAL
1. Move the window to the full-up position, if possible.
2. Disconnect and isolate the battery negative cable.
3. Remove door trim panel and window regulator.
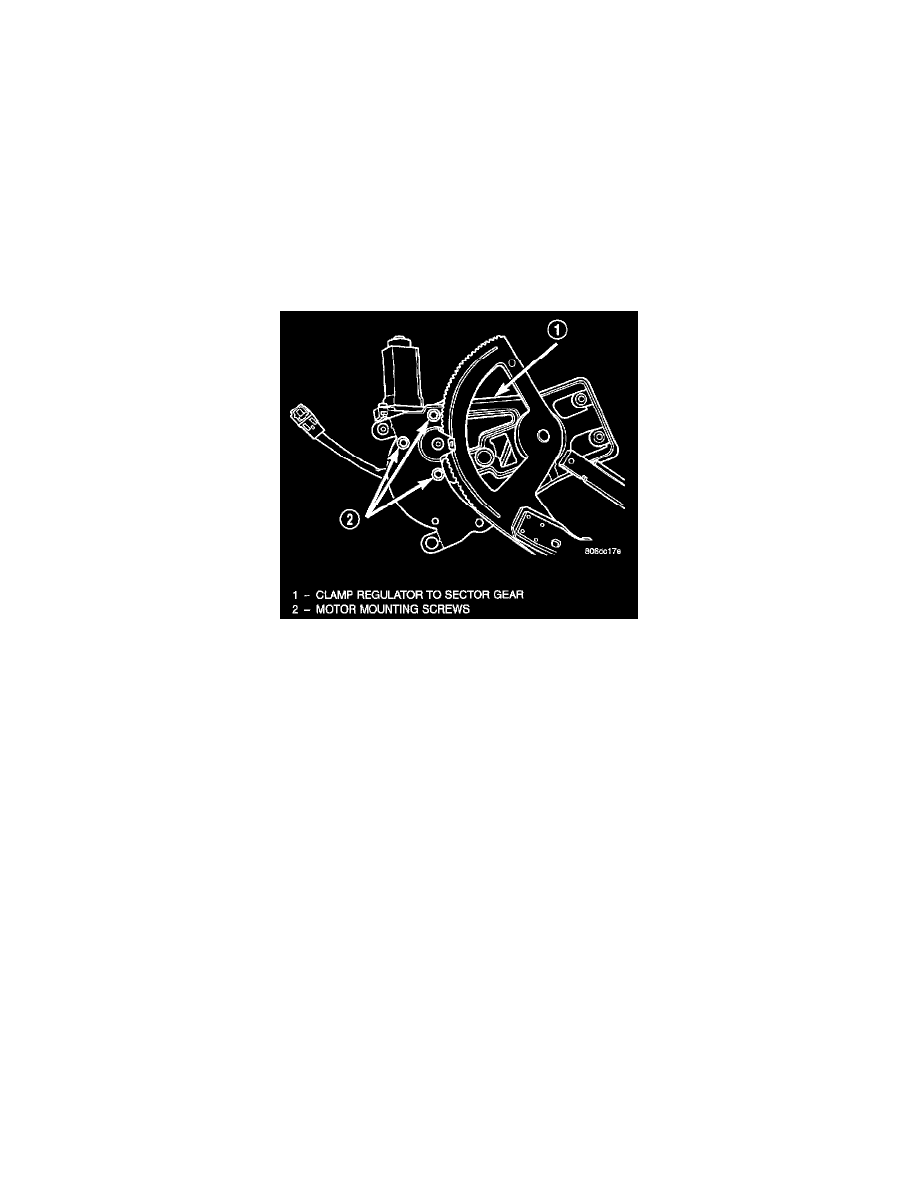
WARNING: FAILURE TO CLAMP THE SECTOR GEAR TO THE MOUNTING PLATE WHEN REMOVING THE MOTOR CAN
RESULT IN INJURY.
4. Disconnect wiring connector from motor.
5. Secure the sector gear and mounting plate with a C clamp or similar clamping tool. This will prevent a sudden and forceful movement of the
regulator when the motor is removed.
Motor Removal
6. Remove three mounting screws that hold motor gearbox to regulator.
7. Remove motor from regulator.
INSTALLATION
1. Install new motor on regulator by positioning motor gearbox so that it engages regulator sector teeth.
2. A slight rotational or rocking movement may be necessary to bring three motor gearbox screw holes into proper position.
3. Install three gearbox screws and one tie down bracket screw, if applicable. Tighten to 5.6 to 8 Nm (50 to 70 in. lbs.) torque.
4. Install regulator, using the switch, test operation of motor.