
Colt L4-1468cc 1.5L SOHC (1987)
Timing Belt: Service and Repair
Removal
1.
Disconnect breather and secondary air hoses, then remove air cleaner assembly, air intake duct and heated air duct.
2.
Disconnect accelerator cable and oxygen sensor lead, and remove spark plug wires.
3.
Remove accessory drive belts.
4.
Support engine as needed, then remove left engine mount bracket.
5.
Remove power steering pump and water pump pulleys.
6.
Remove rocker arm cover, gasket and packing, and the upper timing belt cover.
7.
After removing rocker cover, back off all valve adjusting screws until tip of each screw protrudes less than .08 inch (2 mm) from rocker arm. This
is essential to provide enough freeplay at camshaft to allow correct valve timing during timing belt installation.
8.
Remove damper pulley, crankshaft pulley and the lower timing belt cover.
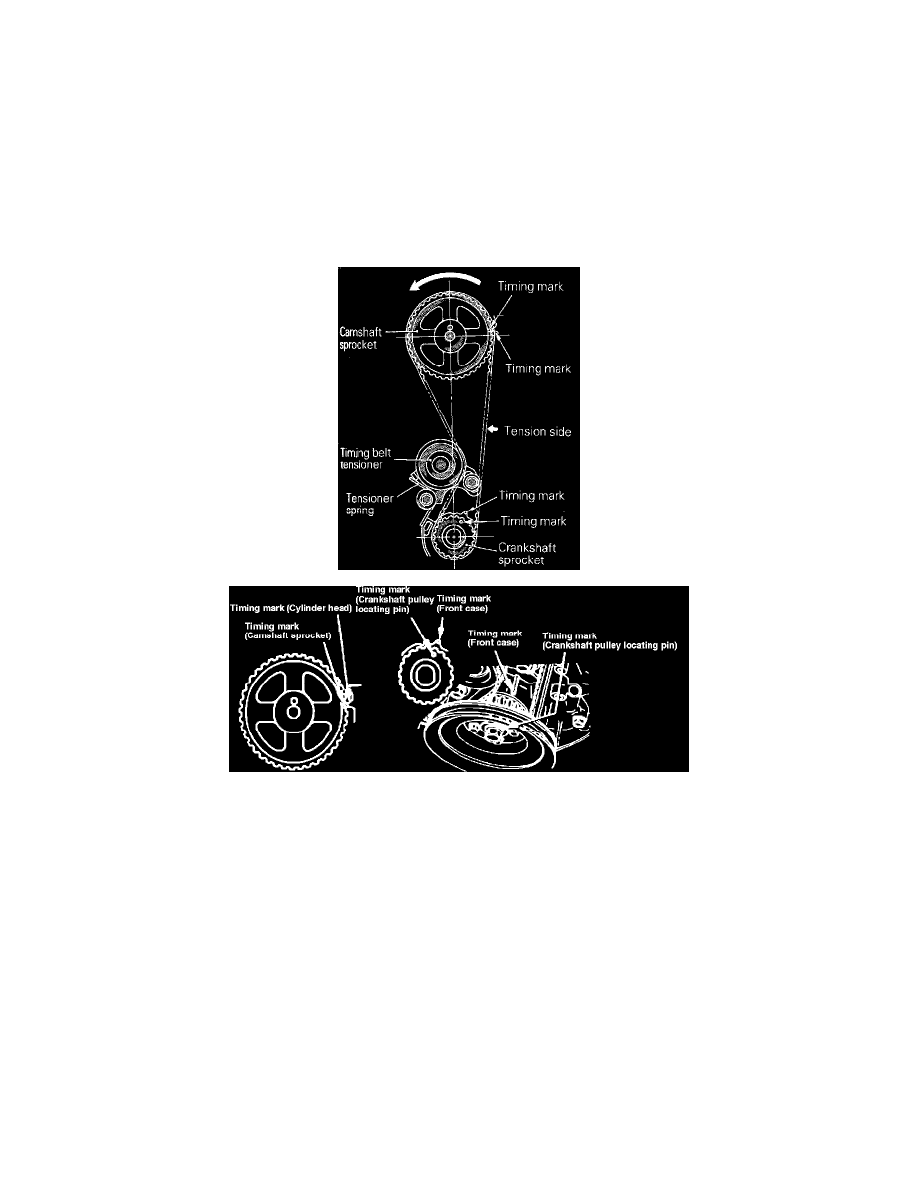
Fig. 40 Camshaft & crankshaft sprocket timing marks. 1500cc engine
9.
Rotate crankshaft in normal direction of rotation until timing marks are aligned, Fig. 40, loosen belt tensioner bolts and move timing belt tensioner
fully toward the water pump, then tighten bolts to hold tensioner.
10.
Remove timing belt. If the timing belt is to be reused, place an arrow mark indicating turning direction (direction of engine rotation) to ensure that
the belt is installed in the same direction as before.
11.
Remove camshaft sprocket, crankshaft sprocket and flange, and timing belt tensioner as needed.
12.
Inspect belt and replace if any of the following conditions are noted:
a. Hardened back surface rubber. With back surface glossy, non-elastic and so hard that no mark is produced when fingernail is forced into
surface.
b. Cracked back surface rubber.
c. Cracked or separated canvas.
d. Cracks at tooth bottom or side of belt.