
Colt L4-1597cc 1.6L DOHC (1990)
Brake Caliper: Service and Repair
Disassembly and Assembly
Front
1.
Remove caliper, refer to Removal/Installation.
2.
Remove boot ring from caliper body.
3.
Place shop towel in saddle of caliper body, then apply compressed air to brake fluid inlet to force piston from bore. Remove piston. Keep hands
away from front of piston during removal. Apply compressed air slowly, to ease piston from bore.
4.
Remove piston seal using caution not to scratch cylinder walls.
5.
Clean piston and cylinder wall surfaces with brake fluid or alcohol.
6.
Remove sleeve and boot from caliper body.
7.
Inspect cylinder and piston for wear, damage and/or corrosion. Inspect caliper body and sleeve for wear.
8.
Apply brake fluid to caliper body cylinder walls.
9.
Apply an even coat of brake grease to piston seal, then install seal in caliper bore.
10.
Carefully install caliper piston. Ensure seal does not twist during installation.
11.
Apply brake grease to piston boot, then install boot and boot ring.
12.
Apply brake grease to lock pin and guide pin sleeves.
13.
Install caliper assembly.
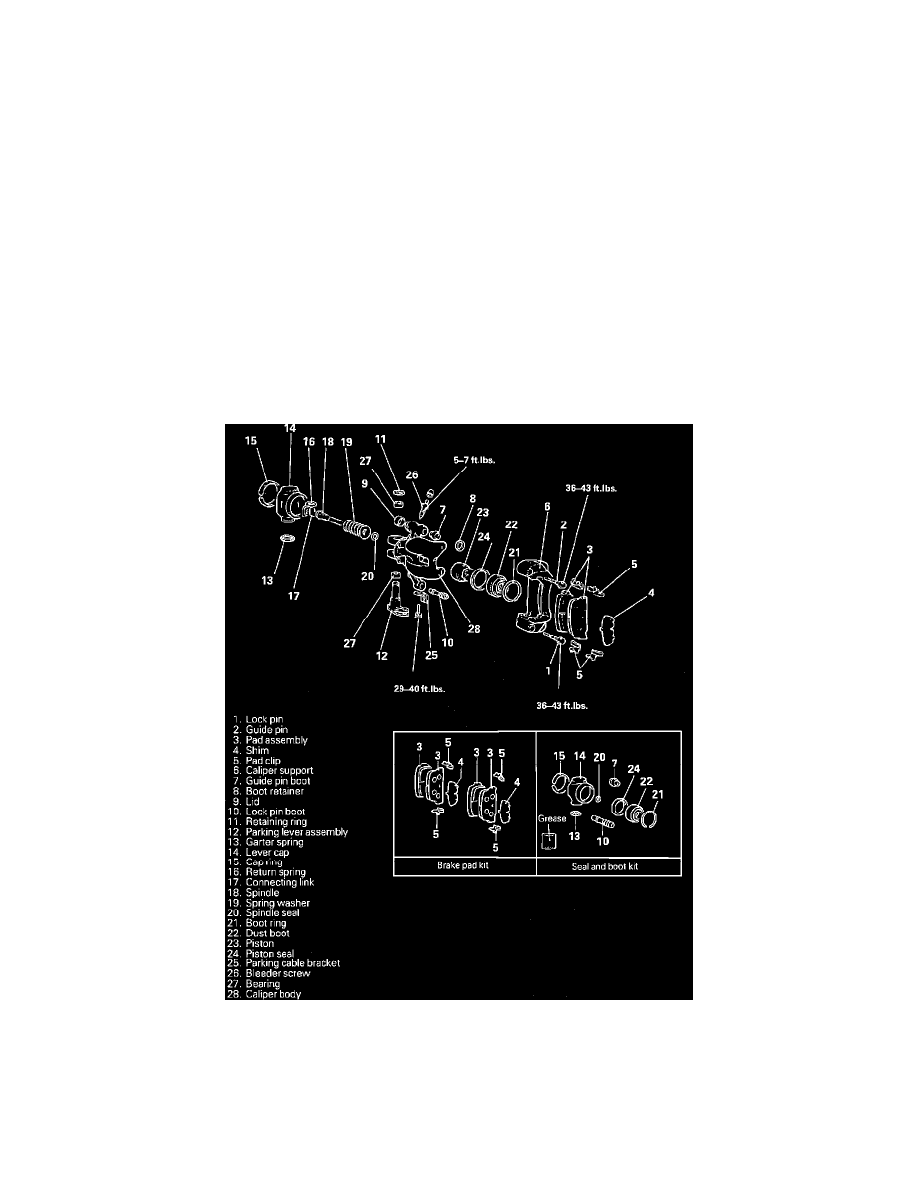
AD Type
Fig. 1 AD Type Dual Pin Floating Caliper Disc Brake Assembly
1.
Remove caliper assembly as described.
2.
Remove guide pin boot, boot retainer, lid and lock pin boot.
3.
Remove retaining ring by disengaging cap ring from lever cap groove and sliding lever cap away.
4.
Remove parking lever assembly, garter spring, lever cap, cap ring, return spring and connecting link.
5.
Unscrew spindle from caliper body, then remove spring washer, spindle seal, boot ring and dust boot.