
Colt L4-1597cc 1.6L SOHC Turbo (1985)
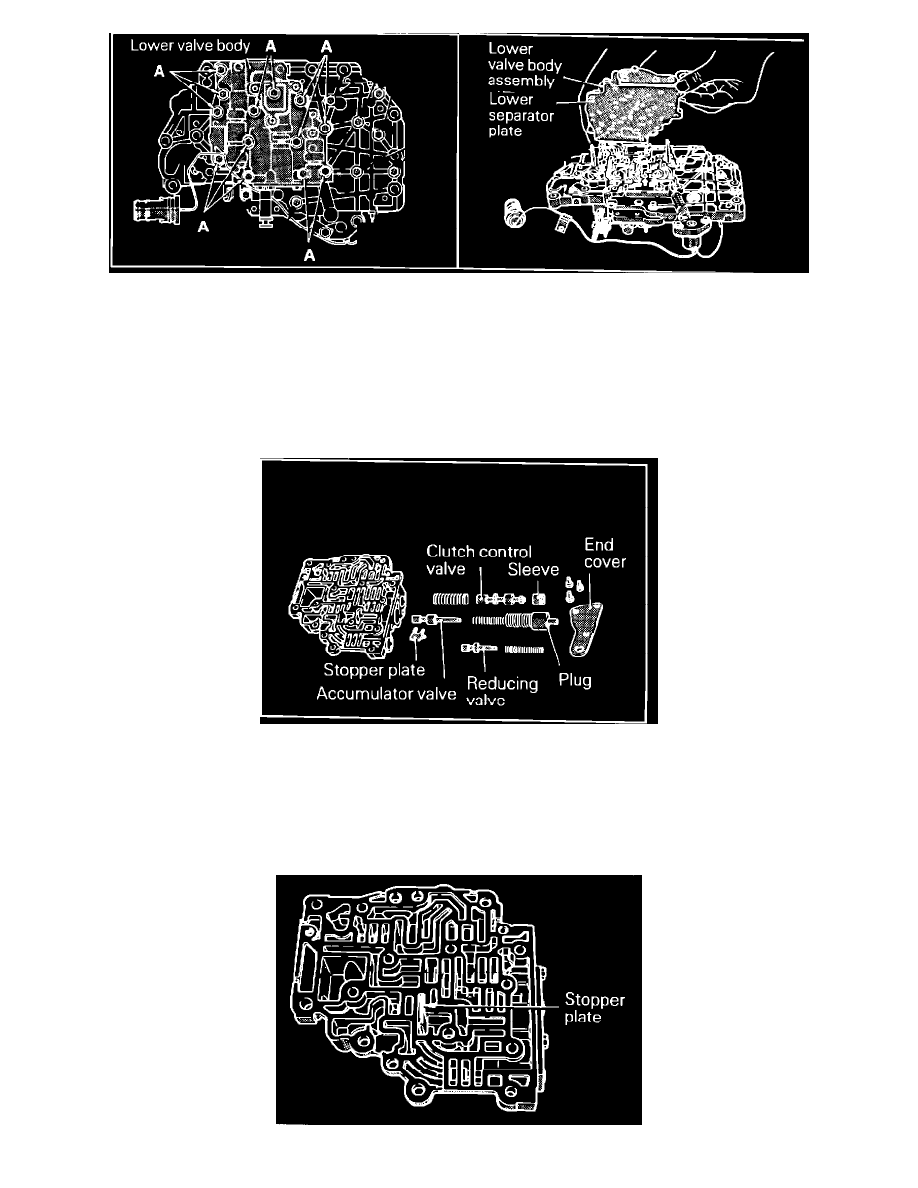
FIGURE 1
1.
Remove the transmission oil pan and oil filter per service manual procedure.
2.
Remove the 13 mounting bolts securing the lower valve body, and remove the lower valve body from the valve body assembly, making sure
the lower separator plate comes with the lower valve body (Figure 1).
CAUTION: THREE STEEL BALLS AND A SPRING WILL COME OUT WHEN THE LOWER VALVE BODY IS SEPARATED
FROM THE UPPER VALVE BODY.
FIGURE 2
3.
Remove the end cover from the lower valve body by removing the three attaching bolts.
4.
Clean and lubricate the new damper clutch control valve assembly (PN MD727246, MD723456, and MD725203) with Dextron II, and install
them in the new lower valve body, PN MD727244. Transfer the remaining parts from the old lower valve body to the new lower valve body
(Figure 2).