
Colt L4-1597cc 1.6L VIN 3 2-BBL (1983)
Timing Belt: Service and Repair
Installation
1.
Install spacer, flange and crankshaft sprocket. Torque sprocket attaching bolt to 44 to 50 ft. lbs.
2.
Apply a thin coat of engine oil to outer surface of camshaft spacer, then position spacer on camshaft.
3.
Install camshaft sprocket and torque attaching bolt to 44 to 57 ft. lbs.
4.
Install tensioner spring, then install tensioner and tighten nut. Check to ensure that straight end of tensioner spring is against side of water pump
body, while bent end of spring is against the tensioner tang. Rotate lower portion of tensioner to align bolt holes, then install bolt.
5.
Loosen tensioner adjusting nut, then push tensioner toward water pump as far as possible and tighten nut to hold tensioner in this position.
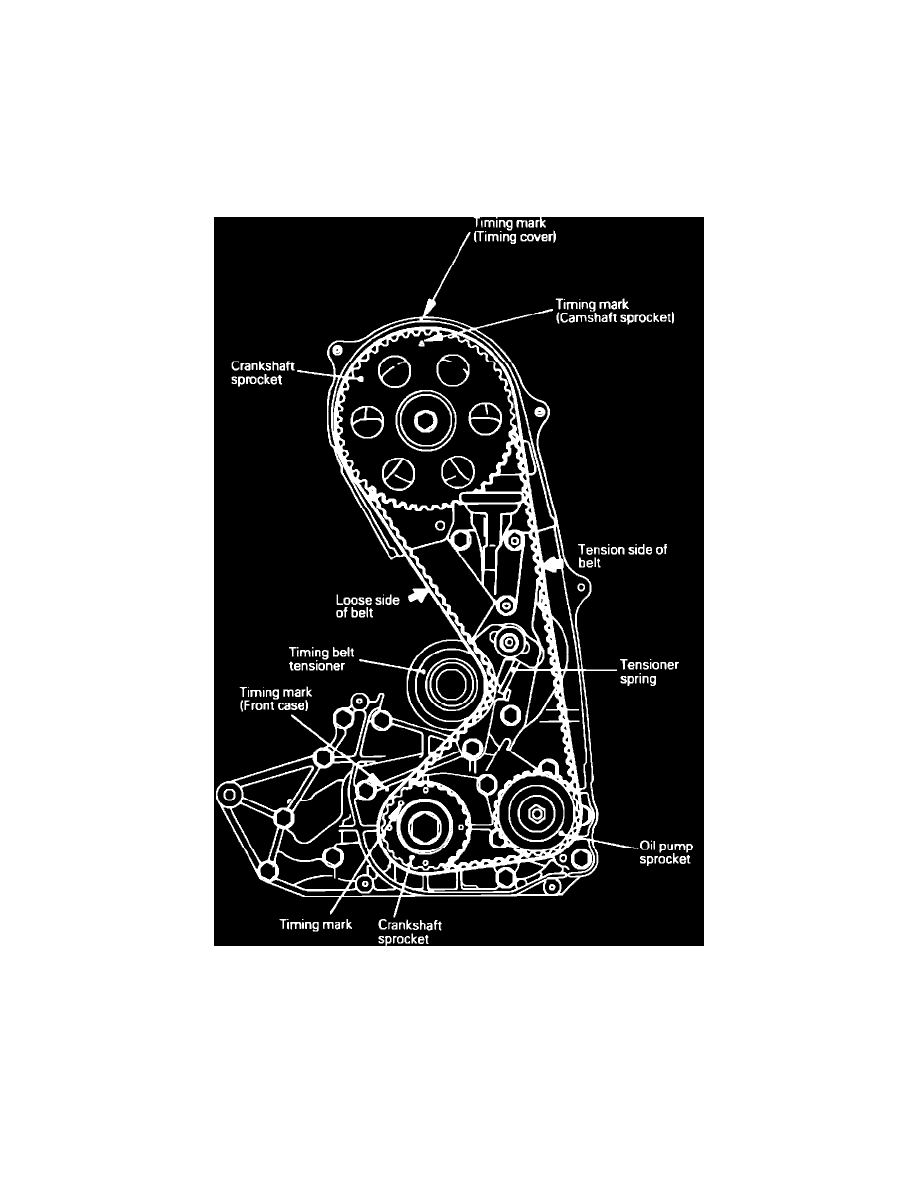
Fig. 35 Timing belt, tensioner and sprockets. 1600cc engine
6.
Ensure sprocket timing marks are aligned, Fig. 35.
7.
Install timing belt over crankshaft sprocket, then over oil pump sprocket and camshaft sprockets, keeping tension side of belt tight as belt is
installed, Fig. 35 If used belt is installed, ensure belt is installed in original direction.
8.
Adjust belt tension as follows:
a. Apply counterclockwise force to camshaft sprocket to tighten belt tension side and ensure all timing marks remain aligned, then loosen
tensioner nut and bolt. This will allow the tensioner spring to move the tensioner against the timing belt.
b. Install crankshaft pulley to prevent timing belt from becoming misaligned, then rotate crankshaft clockwise until camshaft sprocket timing
mark is two teeth away from mark on belt cover. This operation sets proper belt tension. Do not rotate crankshaft counterclockwise or
push on belt to check tension.