
Colt L4-1753cc 1.8L SOHC (1989)
Disassemble differential carrier in numbered sequence shown noting the following:
1. Loosen screws of differential case halves uniformly in several steps.
2. Separate differential case halves keeping all internal components on order in which they are removed.
3. Before differential cases are separated, check position of alignment marks.
INSPECTION
1. Check side gears, pinion gears and pinion shaft for wear or damage.
2. Check side gear spline for wear or damage.
3. Using a dial indicator, ensure amount of warpage in less than 0.0031 inch.
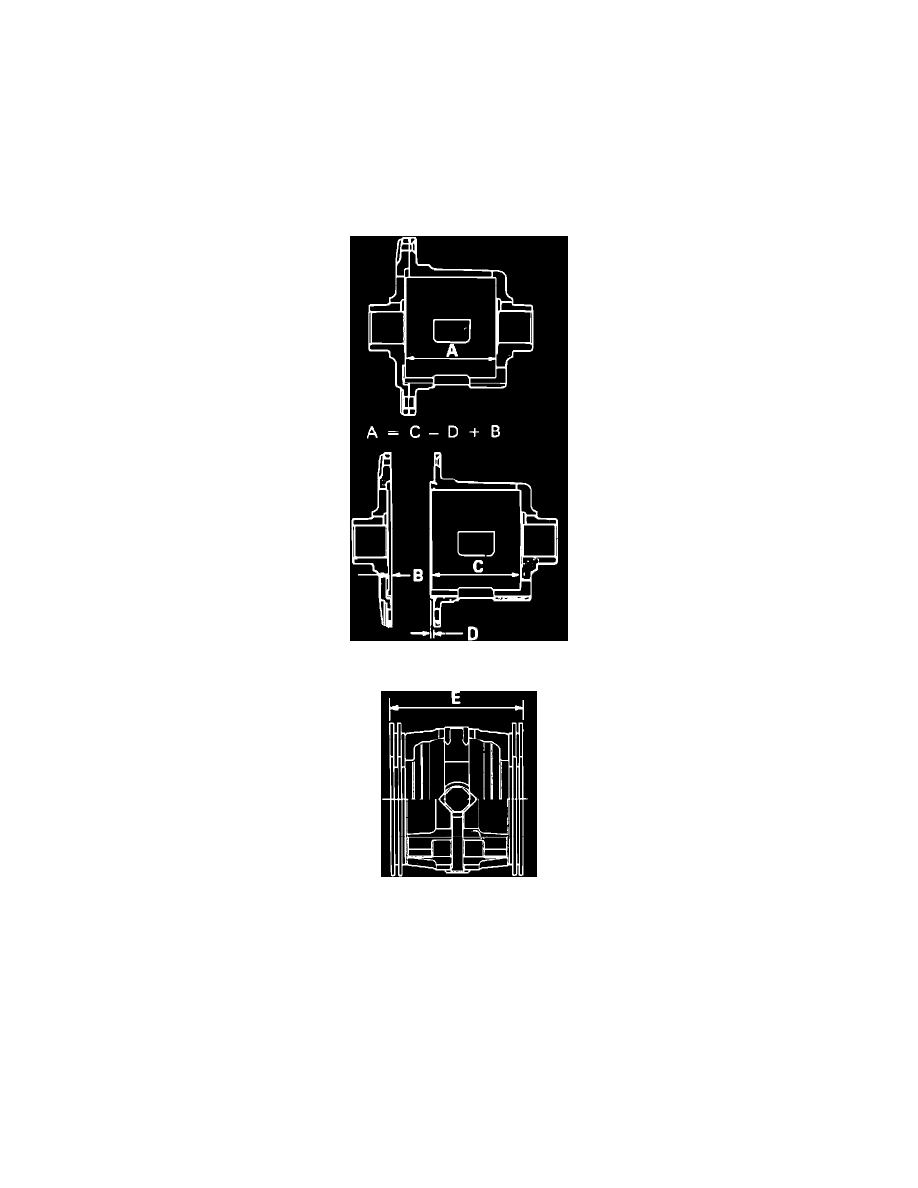
Fig. 68 Obtaining Differential Case Depth
Fig. 69 Measuring Overall Width
ASSEMBLY
Assemble differential carrier in reverse numbered sequence shown noting the following:
1. Before assembly, use the following method to adjust clearance between spring plates and differential cases and to adjust endplay of side gear when
installing internal components.
a. Obtain differential case depth (A) by subtracting dimension (D) from dimension (C) then adding dimension (B) as shown. This represents
distance between clutch plate contact surface when case halves are assembled.
b. Stack spring plates upon another to make a set. Measure and record thickness of left (Lr) and right (Ll) sets. Select left and right sets to
minimize difference in thickness.
c. Measure thickness of friction discs and friction plates. Record left (Kr) and right (Kr) measurements. Select left and right sets to minimize
difference in thickness.
d. Obtain thickness difference (X) between right and left clutch plate sets as follows. X = (Lr + Kr) - (Ll + Kl).
e. If difference is more than 0.0020 inch, replace components as necessary.