
Colt L4-1795cc 1.8L SOHC (1993)
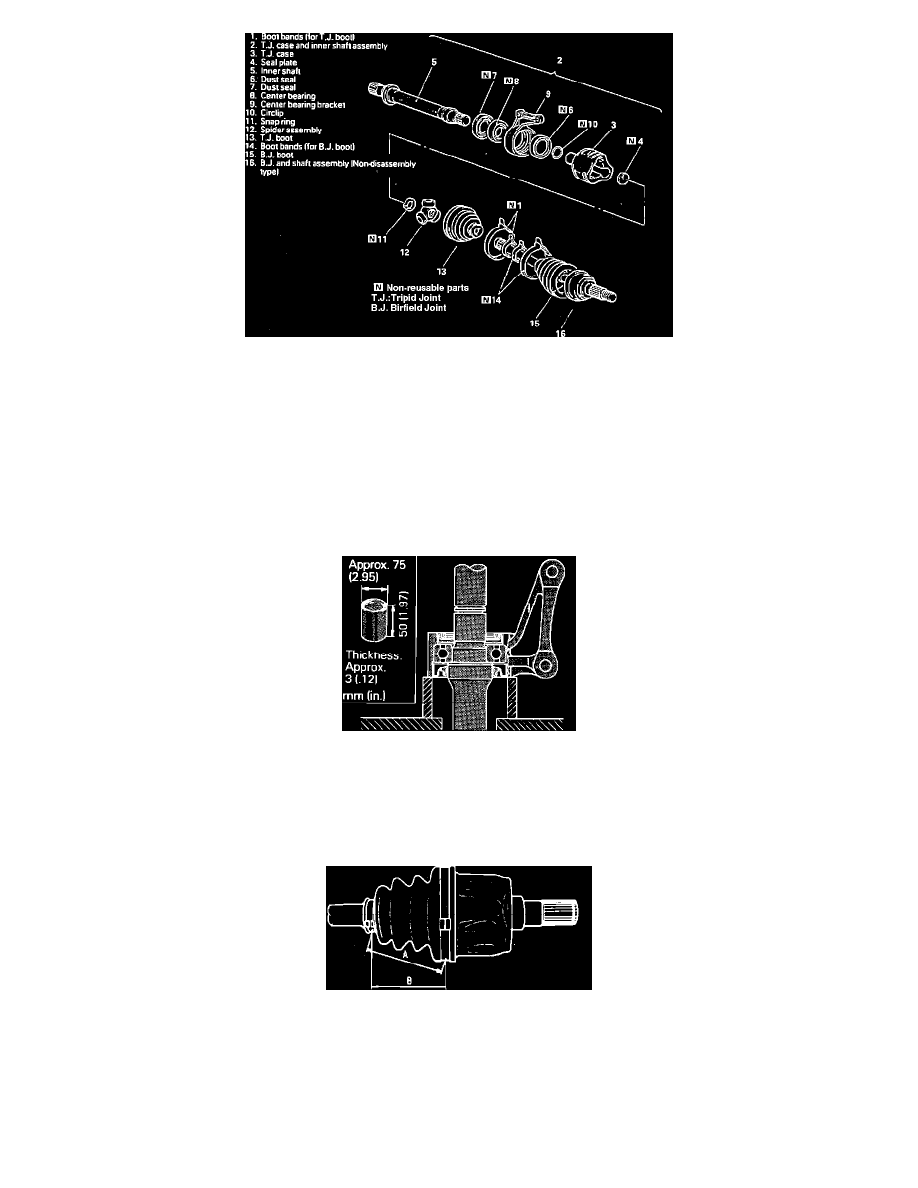
Fig. 7 Exploded View Of Tripod Type Front Drive Axle. With Innershaft
DISASSEMBLY
NOTE: When servicing the drive axle, do not disassemble the Rzeppa type constant velocity joint, as components of this type joint are precision fitted.
1. Remove boot clamps, then remove boot from tripod joint housing and position on drive axle.
2. Pull drive axle from tripod joint housing, then remove snap ring and lift tripod joint spider from housing. Clean tripod joint spider and check for
wear and damage. Also check joint needle roller bearings for smooth operation. Do not disassemble tripod joint spider.
3. Wind tape around drive axle splines, then remove bands for Rzeppa type joint and remove boots from drive axle. If Rzeppa joint is to be reused,
do not wipe away grease. Check grease for contamination and clean and replace grease only if necessary. Note amount of grease removed for use
during reassembly.
Fig. 8 Innershaft Removal
4. On models with inner shaft, continue disassembly as follows:
a. Using press and support fixture No. MB991248 or equivalent, press inner shaft and seal plate out of Tripod case.
b. Using two inch steel pipe as support, press inner shaft from center bearing support.
c. Using screwdriver, remove driveshaft side dust seal, then using same steel pipe press out center bearing and differential side dust seal.
Fig. 5 Double Offset Joint Or Tripod Joint Boot Length Measurement
ASSEMBLY
NOTE: A special grease is used to lubricate the drive axle tripod joint and Birfield joint. This grease is included in the drive axle repair kit and must be
used.
1. Press fit center bearing into center bearing support, then lubricate and press fit dust seals into center bearing.
2. Press fit inner shaft into center bearing, then the inner shaft assembly into Tripod case.