
Colt Vista 2WD L4-2350cc 2.4L SOHC (1993)
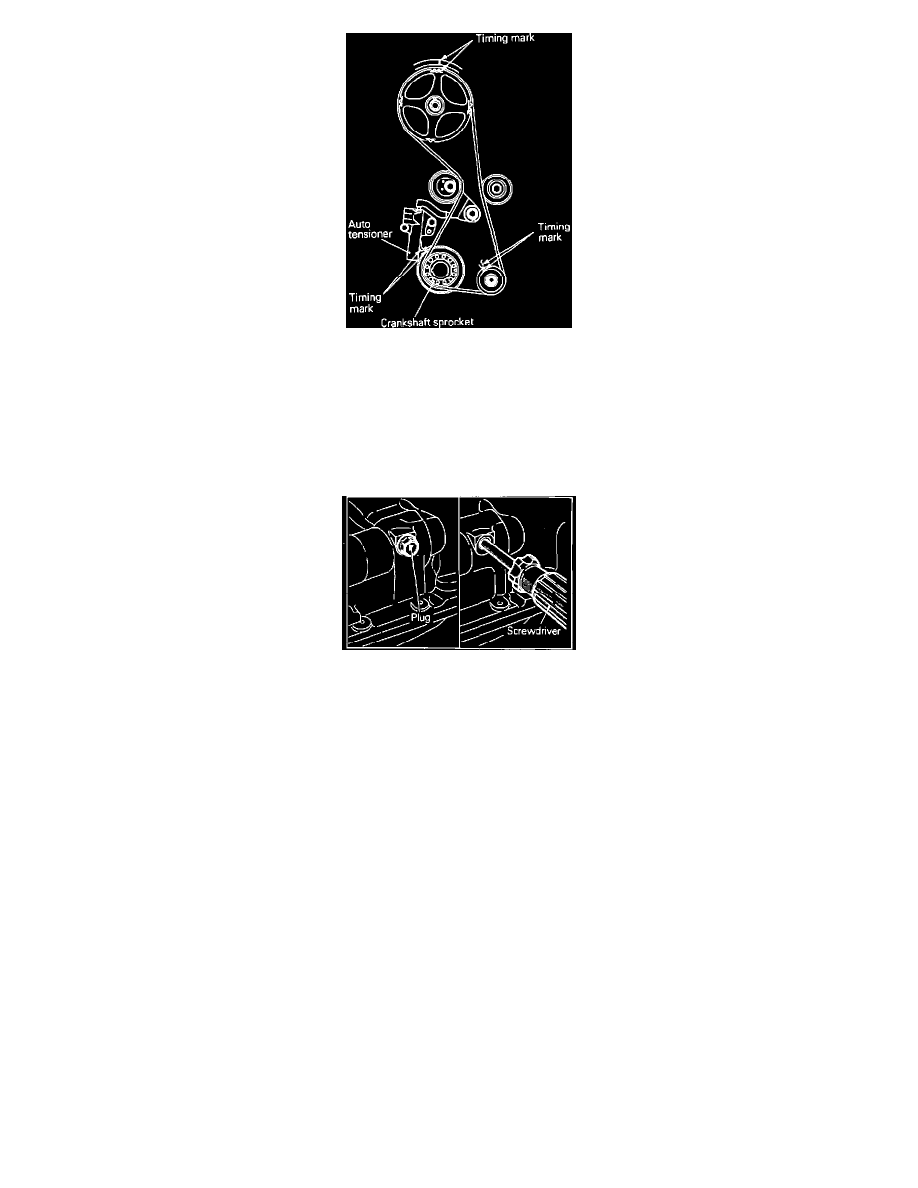
Fig. 19 Aligning timing marks. 1993-96 2.4L/4-143.5 engine
2.
Turn crankshaft clockwise and align timing marks to position No. 1 cylinder on its compression stroke at TDC, Fig. 19.
3.
Remove the auto tensioner.
4.
Mark belt rotating direction on belt.
5.
Tie camshaft sprocket and timing belt with a cord so that the position of the camshaft sprocket will not move with respect to the timing belt.
6.
Using spanner wrench tool Nos. MB990767 and MD998719 or equivalents, remove camshaft sprocket nut and sprocket.
7.
Remove oil pump sprocket as follows:
Fig. 41 Locking silent shaft. 1993-94 2.4L/4-143.5 engine
a. Remove plug on side of engine block, Fig. 41.
b. Insert a Phillips screwdriver into hole to block the left silent shaft. If the screwdriver will only go in .79-.98 inch as it strikes against the
counterbalance shaft, turn the sprocket once, realign the timing mark and check that the screwdriver goes in 2.36 inches or more. The
screwdriver should not be taken out until the timing belt is installed.
c. Remove oil pump sprocket nut then the sprocket.
8.
Mark rotational direction on timing belt B prior to removal.
Installation