
Colt Vista 2WD L4-2350cc 2.4L SOHC (1993)
10.
If screwdriver cannot be inserted 2.4 inch or more turn the oil pump sprocket one turn and realign timing marks. Ensure screwdriver can be
inserted 2.4 inches or more. Screwdriver should not be removed until installation of the timing belt is complete.
11.
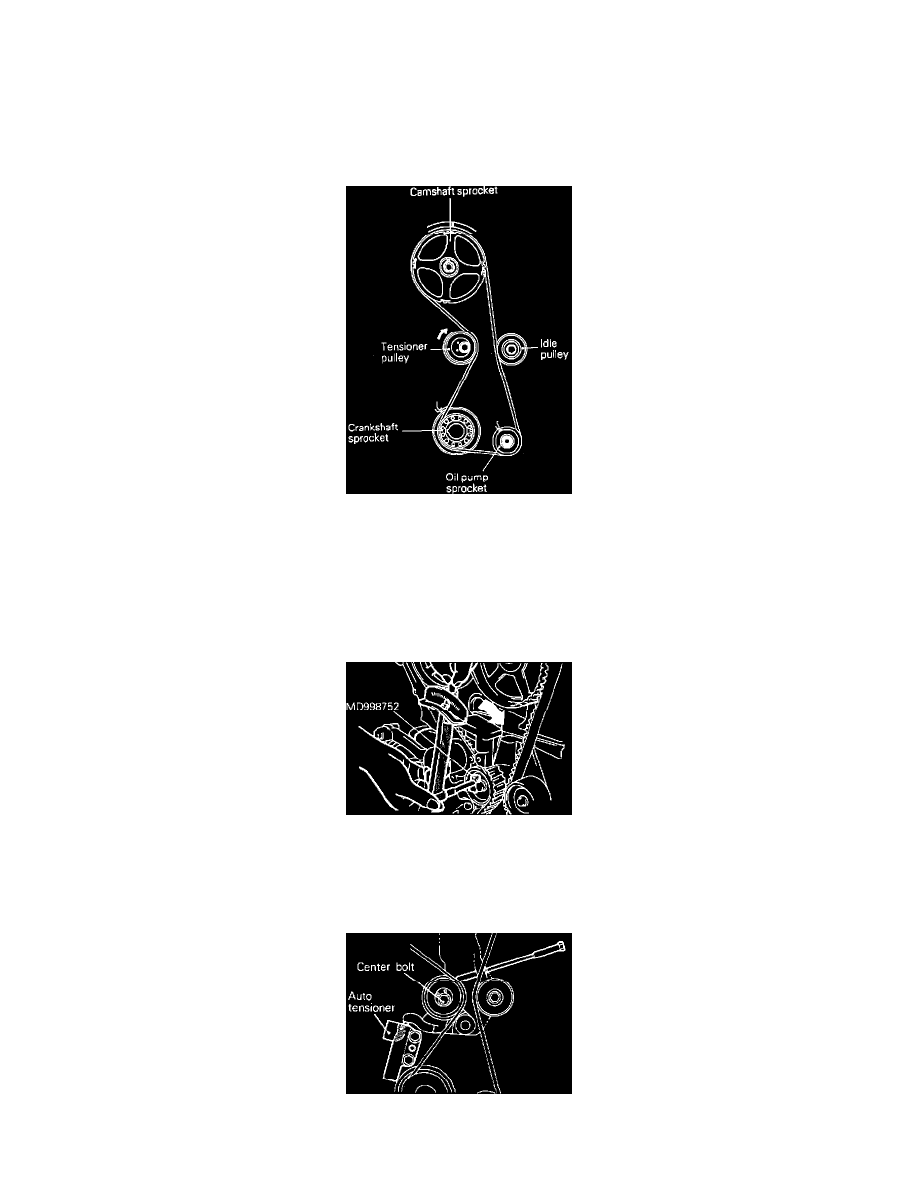
Install timing belt as follows:
a. Install timing belt around tensioner pulley and crankshaft sprocket and secure timing belt onto tensioner pulley with your left hand.
b. Pulling timing belt with your right hand, install it around the oil pump sprocket.
c. Install belt around idler pulley.
d. Install belt around camshaft sprocket.
Fig. 47 Positioning timing belt tension pulley. 1993-94 2.4L/4-143.5 engine
e. Gently raise tensioner pulley so that belt does not sag then temporarily tighten center bolt, Fig. 47.
12.
Adjust timing belt tension as follows:
a. Remove screwdriver and install plug in side of cylinder block.
b. Turn crankshaft 90° (1/4 turn) counterclockwise.
c. Turn crankshaft back to position No. 1 cylinder at TDC.
Fig. 48 Tightening timing belt tension. 1993-94 2.4L/4-143.5 engine
d. Loosen tensioner pulley center bolt, then attach socket wrench tool No. MD998752 or equivalent and a torque wrench and apply 1.88-2.03 ft.
lbs, Fig. 48.
e. Holding tensioner pulley with special tool, tighten center bolt to specification.
Fig. 49 Installing setscrew tool