
Colt Wagon 2WD L4-1468cc 1.5L SOHC (1990)
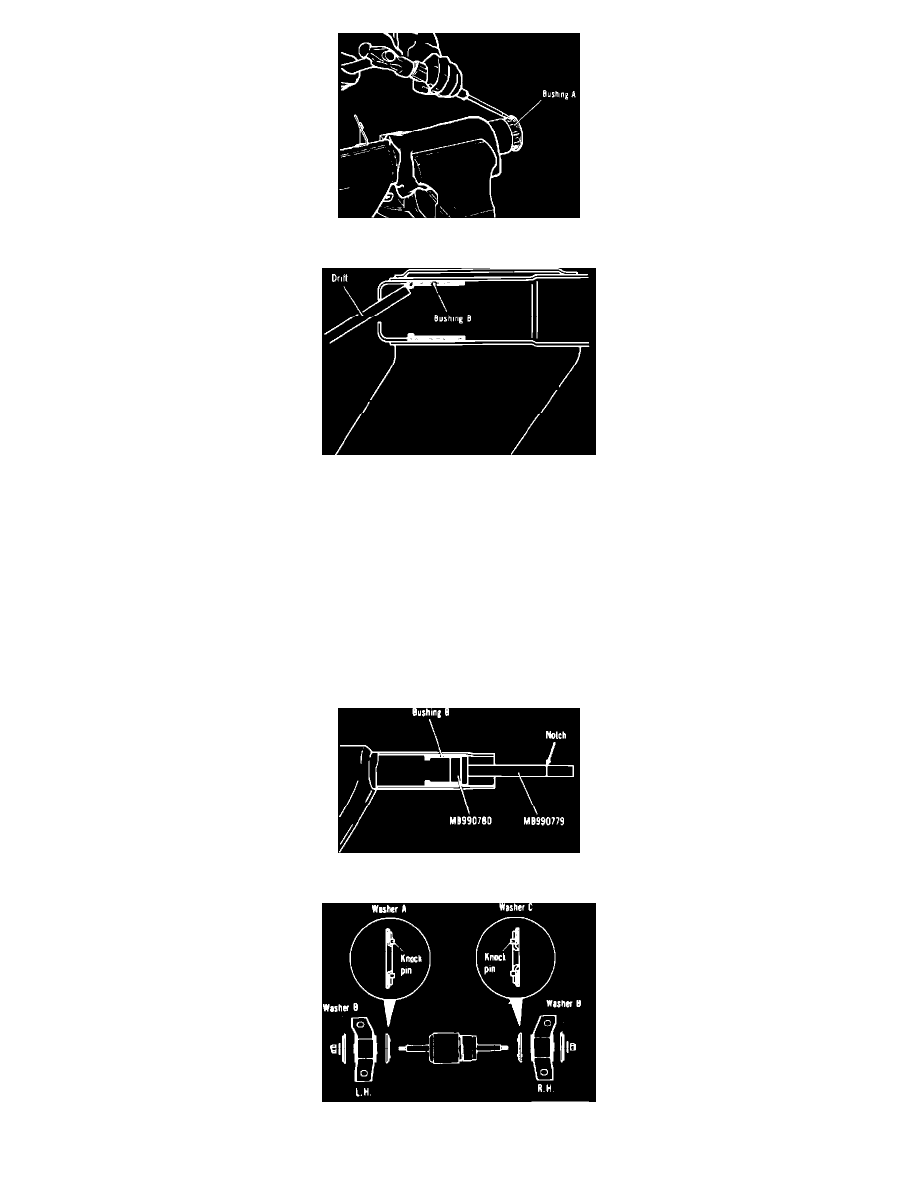
Fig. 15 Removing Bushing ``A'' From Left Suspension Arm 2WD
Fig. 16 Removing Bushing ``B'' From Left Suspension Arm 2WD
DISASSEMBLY
NOTE: Before disassembly, place alignment marks on suspension arms and components so they can be assembled in the same position.
1. Remove nut at each end of the suspension arm assembly, then remove mounting brackets and bushings.
2. Remove dust cover retaining band, then on models equipped with a stabilizer bar, place an alignment mark at each end of the stabilizer bar in line
with punch mark on stabilizer bracket.
3. Separate suspension arm assembly into right and left hand suspension arms, leaving the dust cover attached to the right hand suspension arm.
4. Remove rubber stopper from right hand suspension arm.
5. Using a screwdriver, remove bushing A from left hand suspension arm.
6. Using a suitable drift, drive bushing B from left hand suspension arm.
7. Inspect all components for wear and damage and replace as necessary.
Fig. 17 Installing Bushing ``B'' Into Left Suspension Arm 2 WD
Fig. 18 Installing Mounting Bracket Components 2WD