
Grand Fury/Salon V8-318 5.2L VIN P 2-bbl (1984)
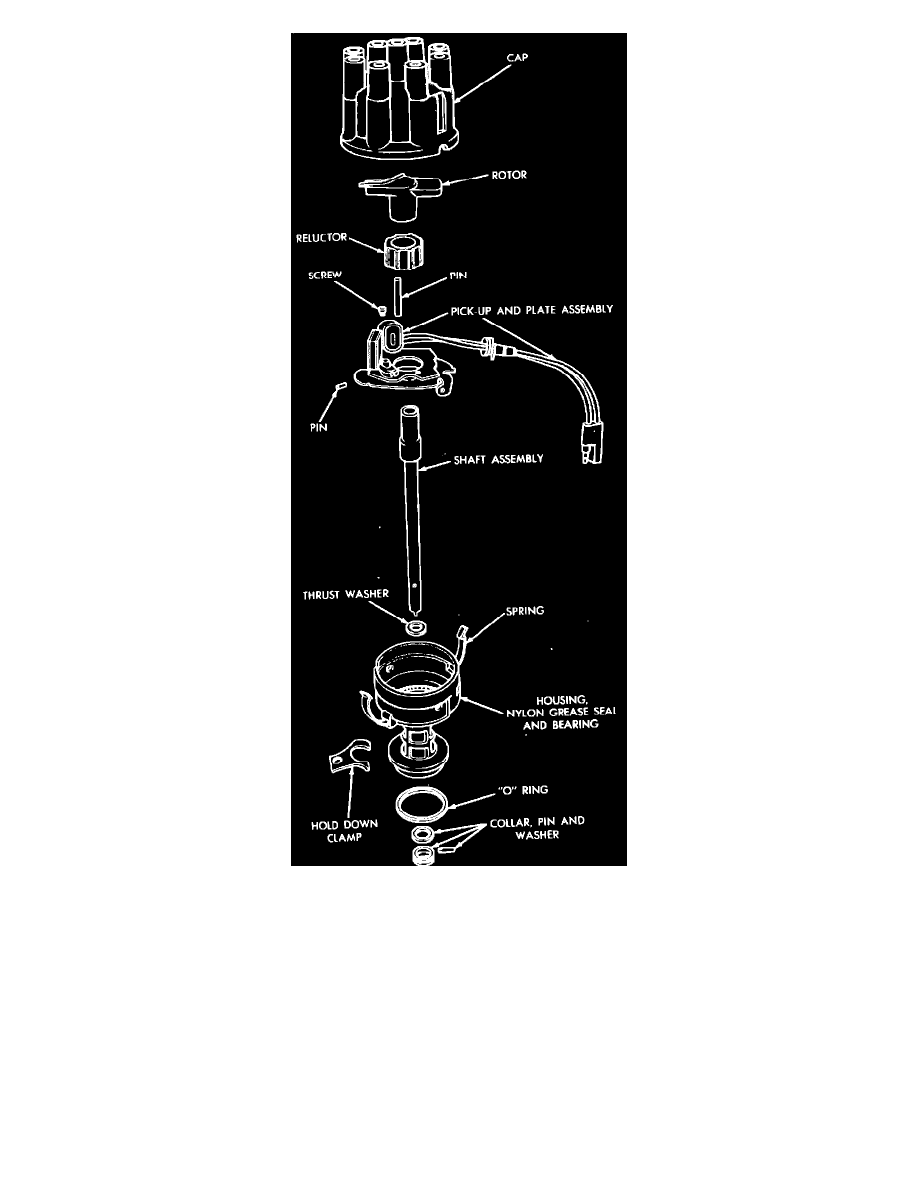
Fig. 5 Exploded view of Electronic Spark Control distributor w/single pickup
DISASSEMBLY
1.
Remove rotor. If necessary, use two screwdrivers under upper part of rotor to pry off, Figs. 4 and 5.
2.
Remove reluctor by prying up from bottom of reluctor with two screwdrivers (7/16 inch maximum width of screwdrivers). Use care not to distort
or damage reluctor teeth.
3.
Remove the two screws retaining plate to housing and lift out the plate and pickup coil as an assembly. The distributor clamp springs are held
in place by peened metal around the openings and should not be removed.
4.
Check distributor shaft and bushing wear as follows:
a. Clamp distributor in a vise. Use extreme caution not to damage distributor.
b. Attach a dial indicator to housing so plunger rests against reluctor sleeve.
c. Place a wire loop around reluctor sleeve and hook a spring scale on the other end of the loop. Apply a one pound pull in line with indicator
plunger and read movement on indicator. Movement must not exceed .006 inch.
d. If side play exceeds .006 inch, replace housing shaft and reluctor sleeve by removing distributor shaft retaining pin and sliding retainer off