
Grand Fury/Salon V8-318 5.2L VIN P 2-bbl (1984)
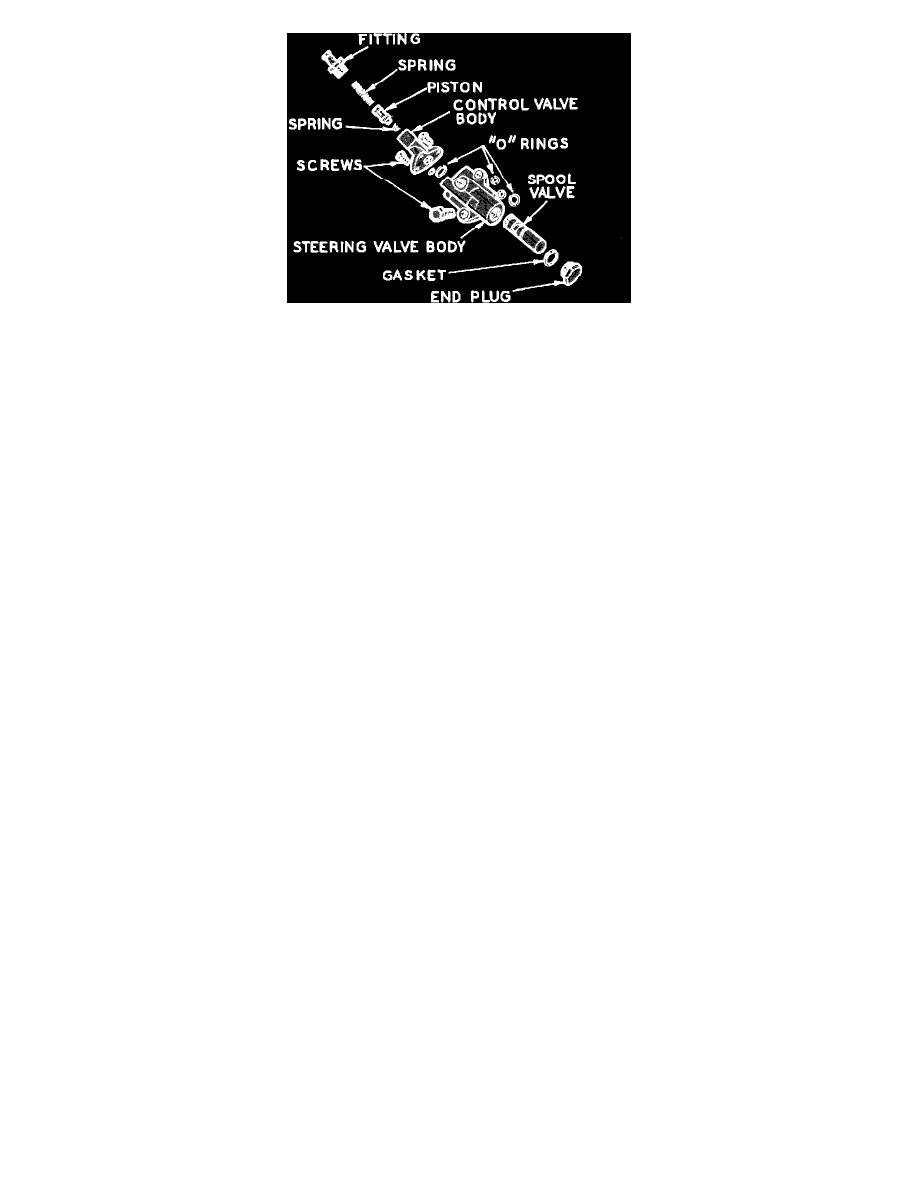
Fig. 11 Control Valve disassembled
DISASSEMBLE
Remove outlet fitting, spring, valve piston and cushion spring. Remove valve body (2 screws) from steering valve. Shake out valve piston. If spool
valve or valve housing is damaged, replace complete valve assembly. Do not remove valve end plug unless inspection indicates a leak at seal.
ASSEMBLE
Install steering valve in housing. Valve lever hole should align with steering gear valve lever opening in bottom of valve housing. Valve must fit
smoothly in housing without striking or binding. If valve end plug was removed install new seal and tighten plug to 25 ft. lb. torque. Install cushion
spring, then lubricate and install valve piston, nose end first, into valve body. Install spring on top of piston and outlet plug and torque to 20 ft. lbs.
Assemble control valve body to steering valve body and torque attaching screws to 95 inch lbs. Install new copper sealing gasket and fitting in
threaded hole on top of valve body and torque to 30 ft. lb.
Steering Shaft
DISASSEMBLE
Remove adjusting screw locknut and unscrew cover from adjusting screw. Remove screw and washer from T-slot in end of gear shaft. Remove date
tag gasket from top of cover and large O-ring from base of cover.
ASSEMBLE
Place adjusting screw washer over screw and slide both into T-slot of shaft. Screw cover into adjusting screw until gear shaft bottoms in cover. Install
date tag gasket over adjusting screw into position at top of cover. Install locknut on adjusting screw but do not tighten. Install large O-ring in groove
on lower face of gear cover.
Power Train, Assembly