
Grand Voyager L4-2.4L DOHC (1996)
Wheel Speed Sensor: Service and Repair
Rear
1. Raise and support vehicle, then remove rear wheel.
2. Remove floor pan grommet, then disconnect speed sensor cable connector at vehicle wiring harness.
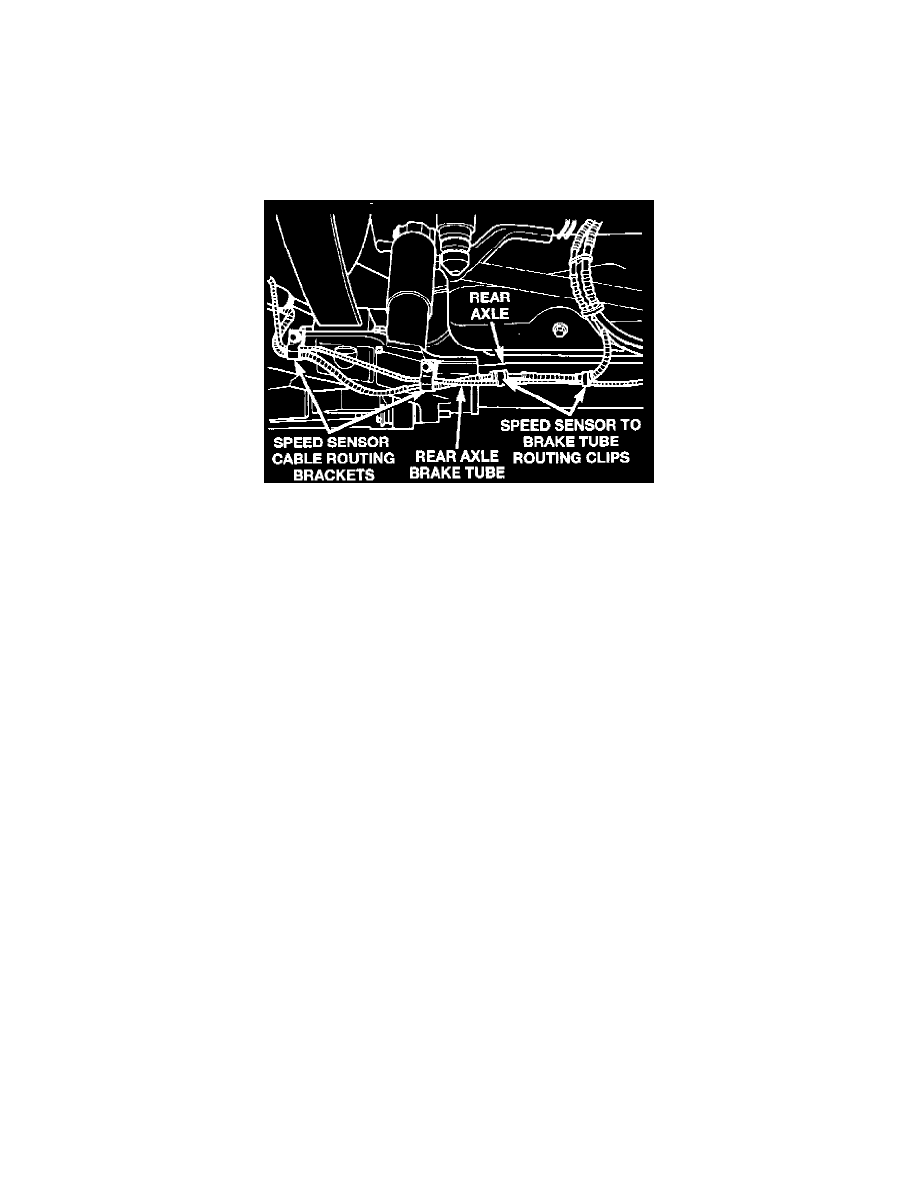
3. Carefully disengage speed sensor cable from rear brake flex hose clips.
4. If right rear speed sensor is to be removed, remove cable grommet from axle flange, then disengage brake tube clip and routing clip from track bar
bracket.
5. Remove two sensor cable and brake tube routing clips, then disengage cable from routing clips on rear brake tube.
Rear Wheel Speed Sensor.
6. Remove wheel speed sensor head to rear bearing bolt. If sensor has seized or if sensor head will not come loose, do not use pliers to loosen. Use
only a hammer and suitable punch to tap gently until free.
7. Remove sensor head from rear bearing, then remove entire assembly from vehicle.
8. Reverse procedure to install, noting the following:
a. Ensure plastic anti-rotational pin is fully seated prior to installing sensor head attaching bolt.
b. Torque sensor head attaching bolt to 9 ft. lbs.
c. Ensure sensor cable is routed properly and is not pinched.
d. Clearance between sensor and tone wheel should be .020-.053 inch and tone wheel runout must not exceed .006 inch.
e. After installation is complete, road test vehicle to ensure ABS and base brake systems function properly.