
Grand Voyager L4-2.4L DOHC (1996)
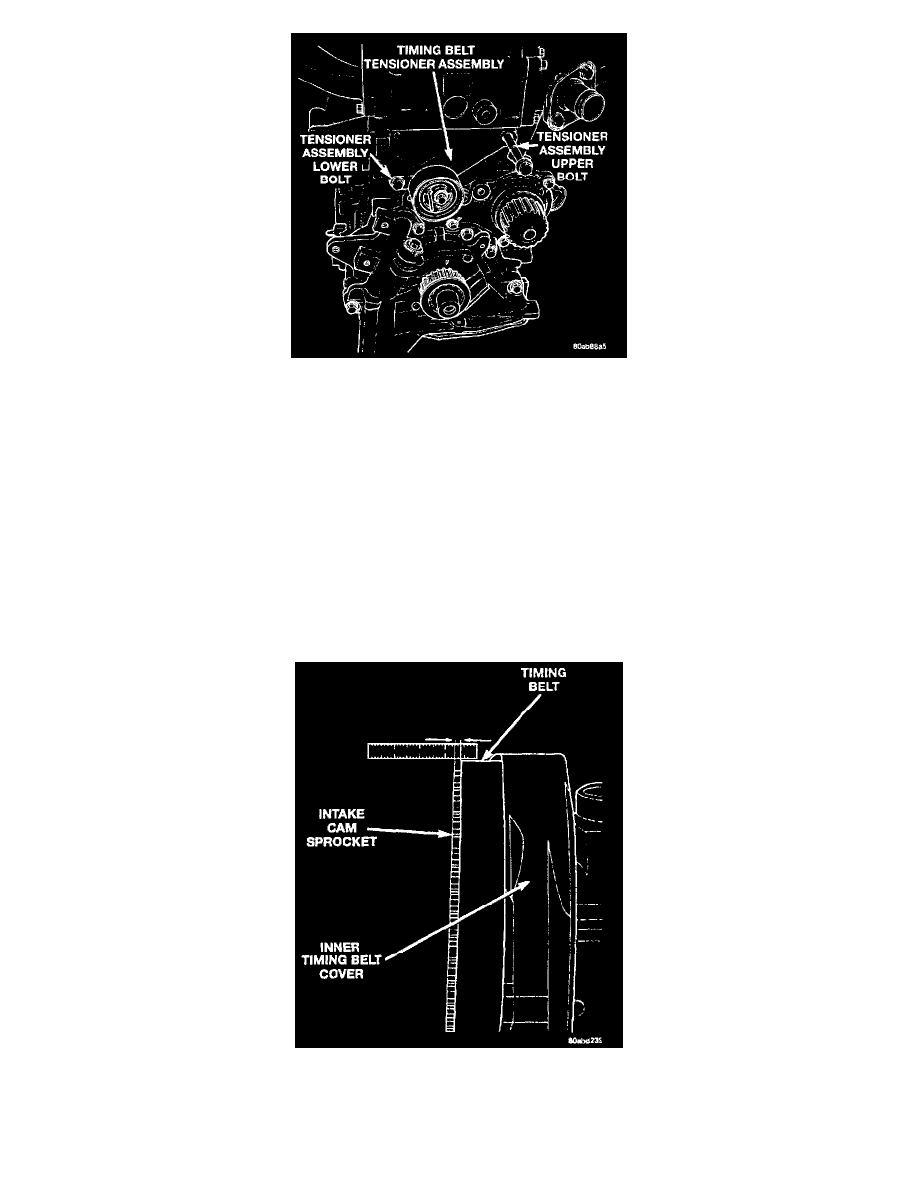
5. Remove lower bolt attaching timing belt tensioner assembly to engine and remove tensioner as an assembly.
NOTE: The tensioner pulley and bracket have been machined to match for proper timing belt tracking. Therefore the timing belt tensioner must
be replaced as an assembly.
INSTALLATION
1. Align timing belt tensioner assembly to engine and install lower mounting bolt but do not tighten. To properly align tensioner assembly - install
one of the engine bracket mounting bolts (M10) 5 to 7 turns into the tensioner's upper mounting location.
2. Torque the tensioner's lower mounting bolt to 61 Nm (45 ft. lbs.). Remove the upper bolt used for tensioner alignment.
3. Install the rear timing belt cover and fasteners.
4. Install the timing belt idler pulley and torque mounting bolt to 61 Nm (45 ft.lbs.).
5. Install the camshaft sprockets and torque bolts to 101 Nm (75 ft.lbs.).
6. Install the timing belt.
CAUTION: Do not run the engine without the engine mount attached to engine.
7. After completing engine assembly, but before the upper cover is installed, start the engine and idle for a few seconds. Shut engine off and measure
the timing belt tracking. Tracking is measured as shown. Measure from the outer edge of the intake cam sprocket to the timing belt. The belt
should be 2-6 mm (0.079-0.236 in.) in from the outer edge of the sprocket.