
Grand Voyager L4-2.4L DOHC (1996)
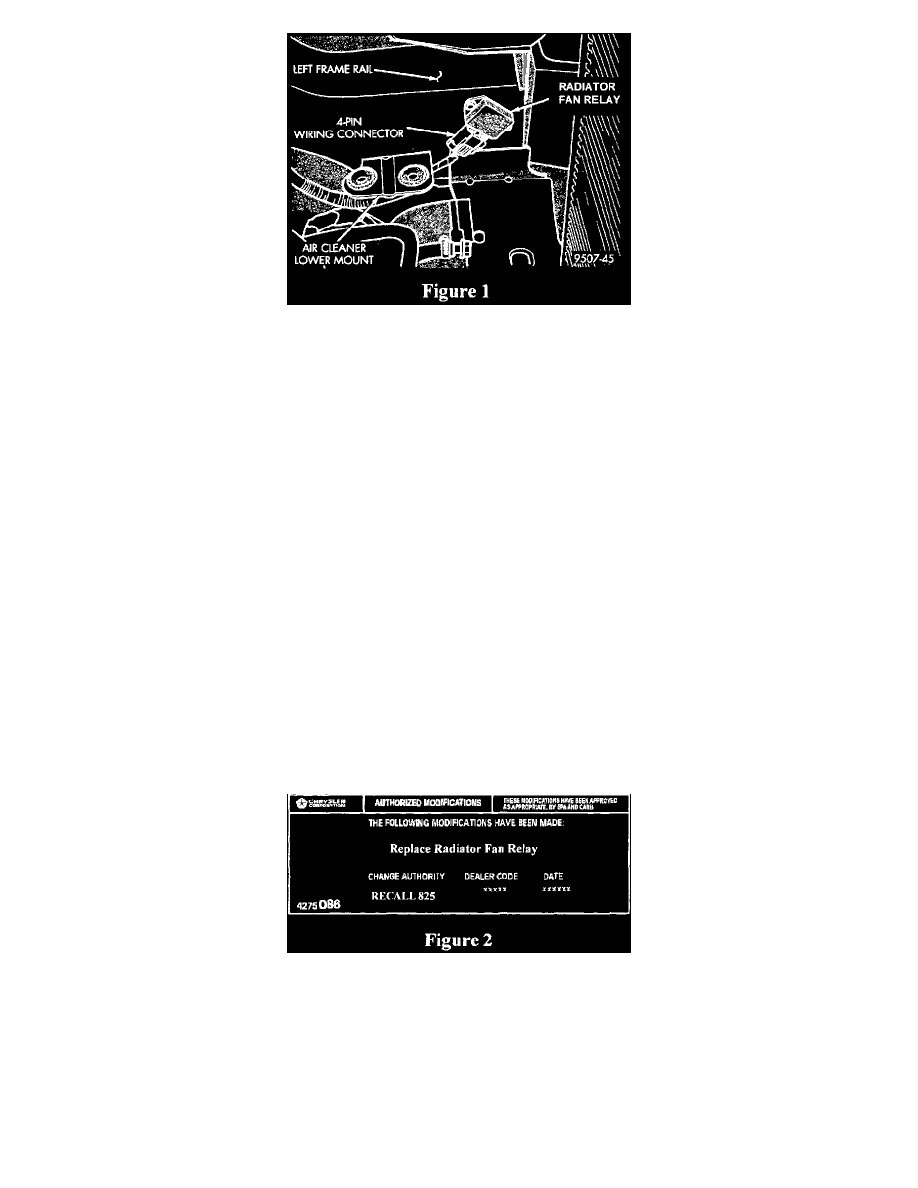
FIGURE 1
5.
Locate the radiator fan relay on the left front inner frame rail just behind the radiator (Figure 1).
6.
Disconnect the radiator fan relay wiring connector.
7.
Remove the radiator fan relay. Discard the relay and the attaching screws.
8.
Clean the left frame rail where the old relay was mounted with a clean cloth.
9.
Install the new radiator fan relay using the supplied screws. Tighten the screws to 35 in-lbs (4 N.m).
CAUTION:
Do not over torque screws. To ensure heat transfer and proper operation, the new radiator fan relay must be installed using both of the provided
screws.
10.
Connect the radiator fan relay electrical connector. Slide the red latch to the locked position.
11.
Install the air cleaner housing.
12.
Install the resonator assembly and connect the upper and lower air inlet hoses.
13.
Install the resonator to upper radiator support screws. Tighten the screws securely.
14.
Connect the negative battery cable.
B. Install the Authorized Modifications Label:
FIGURE 2
Type or print (with a ballpoint pen) the necessary information shown in Figure 2 onto the Authorized Modifications Label. Then attach the label
near the VECI label.
C. Complete Proof of Correction Form for California Residents:
This recall is subject to the State of California Registration Renewal/Emissions Recall Enforcement Program. Complete a Vehicle Emission Recall
Proof of Correction Form (Form No.81-016-1053) and supply it to vehicle owners residing in the state of California for proof that this recall has
been performed when they renew the vehicle registration.