Grand Voyager V6-201 3.3L VIN R SMFI (1997)

Front Door Latch: Service and Repair
The content of this article reflects changes called for in TSB 26-10-96.
REMOVAL
1. Remove front door trim panel.
2. Remove water shield as necessary to gain access to the outside door handle.
3. Roll door glass up.
4. Through access hole at rear of inner door panel, disengage wire connector from power door lock motor, if equipped.
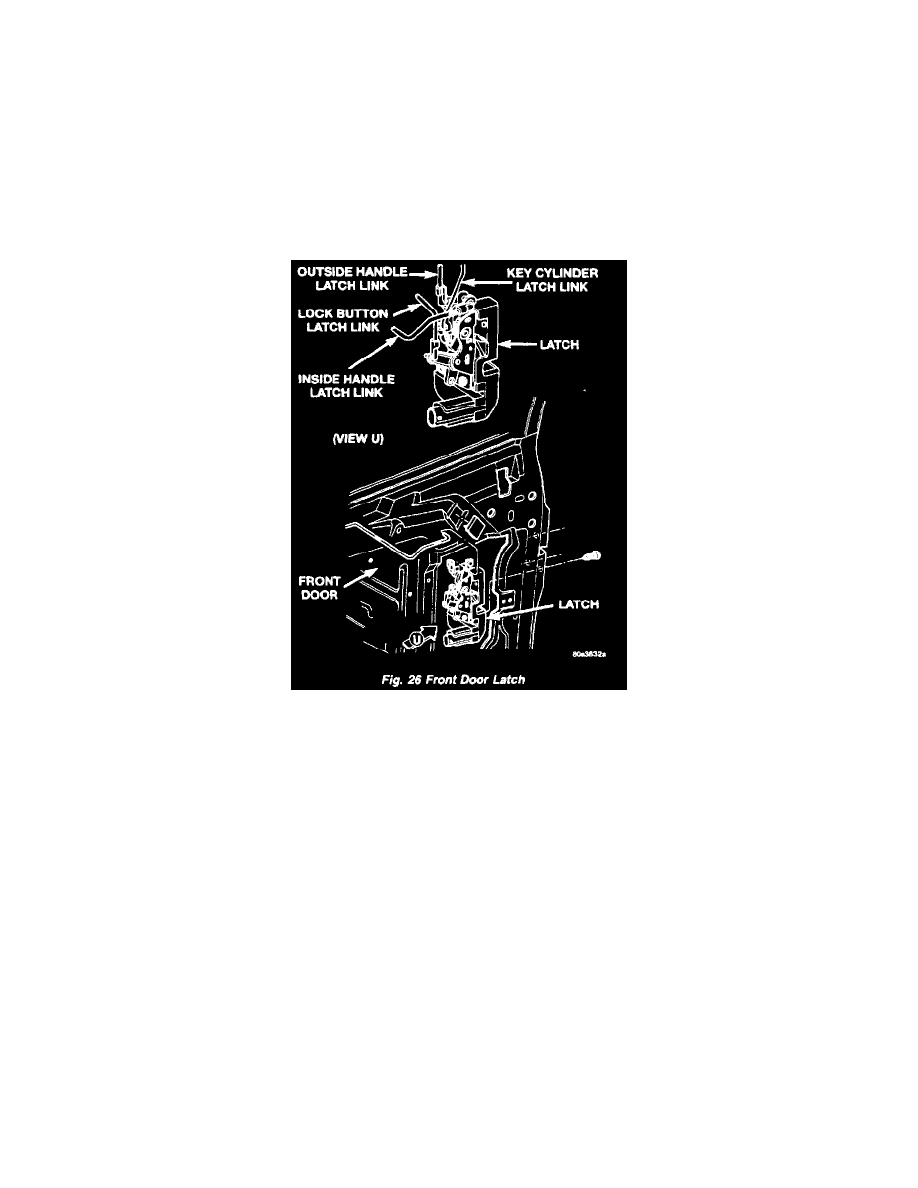
5. Disengage clips holding linkage to door latch.
6. Separate linkages from door latch.
7. Remove screws holding door latch to door end frame.
8. Separate door latch from door.
INSTALLATION
NOTE: The screws attaching the door latch to the door end frame have nylon patches on the threads. All screws must be replaced when the latch has
been removed.
1. Place door latch in position on door end frame.
2. Install screws to hold door latch to door end frame.
3. Insert linkage into door latch.
4. Engage clips to hold linkage to door latch.
5. Engage wire connector into power door lock motor, if equipped.
6. Insert a hex wrench thru the elongated hole located in the door shut face above the latch.
7. Loosen allen head screw.
8. Pull outward on the outside door handle and release.
9. Tighten allen head screw.
10. Verify door latch and power door lock operation.
11. Install water shield and front door trim panel.
