
Grand Voyager V6-201 3.3L VIN R SMFI (1997)
9.
Using needle nose pliers, remove both tilt head return springs from the tilt head assembly.
10.
Remove the snap ring from the steering shaft upper tilt head assembly.
11.
Remove the two # 25 torx bit screws attaching the tilt rack to the tilt head housing.
12.
Remove the two # 45 torx bit screws attaching the tilt head assembly to the steering column.
13.
Lift tilt steering column lever and remove the tilt head housing and the tilt rack from the steering column.
14.
Remove the tilt head housing from the shaft being careful not to misplace the lower bearing wedge.
15.
Remove and discard the wave washer.
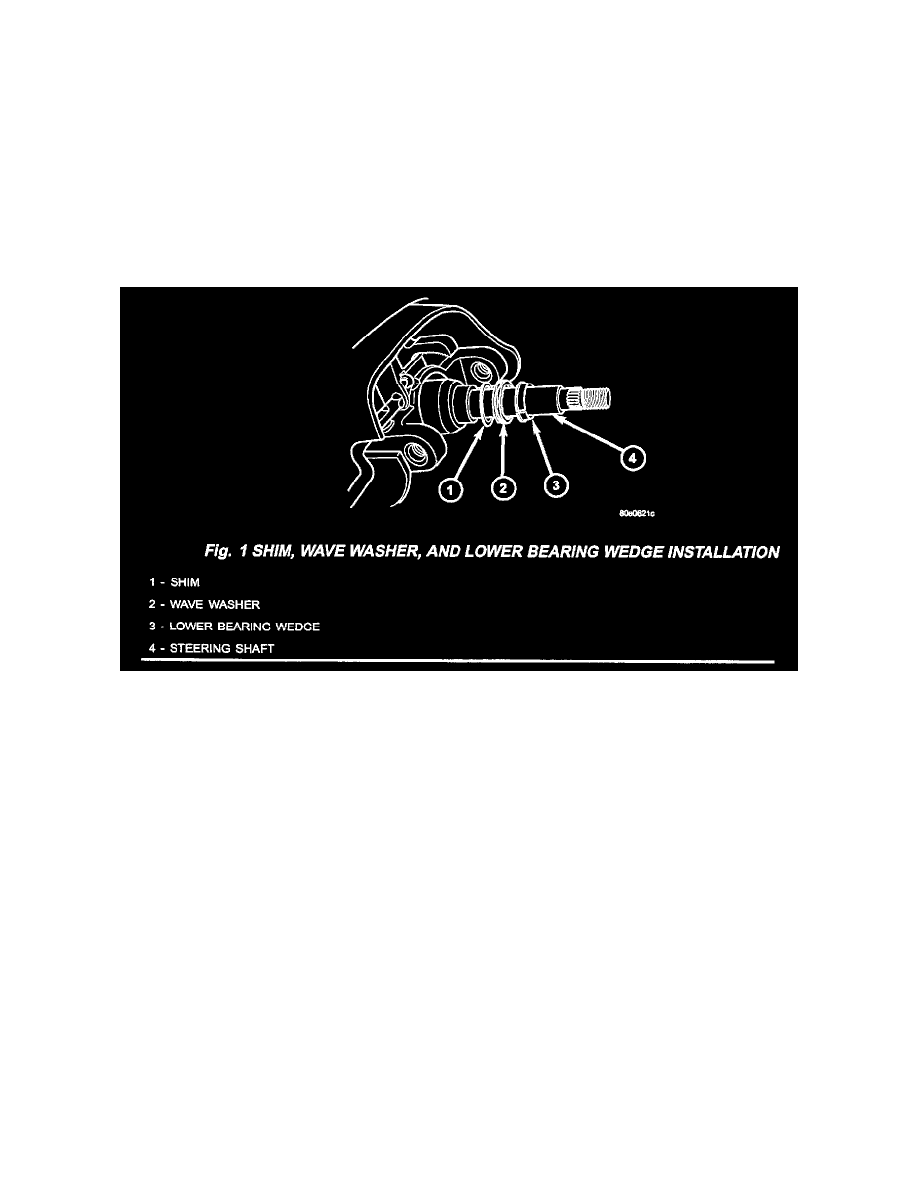
16.
To the base of the shaft, install in order: the shim, the wave washer, and the lower bearing wedge (Fig. 1).
17.
Install the new tilt head assembly to the steering shaft. Apply Mopar Lock & Seal adhesive (or equivalent) to both torx screw threads only and
tighten to 11 N.m (100 in. lbs.).
18.
Install the upper bearing wedge to the tilt steering shaft.
19.
Apply a light coat of Mopar silicon spray lubricant on the steering shaft near the snap ring groove. This will facilitate snap ring installation.
20.
Position the new snap ring onto the shaft near the bearing wedge. With one hand, pull the steering shaft outward and push the snap ring as far
down the shaft as possible.