
Grand Voyager V6-201 3.3L VIN R SMFI (1997)
3.
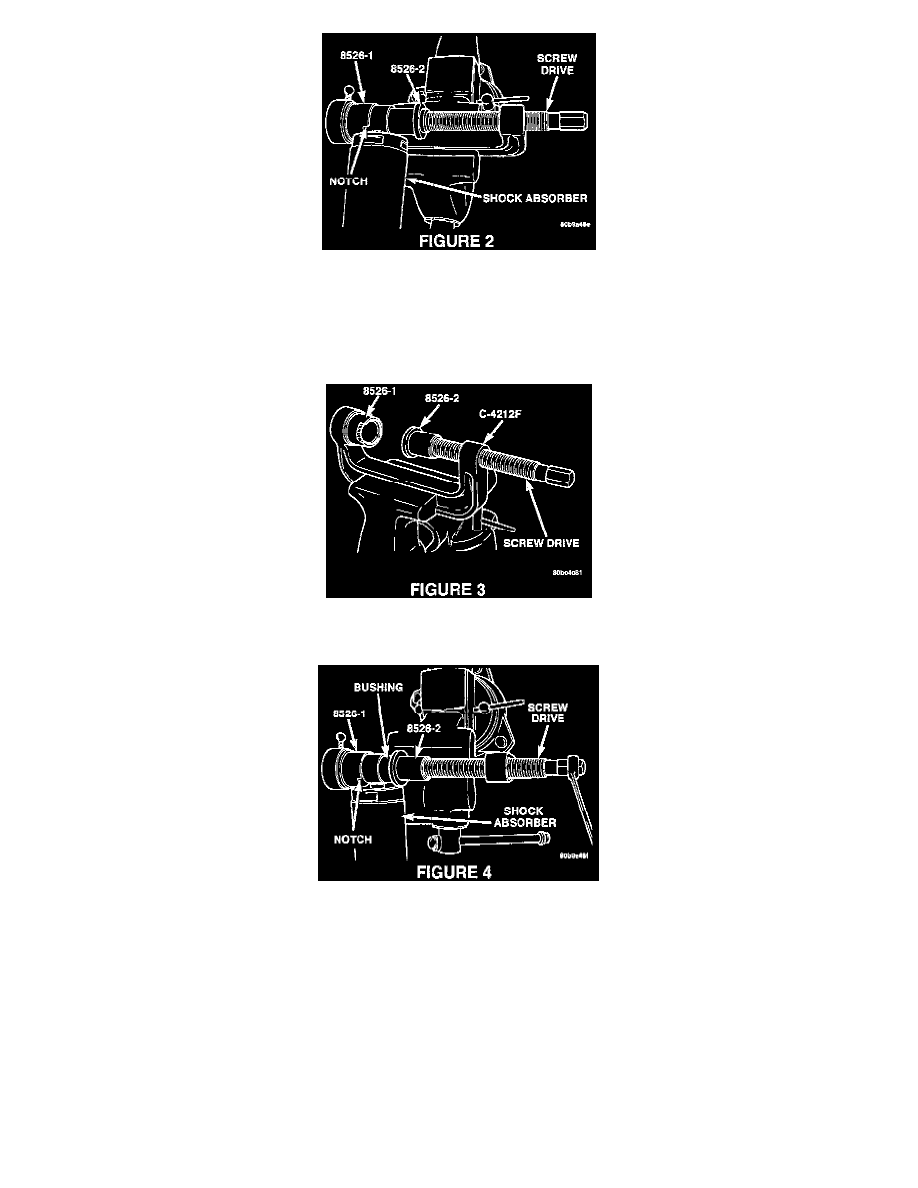
Place the shock absorber upper mounting eye in the receiver so the notch in the receiver clears the shock absorber body (Figure 2).
4.
Tighten the screw drive until the driver contacts the outer circumference of the bushing evenly. Continue to tighten the screw drive until the
bushing is pressed completely out of the shock absorber eye and into the receiver.
5.
Back off the screw drive and remove the bushing from the receiver.
6.
Install the driver, special tool 8526-2, on the tip of the ball joint press screw drive as shown in Figure 3. Position the driver this way to seat the
bushing to its correct depth.
7.
Place the shock absorber upper mounting eye in the receiver so the notch in the receiver clears the shock absorber body (Figure 4).
8.
Position the bushing between the shock absorber eye and the driver. Tighten the screw drive until the driver, bushing, and shock absorber eye are
touching and squarely aligned.
9.
Press the bushing into the shock absorber eye until the driver bottoms against the face of the eye. Back off the ball Joint press screw drive and
remove the shock absorber from the press.
10.
Repeat steps 2 through 9 for the other shock.
11.
Using the procedure outline in section 2 of the appropriate service manual, install the rear shocks.
POLICY: Reimbursable within the provisions of the warranty.
TIME ALLOWANCE: