
Grand Voyager V6-229 3.8L (1996)
REMOVAL
1. Remove instrument panel side cover.
2. Remove screw holding A-pillar extension to door hinge pillar.
3. Separate A-pillar extension trim from vehicle.
INSTALLATION
1. Place A-pillar extension trim in position on vehicle.
2. Install screw to hold A-pillar extension to door hinge pillar.
3. Remove instrument panel side coven
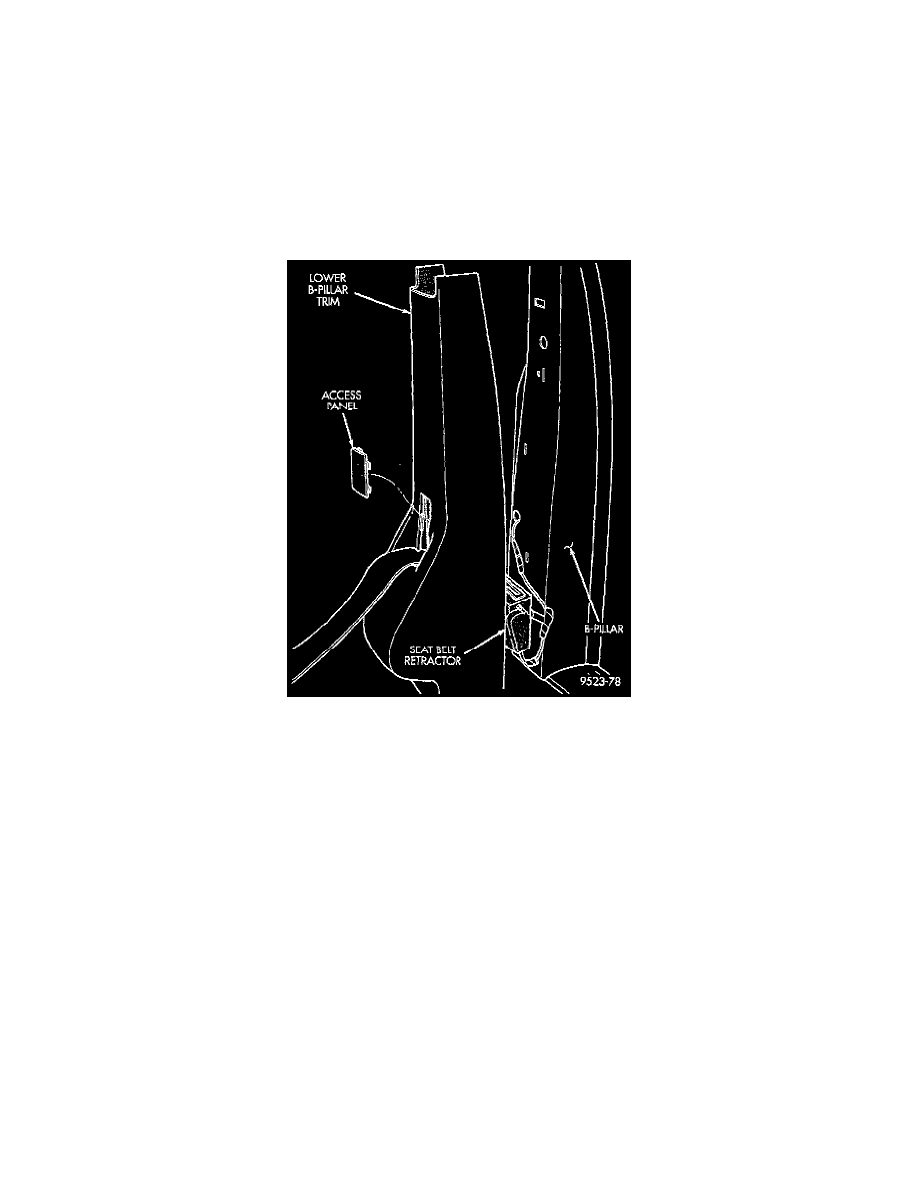
Lower B-Pillar Trim Cover
Lower B-Pillar Trim Cover
REMOVAL
1. Slide lower seat belt cover rearward to expose anchor bolt.
2. Remove bolt holding lower seat belt anchor to floor
3. Remove upper B-pillar trim coven
4. Remove access panel from B-pillar trim.
5. Remove screw holding lower trim cover to B-pillar from below seat belt retractor.
6. Disengage hidden clips holding lower trim cover to B-pillar.
7. Separate lower B-pillar trim cover from vehicle.
INSTALLATION
1. Place lower B-pillar trim cover in position on vehicle.
2. Insert seat belt through hole in lower B-pillar trim.
3. Engage hidden clips to hold lower trim cover to B-pillar.
4. Install screw to hold lower trim cover to B-pillar below seat belt retractor.
5. Install access cover,
6. Install upper B-pillar trim cover.
7. Place seat anchor in position on floor so webbing is pointed rearward and slightly outboard.
8. Install bolt to bold lower seat belt anchor to floor.
9. Verify that seat belt anchor does not interfere with seat track travel.
Overhead Grab-Handles
REMOVAL
1. Using a trim stick (C-4755), remove screw access covers from grab-handle.