
Grand Voyager V6-229 3.8L (1996)
REMOVAL
1. Remove bolt holding lever seat belt anchor to floor.
2. Lower shoulder belt height adjuster to the bottom of travel.
3. Remove shoulder belt turning loop from height adjustment.
4. Using Snap-On prying tool (Al79A) or equivalent remove shoulder belt height adjuster knob.
5. Remove shoulder belt bezel from trim cover.
6. Remove screw holding trim cover to B-pillar from inside bezel cavity.
7. Disengage hidden clips holding trim cover to 13-pillar
8. Separate B-pillar trim cover from vehicle.
INSTALLATION
1. Place B-pillar trim cover in position on vehicle.
2. Insert seat belt through B-pillar trim and web guide.
3. Engage hidden clips to hold trim cover to B-pillar
4. Install screw to hold trim cover to B-pillar inside bezel cavity
5. Install shoulder belt bezel into trim cover.
6. Install height adjuster knob.
7. Install shoulder belt turning loop onto height adjuster.
8. Place seat anchor in position on floor so webbing is pointed rearward and slightly outboard.
9. In stall bolt to hold lower seat belt anchor to floor.
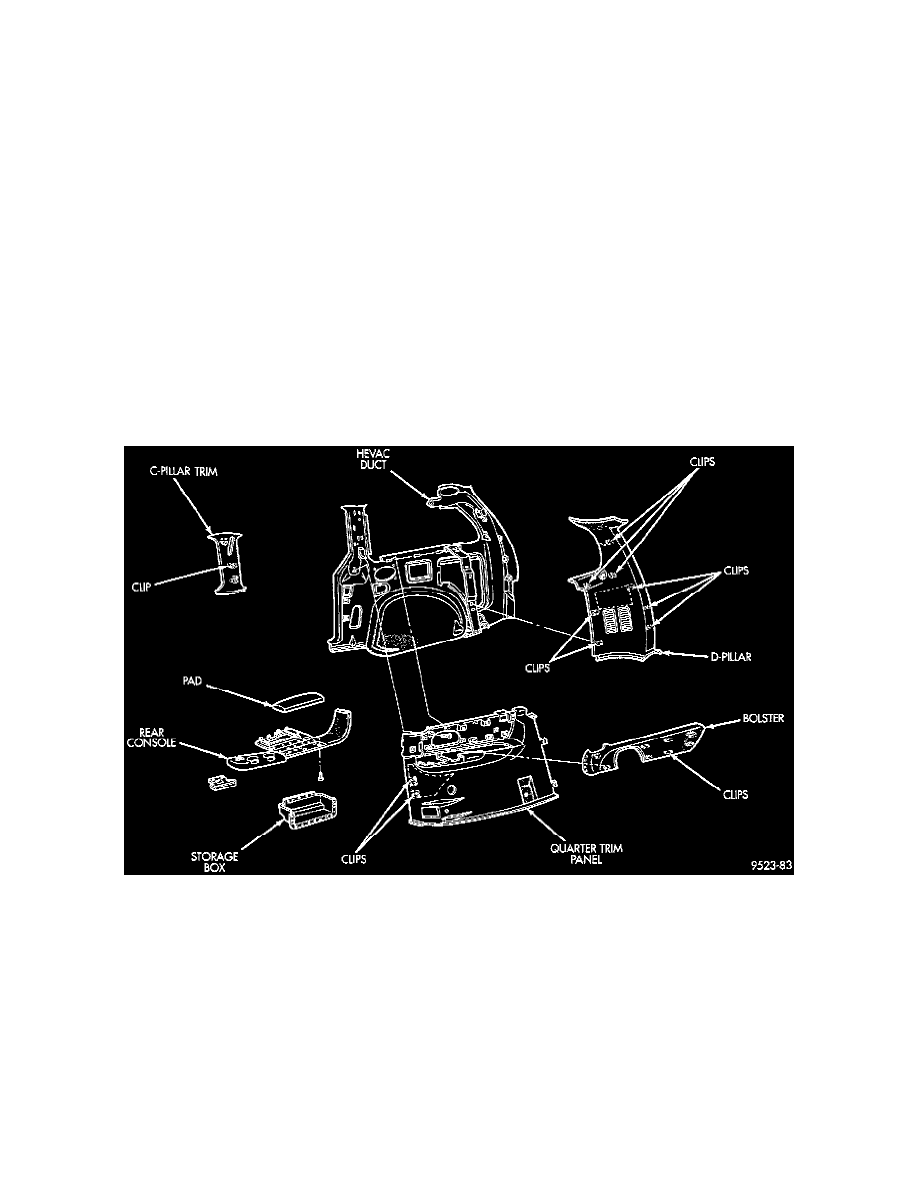
Upper C-Pillar Trim
Right Quarter Trim Panel - Left On 4 Door
REMOVAL
1. Remove quarter trim bolster.
2. Remove seat belt turning loop from height adjuster.
3. Disengage hidden clips holding trim to upper C-pillar.
4. Separate upper C-pillar trim from vehicle.
INSTALLATION
1. Place upper C-pillar trim in position on vehicle.
2. Engage hidden clips to hold trim to upper C-pillar.
3. Install seat belt turning loop onto height adjuster.
4. Install quarter trim bolster.