
Grand Voyager V6-229 3.8L (1996)
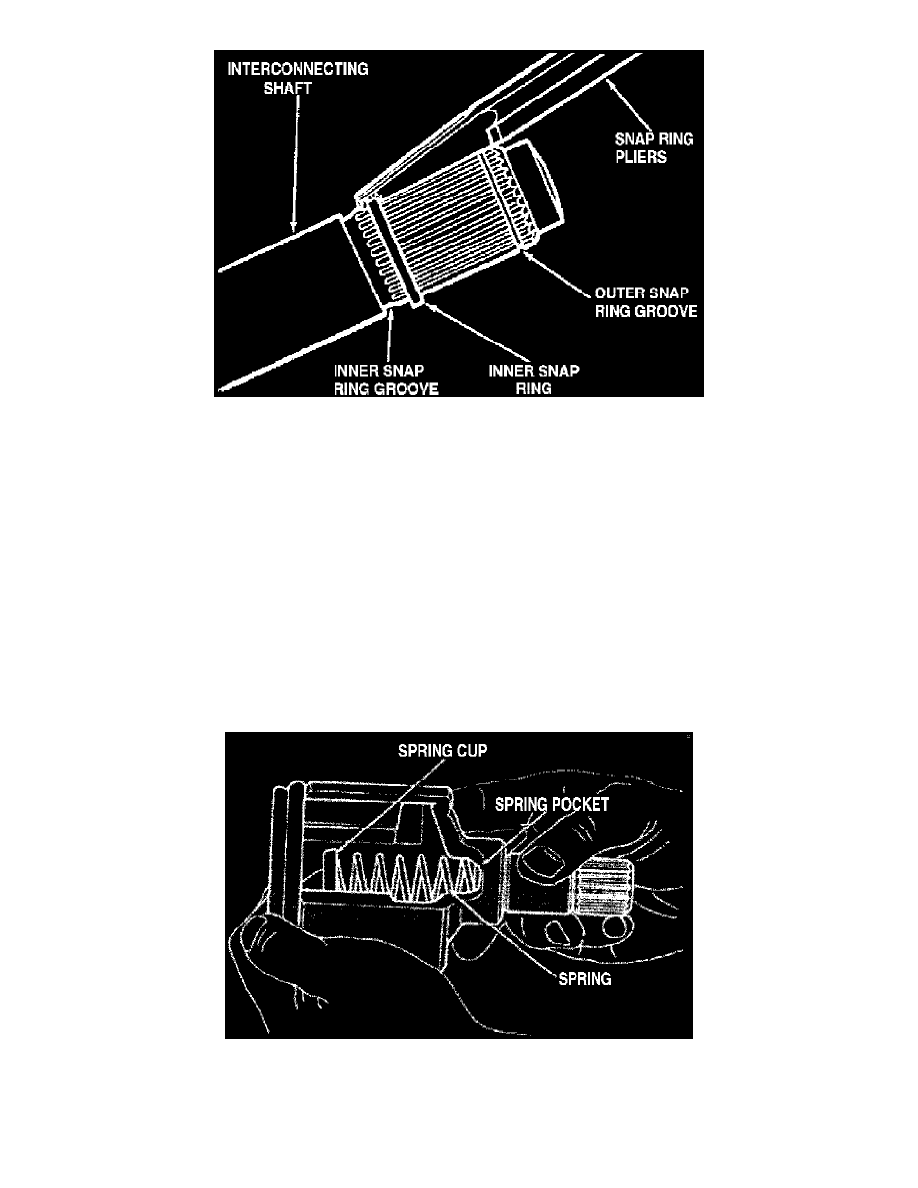
Fig. 12 Inner Tripod Retaining Snap Ring Removal
a. On models with inner tripod snap ring, remove snap ring from interconnecting shaft.
b. On all models, pull boot from interconnecting shaft.
Inspection
Remove grease from assembly and inspect bearing race, tripod components, spring cup, spring and spherical end of connecting shaft for excessive wear
or damage. Inspect boot for pinholes, cracks or other damage.
Assembly
1. If replacing boot, slide new boot into position over end of interconnecting shaft.
2. On models with single snap ring tripod retention, install new boot to interconnecting shaft, then the tripod assembly until it is past ring groove.
Install new snap ring into interconnecting shaft.
3. On models with dual tripod retaining snap rings, install inner tripod snap ring to interconnecting shaft.
4. On all models, install tripod assembly onto interconnecting shaft, chamfer end down. If necessary, tap tripod assembly onto interconnecting shaft
using a suitable brass hammer. Do not strike bearing assemblies with hammer.
5. Install outer tripod assembly retaining snap ring to interconnecting shaft.
6. Apply suitable CV joint grease into housing and boot.
Fig. 13 Spring & Cup Installation
7. On models with internal spring and cup, place spring into housing spring pocket with spring cup attached to exposed end of spring. Place small
amount of grease on concave surface of spring cup.
8. On all models, clamp stub shaft of housing in a suitable vice with protective caps on jaws.