
Grand Voyager V6-3.0L VIN 3 (1998)
18.
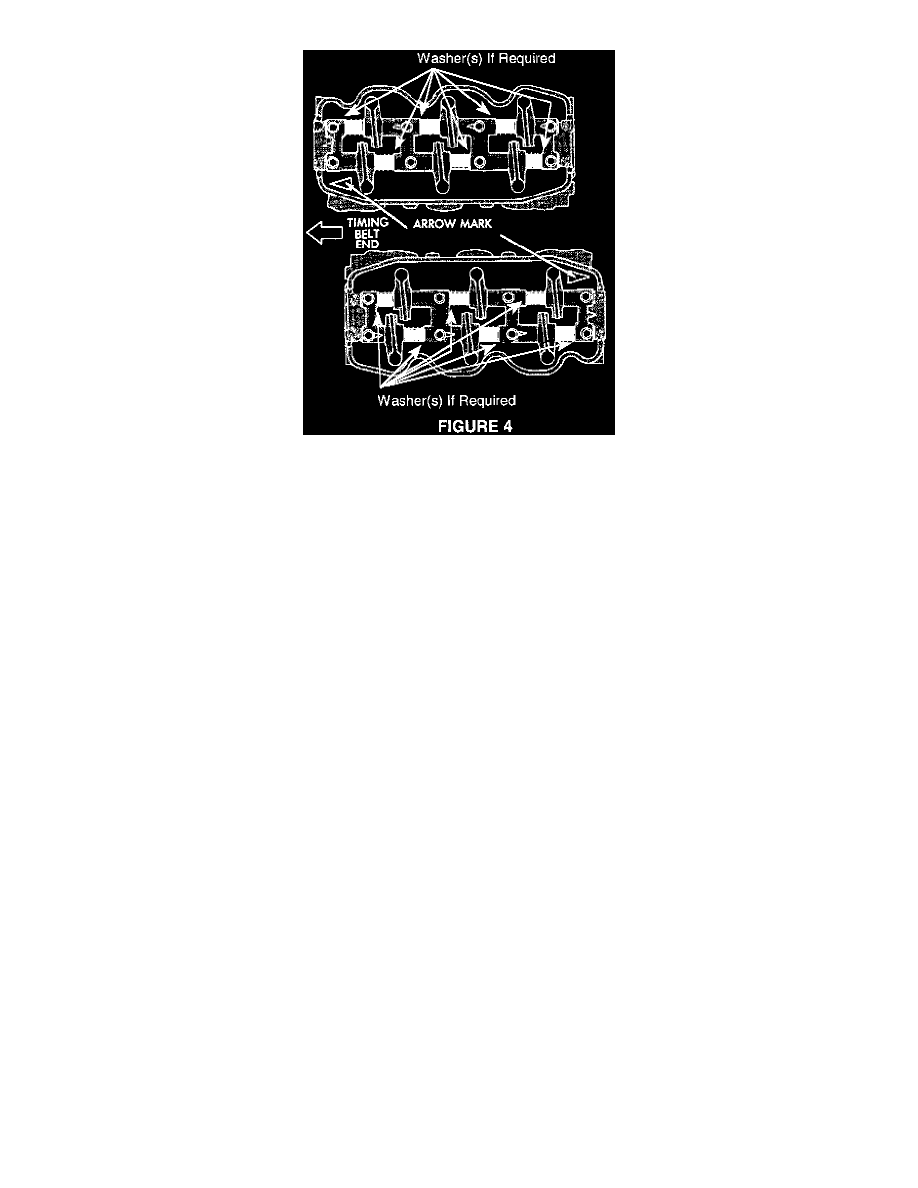
Remove the rocker assembly from the head. If any washer(s) is/are required (based on above table and measurements taken in step 17) disassemble
the rocker assembly again. Take note of the position off all components so they can be reassembled into the same location. Place washer(s) only in
those locations that require them (Figure 4).
NOTE:
THE WASHERS SHOULD BE INSTALLED BETWEEN THE SPACER AND CAM CAPS ONLY.
19.
Install the rocker assembly to the head with the lifters in place. Make sure to install each lifter back in their original location. Use the auto lash
adjuster retainer special tool MD-998443 to hold the lifters in place while installing the assembly. Carefully snug the bolts evenly (from the center
outward) to bring the assembly back down to its original position.
20.
Torque the bolts to 10 Nm (85 in. lbs.) in the following order: bearing cap 3, 2, 1 and finally 4. Repeat the tightening procedure taking the torque
to 20 Nm (180 in. lbs.).
21.
Measure the final clearance between the rocker arm and spacer with feeler gauges (Figure 3). The minimum clearance is 0.2 mm (0.008 in) and the
maximum clearance is 0.6 mm (0.024 in). If necessary, tap each rocker over to get an accurate measurement.
NOTE:
IF THE CLEARANCE IS TOO SMALL THE VALVE TRAIN WILL BIND AND IF THE CLEARANCE IS TOO LARGE THE VALVE TRAIN
MAY MAKE NOISE. IF NECESSARY, THE PROCEDURE WILL REQUIRE REPEATING TO BRING THE CLEARANCE WITHIN PROPER
SPECIFICATIONS.
22.
Repeat steps 12 through 21 for the other head.
23.
The rocker cover gaskets are designed to be reused. Clean and inspect the gaskets before reuse. If necessary, use new gaskets p/n MD120091.